Traditional Bathroom Vanity Unit With Drawers Assembly
The assembly of a traditional bathroom vanity unit with drawers requires careful planning, diligent execution, and a foundational understanding of basic carpentry and plumbing principles. These units, often characterized by their classic designs, intricate details, and robust construction, offer both aesthetic appeal and practical storage solutions for the bathroom. A successful assembly will not only ensure the longevity of the vanity but also contribute to the overall functionality and visual harmony of the bathroom space.
Before commencing the assembly process, it is imperative to thoroughly inspect all components of the vanity unit. This includes the main cabinet, drawer boxes, drawer fronts, hardware (screws, handles, hinges, drawer slides), countertop (if separate), and any accompanying accessories. Compare the received components with the parts list provided by the manufacturer, ensuring that all necessary items are present and undamaged. Any discrepancies or damages should be reported to the supplier immediately to avoid potential complications during the later stages of assembly.
Following the inventory check, the assembly area must be adequately prepared. Clear the workspace of any obstructions and protect the flooring with a drop cloth or similar protective covering. Gather all necessary tools, including a screwdriver (both Phillips head and flathead), a power drill with various drill bits, a level, a measuring tape, a pencil, a rubber mallet, and safety glasses. Having the right tools readily available will streamline the assembly process and minimize potential delays.
Key Point 1: Cabinet Assembly and Leveling
The first critical step is the assembly of the main cabinet structure. Most traditional vanity units arrive partially assembled, typically requiring the attachment of side panels, back panels, and internal supports. Refer to the manufacturer's instructions for the specific assembly sequence for the model in question. Apply wood glue to the joining surfaces for enhanced structural integrity and secure the panels with screws provided in the hardware kit. Ensure that the screws are driven straight and flush with the surface to prevent any protrusions that could interfere with the installation of drawers or doors.
Once the cabinet is assembled, it is crucial to level it accurately. Unevenness can lead to problems with drawer operation, door alignment, and overall stability. Position the vanity unit in its intended location and use a level to check the top and sides. If necessary, shim the base of the cabinet with thin pieces of wood or plastic until it is perfectly level in all directions. Secure the shims in place with construction adhesive or small finishing nails to prevent them from shifting over time.
If the vanity unit is designed to be wall-mounted, ensure that the wall is structurally sound and capable of supporting the weight of the unit, especially when loaded with items. Locate the wall studs using a stud finder and mark their positions. Use appropriate fasteners (e.g., lag screws, toggle bolts) to securely attach the vanity unit to the wall studs. A poorly secured wall-mounted vanity unit can pose a significant safety hazard.
After the cabinet is leveled and secured (either to the floor or wall), inspect all joints and connections for any gaps or weaknesses. Reinforce any questionable areas with additional screws or wood glue. The goal is to create a solid and stable foundation for the subsequent stages of the assembly process.
Key Point 2: Drawer Installation and Adjustment
The installation of drawers is a meticulous process that requires precise alignment and proper functioning of the drawer slides. Begin by attaching the drawer slides to the interior sides of the cabinet, ensuring they are level and parallel to each other. The manufacturer's instructions will specify the correct height and placement of the drawer slides for the particular vanity model.
Next, assemble the drawer boxes themselves. Typically, this involves joining the drawer sides, bottom, and back using screws or nails. Apply wood glue to the joints for increased durability. Ensure that the drawer boxes are square and that the dimensions match the specifications provided in the assembly instructions. An incorrectly sized or shaped drawer box will not fit properly into the cabinet.
Attach the mating part of the drawer slides to the sides of the drawer boxes. Again, follow the manufacturer's instructions carefully to ensure proper alignment. Slide the drawer boxes into the cabinet, engaging the drawer slides. Check for smooth operation and any binding or friction. If the drawers do not slide smoothly, adjustments will be necessary.
Drawer adjustment is often required to correct any misalignments or binding. Most drawer slides have adjustment screws that allow for fine-tuning of the drawer's vertical and horizontal position. Use a screwdriver to adjust these screws until the drawer slides smoothly and closes flush with the cabinet frame. If necessary, loosen the screws holding the drawer slides to the cabinet or drawer box and reposition them slightly to achieve the desired alignment.
Once the drawers are sliding smoothly, attach the drawer fronts. Most traditional vanity units feature decorative drawer fronts that are attached separately to the drawer boxes. Position the drawer fronts carefully, ensuring they are centered and aligned with the other drawers. Use screws or adhesive to secure the drawer fronts to the drawer boxes. Finally, install the drawer pulls or knobs. Pre-drilling pilot holes will prevent the wood from splitting and ensure that the screws are properly aligned.
Key Point 3: Countertop and Plumbing Considerations
If the countertop is separate from the vanity unit, its installation should be undertaken with care to avoid damage and ensure a watertight seal. Clean the top surface of the vanity cabinet and apply a bead of silicone caulk around the perimeter. Carefully lower the countertop onto the cabinet, aligning it properly. The silicone caulk will create a waterproof barrier and prevent water from seeping into the cabinet below.
Secure the countertop to the cabinet using screws or adhesive, as specified in the manufacturer's instructions. Ensure that the screws are not overtightened, as this could crack the countertop. Wipe away any excess silicone caulk with a damp cloth.
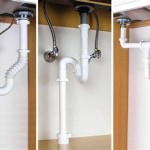
The plumbing connections for the sink and faucet are a critical aspect of the vanity unit assembly. Before connecting the plumbing lines, ensure that the water supply is shut off. Install the faucet and drain assembly according to the manufacturer's instructions. Connect the water supply lines to the faucet and the drainpipe to the drain assembly. Use Teflon tape on all threaded connections to create a watertight seal.
After connecting the plumbing lines, turn on the water supply and check for leaks. If any leaks are detected, tighten the connections or replace the Teflon tape. It is advisable to have a qualified plumber inspect the plumbing connections to ensure they are properly installed and meet local building codes.
Finally, install any remaining accessories, such as backsplashes, side splashes, or decorative trim. These finishing touches will enhance the aesthetic appeal of the vanity unit and protect the surrounding walls from water damage.
The successful assembly of a traditional bathroom vanity unit with drawers requires patience, attention to detail, and adherence to the manufacturer's instructions. By following these guidelines and taking the necessary precautions, one can achieve a professional-looking installation that will provide years of reliable service.
It is important to emphasize that this guide provides general instructions. Specific models of traditional bathroom vanity units may have unique assembly requirements. Always consult the manufacturer's instructions for the specific model being installed. If unsure about any aspect of the assembly process, it is recommended to seek the assistance of a qualified professional.

Sworth Traditional White Sink Vanity Unit Toilet Package Victorian Plumbing

850mm White Traditional Freestanding Vanity Unit With Basin And Chrome Handles Kentmere Better Bathrooms

Atlanta Bathrooms Creating For Generations

850mm White Traditional Freestanding Vanity Unit With Basin And Chrome Handles Kentmere Better Bathrooms

Classic Traditional Wall Hung 1 Drawer Vanity Unit With Tap Hole Fireclay Basin 600mm Satin Grey Balterley Diy At B Q

1250mm Green Traditional Freestanding Vanity Unit With Basins And Brushed Brass Handles Kentmere Better Bathrooms

Butler Rose Darcy Traditional Floorstanding Vanity Unit With Belfast Basin Tap Warehouse

Sworth Traditional Green Double Basin Vanity Cupboard Combination Unit Victorian Plumbing

650mm Beige Traditional Freestanding Vanity Unit With Basin And Black Handles Kentmere Furniture123

800mm Bathroom Vanity Unit Basin Sink Cabinet Gloss Grey Traditional
Related Posts
