Water Leaking Behind Bathroom Sink: Causes, Identification, and Solutions
The insidious presence of water leaks in a bathroom can lead to a range of problems, from minor inconvenience to significant structural damage. One common, yet often overlooked, source of these leaks is behind the bathroom sink. Identifying and addressing water leaks behind a bathroom sink promptly is crucial to prevent mold growth, wood rot, and costly repairs. This article provides a comprehensive overview of the potential causes of water leaks behind bathroom sinks, methods for accurate identification, and detailed solutions for resolving these issues.
The area behind a bathroom sink is typically concealed, making leaks difficult to detect in their early stages. Regular inspection and awareness of potential warning signs are essential for early intervention. Furthermore, understanding the plumbing components located in this area aids in pinpointing the source of the leak and implementing the appropriate repair strategy. Water leaks, left unattended, can not only damage the immediate area around the sink and vanity but also compromise the integrity of the surrounding walls, floors, and even the ceiling of the room below. Therefore, a proactive approach to leak detection and repair is paramount.
Common Causes of Water Leaks Behind Bathroom Sinks
Several factors can contribute to water leaks originating behind the bathroom sink. Identifying the specific cause is the first step towards an effective solution. These causes often relate to the age, condition, and installation of the various plumbing components located in this area.
1. Supply Line Issues: The supply lines, also known as water supply tubes, are flexible hoses that connect the shut-off valves beneath the sink to the faucet tailpieces. These lines are responsible for delivering both hot and cold water to the faucet. Over time, these lines can deteriorate, crack, or develop loose connections, resulting in leaks. The rubber or plastic washers within the supply line fittings can also dry out and lose their sealing properties. Look for signs of corrosion, kinks, or bulging in the supply lines, as these are indicators of potential failure.
The connections at both ends of the supply lines are vulnerable to leaks if they are not properly tightened or if the threads are damaged. A wrench should be used to ensure a snug fit, but overtightening can also damage the fittings. Periodic inspection and gentle tightening of these connections can prevent future leaks. Older supply lines can become brittle and prone to cracking, necessitating replacement. It is generally recommended to replace supply lines every 5-10 years, or sooner if signs of wear and tear are evident.
2. Drain Assembly Leaks: The drain assembly comprises several components, including the sink drain flange, the tailpiece, the P-trap, and the drainpipe. Each of these components connects to the others using slip nuts and washers. Leaks can occur at any of these connection points due to loose nuts, damaged washers, or corrosion of the drainpipe.
The P-trap, a U-shaped pipe located beneath the sink, is designed to trap debris and prevent sewer gases from entering the bathroom. Leaks in the P-trap are often caused by clogs or corrosion. Disassembling the P-trap and cleaning out any accumulated debris can sometimes resolve minor leaks. However, if the P-trap is corroded or damaged, it will need to be replaced. The drain flange, located at the top of the drain assembly, can also leak if the plumber's putty or silicone sealant used to seal it to the sink has deteriorated. Removing and resealing the drain flange may be necessary to stop this type of leak.
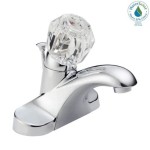
3. Faucet Problems: The faucet itself can be a source of leaks that appear to originate behind the sink. Leaks around the base of the faucet, where it meets the sink, can trickle down and appear to be coming from elsewhere. Internal faucet components, such as cartridges or O-rings, can also wear out and cause leaks within the faucet body. These leaks can then run down the supply lines or drain pipes and manifest as a leak behind the sink.
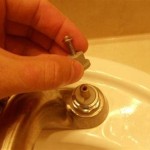
Inspecting the faucet for visible cracks or signs of corrosion is important. If the leak seems to be coming from within the faucet, it may be necessary to disassemble the faucet and replace the worn-out parts. Faucet repair kits are available for many common faucet models and contain the necessary replacement parts, such as O-rings, cartridges, and washers. In some cases, it may be more cost-effective to replace the entire faucet, especially if it is old or severely damaged.
4. Shut-Off Valve Leaks: The shut-off valves, located beneath the sink, control the flow of water to the faucet. These valves allow for easy shut-off of the water supply during repairs or maintenance. Over time, the packing nuts around the valve stems can loosen, causing leaks. The valves themselves can also corrode or fail internally, leading to leaks.
Tightening the packing nut around the valve stem can often stop minor leaks. However, if the valve is corroded or damaged, it should be replaced. Replacing a shut-off valve can be a more complex task, as it requires shutting off the main water supply to the house. It is often advisable to consult a qualified plumber for this type of repair. Regular exercise of the shut-off valves (turning them on and off) can help prevent them from seizing up and prolong their lifespan.
Identifying the Source of the Leak
Pinpointing the exact source of the water leak is crucial for a successful repair. A systematic approach to leak detection will save time and prevent unnecessary repairs. Here are some helpful techniques:
1. Visual Inspection: Begin with a thorough visual inspection of the area behind the sink. Use a flashlight to carefully examine the supply lines, drain assembly, faucet connections, and shut-off valves. Look for any signs of water dripping, pooling, or staining. Check for corrosion, cracks, or loose connections. Pay close attention to the areas where components connect to each other. Run your hand along the pipes and connections to feel for moisture. Even a small amount of moisture can indicate a slow leak.
2. Dry the Area and Observe: After the initial visual inspection, thoroughly dry the area behind the sink using paper towels or a clean cloth. This will make it easier to identify the source of the leak as it reappears. Once the area is dry, observe the plumbing components closely for several minutes. Turn the faucet on and off, and check for leaks while the water is running and after it is turned off. This will help determine if the leak is related to the faucet, supply lines, or drain assembly.
3. Use Paper Towels as Indicators: Place dry paper towels around the various connection points and under the supply lines and drainpipes. This will help to absorb any water that is leaking and make it easier to pinpoint the source. Check the paper towels periodically to see which ones are wet. The location of the wet paper towels will indicate the general area of the leak. For example, if the paper towel under the P-trap is wet, the leak is likely coming from the P-trap or the connections above it.
4. Dye Testing: In cases where the leak is difficult to locate, dye testing can be a helpful technique. This involves adding a small amount of food coloring or a specialized leak detection dye to the water in the sink. Run the water and observe where the colored water leaks out. This will clearly identify the source of the leak. Be sure to use a color that contrasts with the sink and plumbing fixtures for better visibility. Rinse the sink thoroughly after the test to remove any remaining dye.
Solutions for Common Water Leak Problems
Once the source of the leak has been identified, the appropriate repair can be undertaken. The specific solution will depend on the cause and severity of the leak. In some cases, a simple tightening of a connection may be sufficient, while in other cases, a component replacement may be necessary.
1. Tightening Connections: If the leak is caused by a loose connection, tightening the nut or fitting may resolve the problem. Use a wrench to tighten the connection, but be careful not to overtighten it, as this can damage the threads or crack the fitting. A quarter turn beyond hand-tight is often sufficient. After tightening the connection, dry the area and observe it for further leaks. If the leak persists, the washer or fitting may need to be replaced.
2. Replacing Washers and O-Rings: Leaks at connection points are often caused by worn or deteriorated washers or O-rings. These small rubber or plastic components provide a seal between the pipes and fittings. Replacing these components is a relatively simple and inexpensive repair. Turn off the water supply before disassembling the connection. Remove the old washer or O-ring and replace it with a new one of the same size and type. Ensure that the new washer or O-ring is properly seated before reassembling the connection.
3. Replacing Supply Lines: If the supply lines are cracked, corroded, or kinked, they should be replaced. New supply lines are readily available at most hardware stores. When selecting new supply lines, ensure that they are the correct length and have the appropriate fittings for your faucet and shut-off valves. Turn off the water supply before disconnecting the old supply lines. Connect the new supply lines, ensuring that the connections are properly tightened. Check for leaks after turning the water supply back on.
4. Repairing or Replacing Drain Components: Leaks in the drain assembly may require repairing or replacing individual components, such as the P-trap, tailpiece, or drain flange. If the P-trap is clogged, disassembling it and cleaning out the debris may resolve the leak. If the drain flange is leaking, remove it and clean the area around the sink drain opening. Apply fresh plumber's putty or silicone sealant to the underside of the drain flange and reinstall it. Ensure that the flange is properly tightened to create a watertight seal.
5. Faucet Repair or Replacement: Leaks originating from the faucet itself may require repairing or replacing internal components, such as cartridges, O-rings, or washers. Consult the faucet manufacturer's instructions for disassembly and repair procedures. Faucet repair kits are available for many common faucet models and contain the necessary replacement parts. If the faucet is old or severely damaged, it may be more cost-effective to replace the entire faucet. Follow the manufacturer's instructions for faucet installation.
6. Shut-Off Valve Replacement: Replacing a shut-off valve is a more complex task that may require professional assistance. Turn off the main water supply to the house before replacing the valve. Disconnect the existing valve and install the new valve, ensuring that the connections are properly tightened. Turn the main water supply back on and check for leaks.
Addressing water leaks behind the bathroom sink promptly is essential for maintaining the integrity of the bathroom and preventing costly repairs. By understanding the common causes of these leaks, employing effective identification techniques, and implementing appropriate solutions, homeowners can effectively resolve water leak problems and protect their property from water damage.

Bathroom Leak Top 5 Causes Waterleak Co

Common Sink Leaks You Could Probably Fix Yourself

Bathroom Sink Drain Leaking Around Threads Premier Plumbing Inc

How To Fix A Leaking Bathroom Sink Paschal Air Plumbing Electric

The Do S And Don Ts Of Dealing With A Bathroom Sink Or Shower Leak

9 Signs Of A Water Leak In Your Bathroom

How Do You Detect A Leak Behind Bathroom Tiles

What To Do If Your Bathroom Floods Living By Homeserve

Do You Have A Leaking Bathroom Sink Learn About The Possible Causes Water Line Repair In Lake Worth Tx Benjamin Franklin Plumbing

How To Repair A Leak Behind The Bathroom Tub Wall Plumbing Electric Wonderhowto
Related Posts


