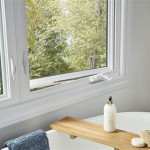
How to Make Floating Shelves for Your Bathroom
Floating shelves offer a stylish and space-saving solution for organizing bathroom essentials. They create a minimalist aesthetic while maximizing vertical space. This guide will walk you through the process of building your own floating shelves, from material selection to installation.
Choosing Materials and Tools
The first step is to gather the necessary materials and tools. You will need:
- Wood: Choose a durable and water-resistant wood like maple, oak, or walnut. Plywood is also a suitable option. Consider the thickness based on the weight you'll be placing on the shelves.
- Brackets: Select brackets that complement the style of your bathroom and are strong enough to support the weight of your belongings. Metal brackets are common and provide a sturdy option.
- Screws: Use screws that are long enough to secure the brackets to the wall and the shelves to the brackets.
- Wood filler: This is used to fill any holes or imperfections in the wood.
- Sandpaper: Different grits of sandpaper are needed for smoothing the wood and preparing it for finishing.
- Wood stain or paint: Choose a finish that enhances the natural beauty of the wood or matches your bathroom's decor.
- Measuring tape: For precise measurements of shelf dimensions and bracket placement.
- Level: To ensure the shelves are installed straight and level.
- Pencil: For marking the positions of brackets and drilling holes.
- Drill: For drilling pilot holes for screws and countersinking.
- Stud finder: To locate wall studs for secure mounting of brackets.
Building the Shelf Unit
Once you have gathered the necessary materials, you can begin building the shelf unit:
- Cut the wood: Measure and cut the wood to your desired shelf dimensions using a saw. Make sure to measure twice and cut once to ensure accurate cuts.
- Sand the wood: Sand the edges of the wood to remove any rough spots and create a smooth finish.
- Apply finish: Apply wood stain or paint according to the manufacturer's instructions. Allow the finish to dry completely before moving on to the next step.
- Attach brackets to the wall: Use the stud finder to locate wall studs, as these provide the most secure anchoring points. Mark the bracket positions on the wall with a pencil and use a drill to create pilot holes. Attach the brackets to the wall using screws. Ensure that the brackets are level and aligned with each other.
- Mount the shelves: Place the shelves on the brackets and secure them with screws. Use a level to ensure the shelves are straight and level.
Finishing Touches
After the shelves are installed, you can add some finishing touches to enhance their appearance and practicality. Consider these options:
- Install shelf dividers: These can be made from wood or metal and help create more organization within the shelves.
- Add a decorative backsplash: A backsplash can add a touch of personality and create a focal point for your shelves. Options include tile, wallpaper, or even paint.
- Apply a protective sealant: This can help prevent water damage and make the shelves easier to clean.
By following these steps, you can create stylish and functional floating shelves that add a touch of elegance to your bathroom while providing ample storage space. Remember to choose materials that are durable and water-resistant, and to install the shelves securely using proper techniques.

Diy Floating Bathroom Shelves Shades Of Blue Interiors

Thrifty And Chic Diy Projects Home Decor

Diy Floating Shelves How To Build Extra Bathroom Storage

Diy Floating Bathroom Shelves Stacy Risenmay

Thrifty And Chic Diy Projects Home Decor

Easy Diy Floating Shelves Shelf Tutorial Free Plans

Diy Floating Shelves How To Build Extra Bathroom Storage

Easy Diy Floating Shelves Tutorial

Simple Diy Floating Shelves In The Bathroom Simply Organized

Diy Floating Bathroom Shelves Shades Of Blue Interiors
Related Posts


