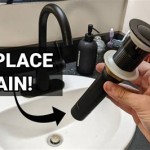
How to Replace a Bathroom Sink Leak
A leaky bathroom sink can be a constant source of frustration, leading to water damage, mold growth, and a hefty water bill. While a minor leak might seem like a small issue, ignoring it can result in more significant problems down the line. Fortunately, replacing a leaky bathroom sink faucet is often a DIY project that can save you money and restore peace of mind.
This guide provides a step-by-step process for replacing a leaky bathroom sink faucet, outlining the necessary tools, materials, and safety precautions. By following these instructions, you can confidently tackle this common plumbing project and enjoy a leak-free bathroom.
1. Gather the Necessary Tools and Materials
Before starting, gather all the necessary tools and materials to ensure a smooth and efficient repair. This includes:
- New bathroom sink faucet
- Adjustable wrench
- Channel-lock pliers
- Phillips head screwdriver
- Flathead screwdriver
- Plumber's tape (Teflon tape)
- Basin wrench
- Bucket or container
- Rag or towel
- Safety glasses
- Gloves
Consider purchasing a faucet with a warranty for added peace of mind. Also, ensure the new faucet's design and features are compatible with your existing sink and plumbing system.
2. Shut Off the Water Supply
Safety is paramount when working with plumbing. Before beginning any repairs, shut off the water supply to the bathroom sink. Locate the shut-off valve under the sink or in the basement. Turn the valve clockwise until it stops completely. To confirm the water is off, turn on the sink faucet to check for any water flow.
3. Disconnect the Old Faucet
Once the water is shut off, it's time to remove the old faucet. Begin by disconnecting the hot and cold water supply lines. Use an adjustable wrench to loosen the nuts that connect the supply lines to the faucet body. If the nuts are stubborn, use channel-lock pliers to grip them firmly. Once the supply lines are detached, carefully remove them from the faucet.
Next, remove the faucet from the sink. Depending on the type of faucet, this may involve unscrewing a mounting nut or removing a decorative escutcheon plate. Use a basin wrench to access and loosen the mounting nut from the underside of the sink. Be sure to use a rag or towel to protect the sink's finish from scratches.
4. Install the New Bathroom Sink Faucet
Now that the old faucet is removed, it's time to install the new one. Start by applying plumber's tape to the threads of the new faucet's supply lines. This helps ensure a tight seal and prevents leaks. Wrap the tape clockwise, overlapping each layer by about half its width.
Next, connect the supply lines to the new faucet. Hand-tighten the nuts initially, then use the adjustable wrench to tighten them securely. Be careful not to overtighten the nuts, as this can damage the faucet or fittings.
With the supply lines attached, position the new faucet in the sink. Align the mounting holes with the faucet's base and carefully thread the mounting nut from the underside of the sink. Use the basin wrench to tighten the mounting nut until the faucet is securely attached.
5. Reconnect the Water Supply and Test for Leaks
Once the new faucet is installed, reconnect the water supply. Slowly turn the shut-off valve counterclockwise to allow water to flow through the lines. Check for any leaks at the connections and tighten any loose nuts if necessary.
Turn on the faucet and check for any drips or leaks. If no leaks are present, your replacement is complete. If you encounter leaks, check the connections again and ensure the nuts are properly tightened. If the leak persists, contact a professional plumber for assistance.
6. Clean Up and Enjoy Your Leak-Free Bathroom Sink
After successfully replacing the bathroom sink faucet, clean up the area and dispose of any waste materials. Wipe away any excess water or debris from the sink and surrounding countertop. Enjoy the peace of mind that comes with a leak-free bathroom sink and the satisfaction of completing a DIY plumbing project successfully.

Bathroom Sink Drain Leaking Around Threads Premier Plumbing Inc

How To Handle Leaking Pipes Under The Bathroom Sink Aggressive Mechanical

Common Sink Leaks You Could Probably Fix Yourself

How To Fix A Leaking Bathroom Sink Paschal Air Plumbing Electric

New Bathroom Sink Drain Leaks At Threads

Bathroom Sink Drain Leaking Around Threads Premier Plumbing Inc

Bathroom Sink Drain Leak Not Sure How To Fix Doityourself Com Community Forums

4 Easy Ways To Fix A Leaky Bathroom Sink Faucet With Double Handle

How To Fix A Leaky Faucet Guides For Every Design And Style

How To Fix Pipework A Tap Faucet Leaking Under The Sink
Related Posts

