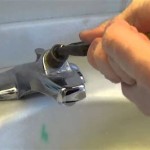
Wrench Selection and Technique for Bathroom Sink Drain Removal
The removal of a bathroom sink drain, often necessitated by clogs, leaks, or fixture replacement, requires specific tools to avoid damage to the sink, drain assembly, and surrounding plumbing. Selecting the appropriate wrench and employing proper technique are crucial for a successful and efficient drain removal process. This article will detail the types of wrenches suitable for this task, the preparatory steps necessary, and the recommended techniques for loosening and removing various drain components. Understanding these factors can prevent common pitfalls, such as stripping nuts or damaging the sink basin.
A variety of drain configurations exist, each presenting unique challenges. Some drains feature simple slip-joint connections, while others utilize more complex nut-and-washer assemblies. Recognizing the drain type is the first step in determining the appropriate wrench and approach. Improper tool selection can lead to frustration, wasted time, and potential damage, underscoring the importance of a well-informed approach to this common plumbing task.
Identifying the Appropriate Wrench Type
Several wrench types are commonly used for bathroom sink drain removal, each with its strengths and weaknesses. The most common options include adjustable wrenches, basin wrenches, pipe wrenches, and specialized drain wrenches. The choice depends on the drain type, the accessibility of connections, and the tightness of the fittings. Understanding the characteristics of each wrench will ensure the selection of the most effective tool for the job.
Adjustable wrenches, also known as crescent wrenches, are versatile tools suitable for a variety of tasks. They feature an adjustable jaw that can be widened or narrowed to fit different nut sizes. While versatile, adjustable wrenches can be prone to slipping, especially on older or corroded fittings. This slipping can round off the edges of nuts, making them even more difficult to remove. When using an adjustable wrench, it is essential to ensure a tight fit and apply consistent pressure to prevent slippage.
Basin wrenches are specifically designed for accessing hard-to-reach nuts behind sinks and within confined spaces. They feature a long handle and a pivoting jaw that can grip nuts from various angles. Basin wrenches are invaluable for removing the mounting nuts that secure the drain assembly to the sink basin. Their elongated handle provides leverage, making it easier to loosen stubborn nuts. However, basin wrenches can be challenging to use in extremely tight spaces or when dealing with heavily corroded fittings.
Pipe wrenches are heavy-duty tools designed for gripping and turning pipes and fittings. They feature serrated jaws that provide a secure grip, but they can also damage softer materials such as brass or plastic. Pipe wrenches are generally not recommended for bathroom sink drain removal unless dealing with a particularly stubborn or corroded metal drain assembly. Their aggressive grip can easily mar the finish of the sink or damage the drain components.
Specialized drain wrenches, such as spud wrenches or drum trap wrenches, are designed for specific types of drain fittings. For instance, a spud wrench is often used for removing the large nut that secures a sink strainer to the basin. These specialized wrenches offer a more precise fit and reduce the risk of damaging the fitting. However, they are less versatile than adjustable or basin wrenches and are only suitable for specific drain configurations.
Preparing for Drain Removal
Before attempting to remove the bathroom sink drain, several preparatory steps are necessary to ensure a safe and efficient process. These steps include gathering the necessary tools and materials, disconnecting the water supply, and protecting the surrounding area from damage. Proper preparation can prevent common problems and minimize the mess associated with plumbing repairs.
First, gather all the necessary tools and materials. This includes the selected wrench, a bucket to catch water, towels to wipe up spills, penetrating oil to loosen corroded fittings, and potentially a new drain assembly if the existing one is damaged or being replaced. Having all these items readily available will streamline the removal process and minimize interruptions.
The next crucial step is to disconnect the water supply to the sink. Locate the shut-off valves under the sink and turn them clockwise until they are fully closed. After closing the valves, turn on the faucet to relieve any remaining pressure in the lines. Place a bucket under the drain pipes to catch any residual water that may be trapped in the system. If the shut-off valves are not functioning properly, the main water supply to the house may need to be turned off.
Protect the surrounding area from damage. Place towels or a drop cloth under the sink to catch any spills and prevent scratches on the floor or cabinet. Consider wearing safety glasses to protect your eyes from debris. If working in a confined space, ensure adequate ventilation to avoid inhaling fumes from cleaning products or penetrating oil. Taking these precautions will help prevent accidents and minimize the cleanup effort.
In some cases, the drain fittings may be heavily corroded, making them difficult to loosen. Applying penetrating oil to the fittings several hours or even a day before attempting removal can significantly ease the process. Allow the oil to soak into the threads to break down the corrosion and loosen the grip. Be patient and reapply the oil as needed.
Techniques for Removing Different Drain Components
The bathroom sink drain assembly typically consists of several components, including the tailpiece, P-trap, drain flange, and mounting nuts. Each component requires a specific technique for removal. Applying the correct approach will minimize the risk of damage and ensure a smooth disassembly process.
The tailpiece is the section of pipe that connects the drain flange to the P-trap. It is usually connected using slip-joint nuts. To remove the tailpiece, loosen the slip-joint nuts using an adjustable wrench. Be prepared for water to spill out as the connection is loosened. Gently wiggle the tailpiece to break it free from the P-trap and drain flange. If the tailpiece is stuck, apply penetrating oil to the joints and allow it to soak in before attempting removal again.
The P-trap is the curved section of pipe that traps debris and prevents sewer gases from entering the bathroom. It is typically connected to the tailpiece and the drainpipe using slip-joint nuts. To remove the P-trap, loosen the slip-joint nuts connecting it to the tailpiece and the drainpipe. Again, be prepared for water to spill out. Carefully remove the P-trap, ensuring that any trapped debris is disposed of properly. Inspect the P-trap for damage or clogs and clean it thoroughly before reinstalling it.
The drain flange is the part of the drain assembly that sits inside the sink basin and is secured by mounting nuts from underneath. Removing the drain flange involves loosening the mounting nuts using a basin wrench. In confined spaces, a basin wrench is essential for reaching these nuts. After loosening the nuts, carefully push up on the drain flange from inside the sink basin while simultaneously supporting it from underneath to prevent it from falling. If the drain flange is stuck, gently tap it with a rubber mallet to break it free from the sink basin. Be cautious not to damage the sink basin during this process.
When dealing with older or corroded drain assemblies, the mounting nuts may be extremely difficult to loosen. In such cases, applying heat using a heat gun or hair dryer can help to expand the metal and break the corrosion. Be careful not to overheat the fittings, as this can damage plastic components or melt solder joints. Alternatively, use a nut splitter to carefully cut through the nut without damaging the surrounding threads. This is a more aggressive approach, but it can be effective for removing severely corroded nuts.
Once all the components are removed, thoroughly clean the sink basin and the surrounding drain area. Remove any old plumber's putty or sealant. Inspect the drain opening for damage or corrosion. If necessary, repair any damage before installing the new drain assembly. Proper cleaning and preparation will ensure a watertight seal and prevent future leaks.
Reinstallation of a new drain assembly involves reversing the removal process. Ensure all connections are properly tightened to prevent leaks. Use new plumber's putty or sealant to create a watertight seal between the drain flange and the sink basin. After reassembling the drain, turn on the water supply and check for leaks. If any leaks are detected, tighten the connections further or reapply sealant as needed.

Husky Double Ended Tub Drain Wrench 16pl0128 The Home Depot

Husky Universal Sink Drain Wrench 410 074 0111 The Home Depot

How To Use A Basin Wrench For Your Home Plumbing Projects Liberty

Husky Universal Sink Drain Wrench 410 074 0111 The Home Depot

Husky Universal Sink Drain Wrench 410 074 0111 The Home Depot

How To Replace A Sink Drain Basket Ron Hazelton

A Basin Wrench Not Always Required How To Use One

Tub Drain Remover Wrench Use To Install And Remove Most Bath Shower Drains Closet Spuds Square Plastic Toilet Seat Nuts Silvery Temu

Husky Double Ended Tub Drain Wrench 16pl0128 The Home Depot

How To Remove A Kitchen Sink Drain 13 Steps With Pictures
Related Posts


