Replacing Shut-Off Valves Under Bathroom Sink
The shut-off valves beneath your bathroom sink are essential components of your plumbing system, responsible for controlling water flow to your sink fixtures. Over time, these valves can wear down, leak, or become difficult to operate, necessitating replacement. Replacing them is a relatively straightforward DIY project that can save you money and prevent further plumbing issues.
Understanding Shut-Off Valves
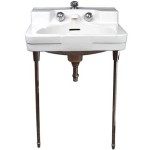
Bathroom sink shut-off valves are typically compression valves, featuring a handle that turns a threaded stem to compress a rubber washer against a seat, sealing the water flow. These valves come in various configurations, including single-handle, double-handle, and angle stop valves.
When a valve begins to leak, it's often due to worn-out washers, corroded internal components, or a damaged seat. Attempting to tighten the valve handle may temporarily stop the leak, but it can damage the valve further. Replacing the valve entirely offers a more permanent solution.
Necessary Tools and Materials
Before starting the project, gather the following tools and materials:
- New shut-off valves (matching the existing configuration)
- Adjustable wrench
- Channel-lock pliers
- Teflon tape
- Pipe wrench
- Bucket
- Towel
- Safety glasses
- Gloves
Ensure the new valves are compatible with the existing pipe size and type. Select valves with high-quality materials for longevity and reliable performance.
Steps for Replacing Shut-Off Valves
Follow these steps to replace your bathroom sink shut-off valves safely and effectively:
- Turn off the water supply: Locate the main water shut-off valve for your home and turn it off completely. This step is crucial to prevent flooding during the replacement process. Open a faucet in the bathroom to drain any remaining water pressure in the pipes.
- Disconnect the old valves: Use an adjustable wrench to loosen the nuts connecting the old valves to the supply pipes. You may need a pipe wrench to loosen stubborn nuts. If the valves are corroded, you can apply penetrating oil to help loosen them.
- Remove the old valves: Once the nuts are loosened, carefully remove the old valves from the pipes. Take note of the orientation of the valves and the direction of the water flow.
- Prepare the new valves: Wrap Teflon tape around the threads of the new valves in a clockwise direction, ensuring a tight seal. Leave a small amount of tape exposed at the end to prevent it from unraveling.
- Install the new valves: Align the new valves with the pipes, ensuring the orientation matches the old valves. Screw the new valves onto the supply pipes using the adjustable wrench. Tighten them securely but avoid overtightening, which can damage the valves or pipes.
- Reconnect the water supply: Open the main water shut-off valve slowly and check for leaks at the connections. If leaks are present, tighten the connections slightly.
- Test the new valves: Turn on the faucet to check the water flow and operation of the new valves. Ensure the valves turn smoothly and stop the water flow completely.
If you encounter any difficulties during the replacement process, or if you are uncertain about any steps, it is recommended to consult a licensed plumber for assistance.

How To Install Water Shut Off Valve For Sinks

Handle Broke Off On Shut Valve Under Sink Diy Plumbing Repair Bathroom

Types Of Under Sink Shutoff Valves Kitchen Infinity

How To Replace Shutoff Valve Under Bathroom Sink

Leaky Sink Valve After Replacing Doityourself Com Community Forums

How To Replace A Shut Off Valve Under Your Sink

Install Shut Off Valve Under Sink Replace Faucet Mobile Home Repair

Stop Plumbing Leaks With Ball Type Shutoff Valves Diy Family Handyman

How To Replace A Shutoff Valve Diy Family Handyman

How To Fix Stuck Or Leaky Water Shut Off Valves
Related Posts