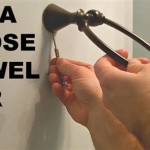
How Do You Remove a Bathroom Mirror With Clips?
Removing a bathroom mirror secured with clips requires a careful approach to prevent damage to the mirror, wall, and surrounding surfaces. Understanding the different types of clips and utilizing the correct tools and techniques are crucial for a successful removal.
Before beginning the removal process, it is essential to gather the necessary tools. These typically include a putty knife, a pry bar or stiff-bladed scraper, a screwdriver (depending on the clip type), safety glasses, work gloves, and drop cloths or old blankets. Having a helper is also recommended for larger or heavier mirrors.
The first step involves identifying the type of clips holding the mirror in place. Several common types exist, including J-clips, L-clips, spring clips, and decorative clips. J-clips are shaped like a "J" and hook over the mirror's edge. L-clips are L-shaped and typically screw into the wall, holding the mirror against it. Spring clips utilize tension to secure the mirror. Decorative clips can vary significantly in design and may require specific removal methods.
Once the clip type is identified, the next step is to prepare the work area. Cover the sink, countertop, and floor with drop cloths or old blankets to protect them from scratches and broken glass. Wearing safety glasses and work gloves is crucial to protect against potential injuries.
For J-clips, carefully insert the putty knife between the wall and the back of the clip. Gently pry the clip away from the wall, working your way around the mirror's perimeter. If the clips are resistant, a pry bar or stiff-bladed scraper may be necessary. Apply steady pressure to avoid bending or breaking the clips.
L-clips typically require unscrewing them from the wall. Using the appropriate screwdriver, carefully remove the screws holding each clip in place. Once all the screws are removed, the mirror can be gently pulled away from the wall. If adhesive was used in addition to the clips, a putty knife or pry bar may be required to break the adhesive bond.
Spring clips are often accessed from the front of the mirror. These clips usually have a small tab or lever that needs to be pressed or manipulated to release the tension. Consult the manufacturer's instructions if available, as the specific release mechanism can vary. Once the tension is released, the mirror can be carefully removed.
Decorative clips may require a different approach depending on their design. Some decorative clips are screwed into the wall, while others may have a hidden release mechanism. Carefully examine the clips and consult the manufacturer's instructions if possible. If the removal method is unclear, contacting a professional glazier or handyman is recommended.
If adhesive was used in addition to the clips, a thin wire or specialized mirror removal tool may be helpful in separating the mirror from the wall. Carefully slide the wire or tool behind the mirror and work it back and forth to break the adhesive bond. This process requires patience and a gentle touch to prevent cracking the mirror.
Once the clips and any adhesive are removed, carefully lift the mirror away from the wall. Enlisting a helper is recommended for larger or heavier mirrors to ensure a safe and controlled removal. After removing the mirror, inspect the wall for any damage and repair as needed.
Different types of wall materials may require specific considerations. For example, removing a mirror from drywall requires extra caution to avoid damaging the wall surface. Using a putty knife with a wide blade can help distribute the pressure and minimize the risk of damage. For tile walls, ensure the grout lines are clean and free of debris before attempting to remove the mirror.
If the mirror is glued directly to the wall without clips, specialized mirror removal techniques are required. Attempting to remove a glued mirror without the proper tools and knowledge can easily result in a broken mirror and potential injury. Consulting a professional glazier is highly recommended in these situations.
After successful removal, properly dispose of the old mirror. Wrap the mirror in thick blankets or cardboard and secure it with tape to prevent shards of glass from causing injury during transport. Check local regulations for proper disposal guidelines for broken or unwanted mirrors.
Removing a bathroom mirror, particularly one with clips, involves careful planning and execution. Understanding the different types of clips, utilizing the correct tools, and employing appropriate techniques are essential for a successful and damage-free removal.

2 Step Guide How To Remove A Bathroom Mirror With Clips

Taking Down A Bathroom Mirror

How To Remove A Frameless Mirror Like Nervous Grandma

How To Remove A Bathroom Mirror Lowe S

How To Safely And Easily Remove A Large Bathroom Builder Mirror From The Wall Site Title

How To Remove A Glass Bathroom Mirror Safely

How To Frame A Mirror With Clips In 5 Easy Steps

How To Remove A Frameless Mirror Like Nervous Grandma

How To Safely And Easily Remove A Large Bathroom Builder Mirror From The Wall Site Title

How To Remove A Bathroom Mirror Lowe S
Related Posts
