How to Install a Bathroom Fan With Light
A bathroom fan with a light fixture is a valuable addition to any bathroom. It helps to remove moisture, prevent mold growth, and provides illumination. Installing a bathroom fan with a light, while seemingly complex, is a manageable DIY project for homeowners with basic electrical skills. This article outlines the steps involved in installing a bathroom fan with a light, providing clear instructions and safety precautions.
Step 1: Gathering Materials and Tools
Before starting the installation, gather all necessary materials and tools. This includes:
- A bathroom fan with light fixture
- Electrical wire (14-gauge or 12-gauge, depending on fan amperage)
- Wire connectors (wire nuts)
- Electrical tape
- Screwdriver
- Wire strippers
- Voltage tester
- Level
- Drill with appropriate drill bits
- Safety glasses and gloves
Ensure the chosen fan is compatible with the existing electrical wiring and meets the bathroom's ventilation requirements.
Step 2: Turning Off Power
Safety is paramount during any electrical work. Before starting the installation, turn off the power to the bathroom circuit at the electrical panel. Locate the circuit breaker for the bathroom and switch it to the "Off" position. Use a voltage tester to confirm that the power is completely off.
Step 3: Removing the Old Fan
If replacing an existing bathroom fan, carefully remove it. Disconnect the electrical wires from the old fan, taking note of the wire colors (usually black, white, and ground). Unscrew the mounting bracket from the ceiling and remove the old fan assembly.
Step 4: Installing the New Fan
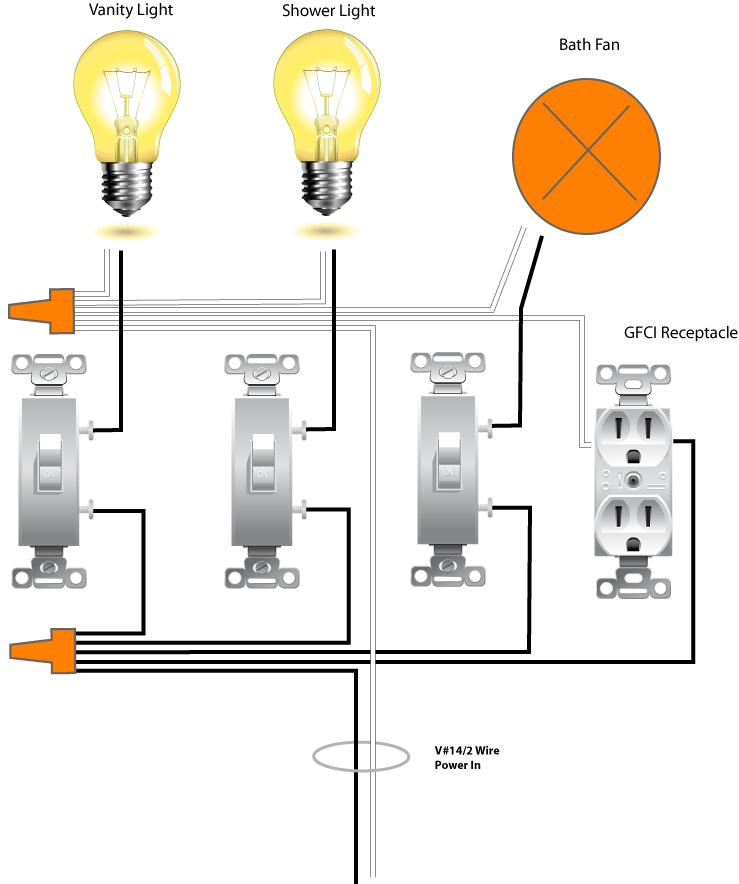
Locate the new fan's mounting bracket and secure it to the ceiling using the appropriate screws. Ensure the bracket is level using a level. Connect the electrical wires to the new fan following these steps:
- Strip the insulation off the ends of the wires using wire strippers. The wire length should be sufficient to reach the fan's terminals.
- Match the wire colors. Connect the black (hot) wire to the black terminal on the fan, the white (neutral) wire to the white terminal, and the green (ground) wire to the green terminal.
- Secure the wire connections with wire nuts. Wrap each connection with electrical tape for added insulation.
Step 5: Testing and Finishing
After connecting the wires, carefully test the fan and light by restoring power to the circuit. Ensure the fan operates smoothly and the light turns on. If encountered, check the wire connections for any loose or mismatched wires. Once everything is functioning correctly, install the fan cover and any decorative trim.
Step 6: Final Touches
After completing the installation, make sure the fan is operating efficiently and the light is functioning properly. Adjust the fan speed settings as needed to ensure optimal ventilation. Lastly, dispose of any old parts responsibly and clean up the work area.
Remember, it is essential to consult the manufacturer's instructions for specific installation details and safety precautions. If you are unsure about any aspect of the installation, contact a licensed electrician for assistance.

Wiring Diagram For A Bathroom Exhaust Fan Switch Masterbathroomexhaustfan Light

Installing A Bathroom Fan Light Ez

Replacing A Bath Fan Switch Electronic Timing Device Electrical

Install A New Bathroom Vent Fan Light The San Fernando Valley Sun

Bathroom Exhaust Fan Fluorescent Light Combination Nutone

How To Put Bath Fan And Light On Separate Switches Instead Of One Switch

How To Wire Bathroom Fan Extractor With Timer And Isolator

Bathroom Exhaust Fan Light Advice Doityourself Com Community Forums
I M Trying To Install A New Bathroom Fan Light And Night Combo The Old Switch Box Was Double Gang With

How To Install A Bathroom Fan With Bluetooth Speakers Fixthisbuildthat
Related Posts


