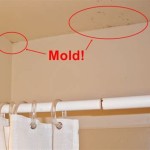
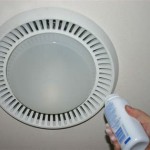
How to Remove Mold Off Bathroom Ceiling
Mold growth on bathroom ceilings is a common household problem, largely due to the elevated humidity and poor ventilation typical of bathroom environments. Mold not only presents an unsightly appearance but can also pose health risks, especially for individuals with allergies or respiratory sensitivities. Addressing mold promptly and effectively is crucial for maintaining a healthy and structurally sound living space. This article outlines a comprehensive approach to identifying, removing, and preventing mold growth on bathroom ceilings.
Before initiating any mold removal process, it is essential to understand the nature of the problem. Mold thrives in damp, poorly ventilated areas, feeding on organic materials such as drywall, paint, and dust. Bathrooms, with their frequent steam and moisture buildup, provide ideal conditions for mold proliferation. Identifying the type of mold present can be helpful, though not strictly necessary for basic removal. Common types found in bathrooms include Cladosporium, Aspergillus, and Penicillium. Regardless of the specific type, all mold should be addressed with caution to prevent its spread and minimize potential health effects.
Prior to commencing any cleaning process, safety precautions are paramount. Mold spores can become airborne during cleaning, potentially exacerbating respiratory issues. Therefore, the following safety measures are highly recommended:
Wear protective gear:
This includes a respirator mask (N95 or higher rating) to filter out mold spores, safety goggles to prevent eye irritation, and rubber gloves to protect skin from direct contact with mold and cleaning solutions.Ensure adequate ventilation:
Open windows and doors to maximize airflow in the bathroom. If possible, use a vent fan to exhaust air outdoors.Isolate the affected area:
If the mold infestation is significant, consider sealing off the bathroom from the rest of the house with plastic sheeting to prevent spores from spreading.
Once the safety precautions are in place, the process of mold removal can begin. Several methods can be employed, ranging from simple household solutions to more specialized cleaning agents. The choice of method will depend on the severity of the mold growth and the type of surface affected.
Identifying the Severity of the Mold Problem
Before diving into specific cleaning methods, it's crucial to assess the extent of the mold infestation. Minor surface mold, typically characterized by small, isolated patches, can often be addressed with DIY solutions. However, extensive mold growth, covering large areas or penetrating deep into the ceiling material, may necessitate professional remediation. Consider the following factors when assessing the severity:
Area of Coverage:
Is the mold limited to a small corner, or does it spread across a significant portion of the ceiling? Larger areas of mold indicate a more severe problem requiring more aggressive treatment.Depth of Penetration:
Does the mold appear to be solely on the surface, or does it seem to be embedded within the drywall or paint? Mold that has penetrated deeper may be harder to remove completely.Underlying Cause:
Is the mold a result of a specific leak or plumbing issue? Addressing the underlying cause of the moisture is essential to prevent recurrence. If the cause is a significant leak or structural issue, it's recommended to consult with professionals.Personal Health Concerns:
If you have pre-existing respiratory conditions, allergies, or a compromised immune system, it's generally advisable to seek professional assistance for any mold removal, regardless of the severity.
If the mold infestation is extensive (larger than 10 square feet), deeply embedded, or accompanied by structural damage, it's strongly recommended to consult with a professional mold remediation company. Attempting to handle a severe mold problem without the proper equipment and expertise can be ineffective and potentially hazardous.
Effective Cleaning Solutions for Mold Removal
For minor surface mold, several readily available cleaning solutions can be effective. It's important to test any cleaning solution in an inconspicuous area first to ensure it doesn't damage the ceiling finish. The following are commonly used and effective options:
Vinegar:
White vinegar is a natural and effective mold killer. Its acidic properties inhibit mold growth without harsh chemicals. To use vinegar, pour undiluted white vinegar into a spray bottle, spray the affected area thoroughly, and let it sit for at least one hour. Then, scrub the area with a brush or sponge and wipe clean with a damp cloth.Bleach Solution:
A diluted bleach solution (1 part bleach to 10 parts water) is a powerful disinfectant that can kill mold effectively. However, bleach can be harsh and may discolor painted surfaces. Always wear gloves and eye protection when using bleach. Spray the affected area with the solution, let it sit for 10-15 minutes, scrub, and rinse thoroughly with clean water. Ensure proper ventilation when using bleach.Important note:
Never mix bleach with ammonia, as this can create toxic fumes.Baking Soda:
Baking soda is a mild abrasive and deodorizer that can help remove mold and absorb moisture. Create a paste of baking soda and water, apply it to the moldy area, let it dry, and then scrub it off with a brush. Rinse the area with clean water. Baking soda can also be mixed with vinegar for a more potent cleaning solution.Hydrogen Peroxide:
Hydrogen peroxide (3% concentration) is another effective mold killer. Pour it into a spray bottle, spray the affected area, and let it sit for 10-15 minutes. Then, scrub and wipe clean. Hydrogen peroxide is generally safe for most surfaces but should still be tested in an inconspicuous area first.Tea Tree Oil:
Tea tree oil is a natural fungicide and antiseptic. Mix a teaspoon of tea tree oil with a cup of water in a spray bottle. Spray the affected area, let it sit for an hour, and then wipe clean. No rinsing is necessary. Tea tree oil has a strong odor, but it will dissipate over time.
When applying any of these cleaning solutions, it is important to work systematically, thoroughly saturating the affected area and scrubbing gently to avoid damaging the ceiling surface. Allow the solution to dwell for the recommended time to effectively kill the mold. After scrubbing, thoroughly rinse the area with clean water and dry it completely to prevent further mold growth.
Preventing Future Mold Growth
Removing existing mold is only half the battle. Preventing its recurrence is crucial for maintaining a healthy bathroom environment. The following measures can significantly reduce the risk of future mold growth:
Improve Ventilation:
The most important step in preventing mold is to improve ventilation in the bathroom. Always use the exhaust fan during and after showers or baths to remove excess moisture. If your bathroom lacks an exhaust fan, consider installing one. Keeping the bathroom door open after showering can also help to improve airflow.Control Humidity:
Use a dehumidifier in the bathroom to reduce moisture levels, especially in humid climates. Wipe down wet surfaces, such as shower walls and mirrors, after each use. Fix any leaks or plumbing issues promptly to prevent water damage.Clean Regularly:
Regularly clean the bathroom, paying particular attention to areas prone to mold growth, such as the ceiling, shower walls, and grout. Use a mold-killing cleaner periodically to prevent mold from taking hold. Regularly dust and vacuum the bathroom to remove organic matter that can serve as a food source for mold.Choose Mold-Resistant Products:
When renovating or remodeling your bathroom, opt for mold-resistant building materials, such as mold-resistant drywall and paint. These products contain additives that inhibit mold growth. Consider using grout sealers to protect grout from moisture penetration.Monitor for Signs of Moisture:
Regularly inspect the bathroom for signs of moisture, such as water stains, condensation, or musty odors. Address any issues promptly to prevent mold from developing. Pay attention to areas around plumbing fixtures, windows, and doors.
By implementing these preventive measures, homeowners can create a less hospitable environment for mold and significantly reduce the likelihood of future infestations. Consistent effort in maintaining a dry, well-ventilated bathroom is key to preventing mold growth and ensuring a healthy living space.
In summary, removing mold from a bathroom ceiling requires a multi-faceted approach encompassing safety precautions, effective cleaning methods, and proactive prevention strategies. By understanding the nature of mold growth, implementing proper cleaning techniques, and addressing the underlying causes of moisture, homeowners can effectively eliminate existing mold and prevent its recurrence, fostering a healthier and more comfortable living environment.

Bathroom Ceiling Mold Removal When To Clean Call Branch Environmental

Cleaning Mold From Bathroom Ceilings Like A Pro Lovetoknow

Don T Let Mould Take Over How To Remove It From Your Ceiling

Remove Bathroom Mould From Your Ceiling

What Is The Best Way To Remove Mold From Bathroom Ceiling

Cleaning Mrs Hinch Fans Share Tips To Remove Ceiling Mould Express Co

Easy Way To Clean Mould Off Walls Ceilings Curtain Magic Remover

How To Remove Mould From Your Bathroom Ceiling Cleanipedia Za

Mold On Bathroom Ceiling How To Clean Off

Black Spots On The Bathroom Ceiling Flood Water Damage Honolulu Oahu Hawaii Md Restoration
Related Posts


