Fix Dripping Sink Faucet Bathroom Tap
A dripping bathroom faucet is a common household nuisance. Not only is the constant drip annoying, but it also wastes water and can lead to higher water bills. Fortunately, fixing a leaky faucet is often a manageable DIY project that can save money and resources. This article outlines the steps involved in repairing a dripping bathroom sink faucet.
1. Identify the Faucet Type
Before beginning any repair, it is crucial to identify the type of faucet. Common types include compression, ball, cartridge, and ceramic disc. Compression faucets have two separate handles for hot and cold water, while ball, cartridge, and ceramic disc faucets typically have a single lever handle. Knowing the faucet type will determine the specific parts required for the repair.
2. Gather Necessary Tools and Materials
Having the correct tools and materials on hand will simplify the repair process. Commonly required tools include a basin wrench, adjustable wrench, Phillips head screwdriver, flathead screwdriver, and pliers. Replacement parts will vary depending on the faucet type and may include O-rings, washers, cartridges, or valve seats. It's recommended to take the old parts to a hardware store to ensure the correct replacements are purchased.
3. Turn Off the Water Supply
This is a critical first step. Locate the shut-off valves under the sink for both hot and cold water. Turn them clockwise until they are completely closed. Turn on the faucet to release any remaining water pressure in the lines. Place a stopper in the sink drain to prevent small parts from falling down the drain.
4. Disassemble the Faucet
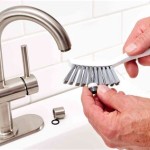
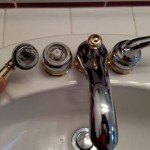
The disassembly process varies depending on the faucet type. For compression faucets, remove the decorative cap on the handle and unscrew the handle using a screwdriver. For ball, cartridge, and ceramic disc faucets, the handle may need to be lifted or pried off. Consult the manufacturer's instructions or online resources for specific disassembly instructions for your faucet model.
5. Inspect and Replace Worn Parts
Once the faucet is disassembled, carefully examine the internal components. Look for worn-out O-rings, washers, or cartridges. These parts are typically the source of the leak. Compare the old parts with the new replacements to ensure they are identical. Replace any worn or damaged parts.
6. Reassemble the Faucet
After replacing the necessary parts, reassemble the faucet in the reverse order of disassembly. Ensure all components are properly aligned and tightened. Avoid over-tightening, as this can damage the faucet.
7. Test for Leaks
Once the faucet is reassembled, slowly turn the water supply valves back on. Observe the faucet carefully for any leaks. Check for leaks around the handle, base, and spout. If leaks are present, tighten connections or re-check the replaced parts. If the leak persists, it may be necessary to consult a professional plumber.
Preventing Future Drips
While repairs address current leaks, preventative measures can minimize future issues. Regularly inspect faucets for signs of wear and tear. Avoid using excessive force when operating the handles. Hard water can contribute to mineral buildup and damage internal components. Consider installing a water softener or using a faucet filter to mitigate the effects of hard water. By taking these preventative steps, homeowners can extend the lifespan of their faucets and reduce the frequency of repairs.
Troubleshooting Persistent Leaks
If a leak persists after attempting the repair, several factors may be contributing to the problem. Corroded pipes, damaged valve seats, or even a faulty shut-off valve can cause persistent leaks. In these cases, it's advisable to seek the assistance of a qualified plumber. They have the expertise and tools to diagnose and address more complex plumbing issues. Attempting to repair extensive damage without proper training could exacerbate the problem and lead to more costly repairs down the line.
Maintaining Your Bathroom Faucet
Regular maintenance can prevent future drips and extend the life of your bathroom faucet. Periodically inspect the faucet for any signs of wear and tear. Clean the aerator, the small screen at the end of the spout, to remove mineral deposits and debris. This will help maintain optimal water flow and prevent clogs. Lubricate moving parts with plumber's grease to ensure smooth operation and prevent premature wear. By following these simple maintenance tips, homeowners can keep their bathroom faucets functioning properly and avoid costly repairs.

5 Reasons Your Faucet Is Dripping Water How To Fix It

How To Fix A Leaky Faucet True Value

Properly Fixing A Leaky Sink Faucet Wallside Windows

Water Dripping From Faucet Why And How To Fix

How To Fix A Leaky Faucet 5 Easy Steps

5 Reasons Your Faucet Is Dripping Water How To Fix It

5 Easy Steps To Fix A Dripping Or Leaking Faucet Home Sweet Homes

How To Fix A Dripping Tap Living By Homeserve

How To Fix A Leaky Bathroom Sink Faucet

Why Is My Faucet Dripping Nonstop
Related Posts

