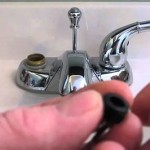
How to Replace a Washer in Bathroom Sink Faucets
A leaky bathroom sink faucet is not only annoying but can also waste precious water and lead to higher utility bills. The culprit behind many leaky faucets is a worn-out washer, a small rubber or plastic disc that sits inside the faucet stem and helps seal the water flow. Replacing a worn washer is a relatively simple task that most homeowners can handle themselves with the right tools and instructions. This article will guide you through the process of replacing a washer in your bathroom sink faucet, ensuring a smooth and successful repair.
Understanding the Components
Before diving into the replacement process, it's essential to understand the basic components of a bathroom sink faucet. The faucet typically consists of: *
Handle:
The lever or knob you turn to control water flow. *Stem:
The internal mechanism that connects the handle to the valve. *Valve:
The component that controls the flow of water. *Washer:
The rubber or plastic disc that sits inside the stem and seals the valve to prevent leaks. *Spindle:
The rod that connects the handle to the stem.Tools and Materials You'll Need
To replace a washer in your bathroom sink faucet, you'll need the following tools and materials:
*Adjustable wrench:
For loosening and tightening nuts. *Channel-lock pliers:
For gripping and turning the stem. *Screwdriver:
For removing screws, if necessary. *Replacement washer:
Matching the size and material of the original washer. *Optional: Faucet cartridge removal tool:
For some faucet types. *Rag or towel:
To absorb any leaking water. *Safety glasses:
To protect your eyes from debris. *Gloves:
To protect your hands.You can find replacement washers at most hardware stores or online retailers. When selecting a replacement washer, ensure it matches the size, shape, and material of the original washer. You can usually find this information on the old washer itself.
Steps to Replace a Bathroom Sink Faucet Washer
The following steps will guide you through the process of replacing a bathroom sink faucet washer:
-
Turn Off the Water Supply.
Locate the shut-off valve for the bathroom sink and turn it off completely. This will prevent water from flowing into the faucet while you work. -
Drain the Faucet.
Open the faucet handle to drain any remaining water from the faucet and pipes. -
Remove the Handle.
Locate the handle screw or nut that secures the handle to the stem. Use a screwdriver or adjustable wrench to remove the handle screw or nut. Once removed, lift the handle off the stem. -
Remove the Stem.
Depending on the type of faucet, there are a few ways to remove the stem: *Screwed-in stem:
Use the adjustable wrench to loosen and remove the nut that secures the stem to the faucet body. *Push-button stem:
If the stem is held in place with a push button or clip, simply press or release the button to remove the stem. *Cartridge stem:
If the faucet has a cartridge stem, you'll need a faucet cartridge removal tool. Insert the tool into the cartridge hole and twist to remove the cartridge. -
Inspect and Replace the Washer.
Once you've removed the stem, you'll see the washer at the end of the stem. Inspect the washer for signs of wear, such as cracking, tearing, or hardening. If the washer is damaged, replace it with a new one. -
Reassemble the Faucet.
Carefully reassemble the faucet, following these steps: *Insert the stem:
Carefully insert the stem back into the faucet body. *Attach the handle:
Align the handle with the stem and reattach the handle screw or nut. -
Turn on the Water Supply.
Turn the water supply back on and test the faucet for leaks. If any leaks persist, tighten the handle screw or nut and recheck.
If you're unsure about any step in the process, it's best to consult with a professional plumber. They can help you diagnose the problem and perform the necessary repairs safely and efficiently.
Additional Tips
Here are some additional tips for replacing a bathroom sink faucet washer:
*Use Teflon tape:
When reattaching the stem to the faucet body, wrap a few layers of Teflon tape around the threads to create a watertight seal. *Clean the faucet:
Before reassembling the faucet, take a moment to clean the stem, valve, and other components. This will help prevent debris from clogging the faucet later. *Check for other problems:
If the leak continues after replacing the washer, there may be other problems with the faucet, such as a worn-out O-ring or a cracked valve. Consult with a plumber for further diagnosis. *Consider a new faucet:
If your faucet is old or worn out, replacing it with a new one may be a more cost-effective solution in the long run.
How To Replace A Washer In An Oldfashioned Leaky Faucet

How To Replace A Washer In An Oldfashioned Leaky Faucet

Leaking Tap Learn How To Change A Washer

Can Washer Be Replaced In This Type Of Bathroom Sink Fauced Doityourself Com Community Forums

How To Change A Washer On Mixer Tap Living By Homeserve

Diy How To Replace A Bathroom Sink Faucet Remove Install

Replacing A Bathroom Faucet Fine Homebuilding

How To Change A Faucet Washer Plumbing By Jake

How To Change A Tap Washer Guide Plumbingforce

Water Dripping From Faucet Why And How To Fix
Related Posts


