How to Remove a Screen from a Bathroom Faucet
Bathroom faucets are often equipped with screens, also known as aerators, to regulate water flow and prevent debris from entering the faucet. These screens can become clogged with mineral deposits, dirt, or other particles, reducing water pressure or causing a sputtering sound. When this happens, you may need to remove the screen to clean it or replace it with a new one. This article will guide you through the process of removing a screen from a bathroom faucet.
Tools and Materials
Before beginning the removal process, gather the necessary tools and materials. You will need:
- A small adjustable wrench or a pair of pliers
- A soft cloth or towel
- A small bowl or container to catch water
- Optional: A cleaning solution like white vinegar or a faucet cleaner
Steps for Removing the Screen
Follow these steps to remove the screen from your bathroom faucet:
- Turn off the water supply. Locate the shut-off valve for your bathroom faucet and turn it to the "off" position. This will prevent water from flowing while you work.
- Prepare for water leakage. Even with the water shut off, there may be residual water in the faucet. Use a bowl or container to capture any drips or spills that may occur during the removal process. Place it under the faucet.
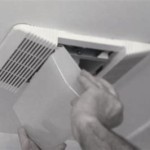
- Locate the screen. The screen will often be a small, circular or rectangular object protruding from the end of the faucet spout. It might be metal or plastic and may have small holes or slits.
- Unscrew the screen. Use the adjustable wrench or pliers to grip the screen and unscrew it counterclockwise. Be careful not to apply excessive force, as this could damage the faucet. Gently twist the screen until it comes loose.
- Clean the screen (optional). If you are cleaning the screen, remove any mineral deposits or debris by soaking it in white vinegar or a faucet cleaner. Rinse the screen thoroughly with water and allow it to dry completely before reinstalling it.
Reinstalling the Screen
Once you have cleaned or replaced the screen, you can reinstall it by reversing the removal process:
- Align the screen. Ensure that the screen is aligned correctly with the faucet spout.
- Screw the screen back on. Use the wrench or pliers to tighten the screen clockwise until it is snug but not overly tight.
- Turn the water back on. Gradually turn the shut-off valve to the "on" position and check for leaks.
Troubleshooting
If you encounter any difficulties removing or reattaching the screen, consider the following:
- Corrosion or build-up. Heavy mineral deposits or corrosion may make it difficult to unscrew the screen. Try using a penetrating oil or a specialized faucet descaler to loosen it.
- Faucet design. Some faucets may have a different screen removal method. Consult the manufacturer's instructions or a plumbing expert for guidance.
- Damaged or worn screen. If the screen is damaged or excessively worn, it may need to be replaced. Choose a screen compatible with your faucet's size and style.
By following these steps and precautions, you can effectively remove the screen from your bathroom faucet and maintain its proper functionality.

How To Clean A Sink Faucet Screen

Replacment Of Recessed Neoperl Faucet Areators

Low Flow Faucet Aerator

How To Unclog A Faucet Aerator For Dummies

How To Clean Faucet Aerator Simpson Plumbing Llc

How To Clean A Bathroom Sink Faucet Aerator Screen Low Water Pressure

Fixing A Faucet Aerator You Can Be Diy R Too The Kim Six Fix

How To Clean Your Faucet Aerator Zn Construction

Replacing A Faucet Aerator That S Stuck

How To Clean A Faucet Aerator
Related Posts