How to Replace a Bathroom Basin Tap
Replacing a bathroom basin tap is a relatively straightforward DIY project that can save you money and enhance the look of your bathroom. With the right tools and a little patience, you can easily tackle this task. This article will guide you through the process step-by-step, ensuring a smooth and successful replacement.
1. Gather the Necessary Tools and Supplies
Before you begin, ensure you have all the necessary tools and supplies at hand. This will prevent interruptions and ensure a smooth and efficient replacement process. Here's a list of essential items:
- Adjustable wrench
- Basin wrench (optional, but highly recommended)
- Phillips screwdriver
- Flathead screwdriver
- Pliers
- Teflon tape
- New basin tap
- Bucket
- Towels
- Optional: Work gloves and safety glasses
2. Turn Off the Water Supply
Safety is paramount when working with plumbing. The first step is to shut off the water supply to your bathroom sink. Locate the shut-off valve, usually found under the sink or near the water meter. Turn the valve clockwise until it stops, ensuring the water flow is completely stopped. To confirm, turn on the tap briefly and check for water flow. If there is no water, you are ready to proceed.
3. Drain the Water from the Basin
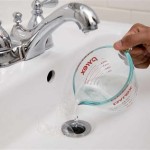
Open the drain plug to release any remaining water from the basin. This prevents water from accidentally spilling during the tap replacement process. You can use a bucket to collect the water.
4. Disconnect the Existing Tap
Now, it’s time to remove the old tap. Start by loosening the nuts that hold the tap in place. These nuts are usually located under the basin, accessed through a small hole. If you have a basin wrench, it will greatly simplify this step. Otherwise, you can use an adjustable wrench, taking care not to damage the basin. Once the nuts are loose, carefully remove the tap from the basin.
5. Remove the Old Tap Cartridge
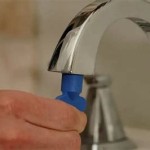
If the tap is a cartridge-type, you will need to remove the cartridge before you can install the new tap. The cartridge is the internal mechanism that controls water flow. It's usually located under a cover plate. Unscrew the cover plate and carefully remove the cartridge, noting its orientation.
6. Install the New Tap
With the old tap removed, you are ready to install the new one. Start by wrapping a few layers of Teflon tape around the threads of the new tap's supply pipes. This ensures a tight seal and prevents leaks. Then, position the new tap in the basin and thread the nuts onto the supply pipes. Tighten the nuts using the adjustable wrench, ensuring they are securely in place.
7. Connect the New Tap Cartridge
For cartridge-type taps, insert the new cartridge into the tap body. Make sure it's correctly aligned and seated properly. Secure the cover plate and tighten it.
8. Turn On the Water Supply
Once the new tap is installed, you can turn the water supply back on. Slowly open the valve, checking for leaks. If there are any leaks, carefully tighten the nuts using the wrench until the leaks stop.
9. Test the Tap
Finally, test the newly installed tap to ensure it functions correctly. Turn it on and off, checking for any leaks. Adjust the temperature control and ensure it operates smoothly. Once you are satisfied with the performance, you have successfully replaced your bathroom basin tap.

How To Easily Replace Basin Taps Step By

How To Replace Or Fit Basin Taps Lever Plumbing Tips

4 Mistakes Changing Basin Taps

How To Replace Bathroom Taps Big
How To Change Bathroom Taps Everything You Need Know

How To Install Basin Taps Replacing A Bathroom Sink Tap

How To Change Wash Basin Tap Leaking Water Solution தம ழ ல

How To Install Basin Taps Replacing A Bathroom Sink Tap

How To Replace A Basin Tap Big Bathroom

How To Replace An Old Bathroom Basin Faucet Lipka Home
Related Posts


