How To Remove a Bathroom Sink Plug
The bathroom sink plug, often referred to as a stopper, is a crucial component for retaining water for various hygiene tasks. However, these plugs can become problematic, accumulating hair, debris, and soap scum, leading to slow draining or complete blockage. Removing the sink plug for cleaning or replacement is a common maintenance task. This article provides a detailed examination of the various types of sink plugs and comprehensive instructions for removing them effectively.
Before initiating any removal process, it is essential to identify the type of sink plug present. Different mechanisms require specific approaches. Understanding the specific type avoids potential damage to the sink, drain assembly, or the plug itself. The subsequent sections delineate the most prevalent types of bathroom sink plugs.
Pop-up stoppers are arguably the most common type found in modern bathrooms. They operate via a linkage connected to a pivot rod located behind the sink drain. Rotating the lift rod, usually positioned behind the faucet, actuates the pivot rod, raising or lowering the stopper. This mechanism can be made of plastic or metal, impacting its durability and propensity for corrosion. Proper identification of a pop-up stopper involves recognizing the lift rod behind the faucet and observing the stopper's vertical movement when the rod is manipulated.
A lift-and-turn stopper features a knob or a small handle directly on the stopper itself. To open or close the drain, the user lifts the stopper and turns it to lock it in the desired position. These stoppers are relatively simple in design and removal often involves gripping the stopper firmly and unscrewing it. However, some models may have a set screw that first needs to be loosened with an Allen wrench or a small screwdriver.
Push-button stoppers, also known as clicker stoppers, operate with a simple push-down mechanism. Pressing the stopper once seals the drain, and pressing it again releases it. These stoppers often have intricate internal mechanisms that can be susceptible to clogging. Disassembly can sometimes be more complex compared to other types, as internal components might require specific tools or techniques.
Flip stoppers are characterized by a lever or a tab positioned directly on the stopper. This lever is flipped to block or unblock the drain opening. They are relatively simple in design and are often found in older sinks. Removal often involves simply pulling the stopper out, although some models might have a screw or clip that needs to be disengaged first.
Key Point 1: Removing a Pop-Up Stopper
The removal of a pop-up stopper involves accessing the linkage located underneath the sink. The following steps outline the procedure:
Step 1: Preparation. Ensure the area under the sink is clear of obstructions. Place a bucket or basin underneath the drain assembly to catch any residual water or debris. Gather necessary tools, including a pair of pliers, a small adjustable wrench, and a screwdriver (possibly Phillips head or flathead, depending on the set screw). A flashlight is also recommended for better visibility.
Step 2: Locate and Disconnect the Pivot Rod. Identify the pivot rod, a horizontal rod that connects to the pop-up stopper assembly. This rod typically passes through a ball joint or a similar connector. Loosen the retaining nut or screw that secures the pivot rod to the drainpipe extension. This might require the use of pliers or an adjustable wrench. Be cautious not to overtighten or strip the nut. Once loosened, carefully slide the pivot rod out of the ball joint.
Step 3: Remove the Pop-Up Stopper. With the pivot rod detached, the pop-up stopper should now be free to move. Pull the stopper straight up from the drain opening. If the stopper is stuck, gently wiggle it back and forth to loosen any accumulated debris or corrosion. Avoid using excessive force, as this could damage the stopper or the drain assembly.
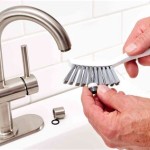
Step 4: Clean the Stopper and Drain. Once the pop-up stopper is removed, thoroughly clean it with a brush and a suitable cleaning solution to remove any accumulated hair, soap scum, or other debris. Inspect the drain opening as well and remove any visible obstructions. A bent wire or a specialized drain cleaning tool can be helpful for this task.
Step 5: Reassembly (If Applicable). If the intention is to reinstall the pop-up stopper, reverse the removal steps. Ensure the stopper is properly aligned, and the pivot rod is correctly inserted and secured. Test the mechanism by operating the lift rod to confirm the stopper functions smoothly. Tighten the retaining nut securely but avoid over-tightening.
Key Point 2: Removing a Lift-and-Turn Stopper
Lift-and-turn stoppers are generally simpler to remove due to their direct connection to the drain. The procedure is as follows:
Step 1: Initial Inspection. Examine the stopper for any visible set screws. Some lift-and-turn stoppers feature a small set screw, typically located on the side of the stopper near the top. If a set screw is present, locate the appropriate Allen wrench or screwdriver to loosen it. Turn the set screw counterclockwise until it is sufficiently loosened, but do not remove it completely.
Step 2: Unscrew the Stopper. Grip the stopper firmly. Rotate the stopper counterclockwise to unscrew it from the drain assembly. If the stopper is difficult to turn, try applying a penetrating oil or lubricant around the base of the stopper to loosen any corrosion or buildup. Allow the lubricant to sit for a few minutes before attempting to unscrew the stopper again.
Step 3: Removal and Cleaning. Once the stopper is unscrewed, lift it straight up and out of the drain. Clean the stopper thoroughly with a brush and a suitable cleaning solution to remove any accumulated debris. Inspect the drain opening and remove any visible obstructions.
Step 4: Reinstallation (If Applicable). If the intention is to reinstall the lift-and-turn stopper, reverse the removal steps. Screw the stopper back into the drain assembly, turning it clockwise until it is snug. If a set screw is present, tighten it until it is secure. Avoid over-tightening the set screw, as this could damage the stopper or the drain assembly. Test the stopper's function by lifting and turning it to ensure it operates smoothly.
Key Point 3: Removing a Push-Button (Clicker) Stopper
Push-button stoppers can be slightly more challenging to remove due to their internal mechanisms and varying designs. The following procedure provides a general guideline, but specific models might require slight adjustments.
Step 1: Identify the Stopper Type. Examine the push-button stopper closely. Some models have a decorative cap that can be unscrewed or pried off, while others may require the entire internal assembly to be removed from below the sink.
Step 2: Remove the Cap (If Applicable). If the stopper has a removable cap, attempt to unscrew it by turning it counterclockwise. If the cap is stuck, try using a rubber glove to improve grip. If the cap does not unscrew, try prying it off carefully with a small, flathead screwdriver. Be cautious not to scratch or damage the finish of the stopper or the sink.
Step 3: Access the Internal Mechanism. Once the cap is removed, the internal mechanism of the stopper should be visible. Some mechanisms may have a screw or a clip that needs to be removed to release the stopper. Carefully examine the mechanism for any visible fasteners and remove them accordingly.
Step 4: Remove the Stopper. With the fasteners removed, gently pull the stopper straight up and out of the drain. If the stopper is stuck, try wiggling it back and forth to loosen any accumulated debris or corrosion. Avoid using excessive force, as this could damage the internal mechanism.
Step 5: Clean the Stopper and Drain. Once the stopper is removed, thoroughly clean it and the drain opening to remove any accumulated debris. A specialized drain cleaning tool or a bent wire can be helpful for this task. Pay particular attention to cleaning the internal components of the stopper to ensure proper function.
Step 6: Reassembly (If Applicable). Reinstalling a push-button stopper can be more complex and may require careful attention to the specific model's instructions. Ensure all components are properly aligned and secured. Test the mechanism by pressing the stopper to confirm it operates smoothly. Note that due to the complexity of some push-button stoppers, replacement might be a more practical solution than reassembly if the mechanism is damaged or heavily corroded.
When confronted with a flip stopper, the removal process generally involves a straightforward approach. Typically, these stoppers are designed to be easily removed for cleaning purposes. Start by simply grasping the lever or tab on the stopper. If the stopper moves freely, attempt to pull it directly upwards. In many instances, the stopper will detach without requiring any additional tools or disassembly. However, some flip stoppers may have a small screw or clip securing them in place. Inspect the base of the stopper for any visible screws. If a screw is present, use a screwdriver to loosen it before attempting to remove the stopper. Similarly, check for any clips or retaining mechanisms that may need to be disengaged. Once the screw or clip is removed or disengaged, gently pull the stopper upwards to remove it. As with other types of stoppers, after the flip stopper is removed, thoroughly clean both the stopper and the drain opening to remove any accumulated debris or buildup. Ensure that any screws or clips are stored safely for reinstallation. If reinstallation is desired, simply reverse the removal process. Align the stopper with the drain opening and gently push it into place. Secure any screws or clips that were previously removed, ensuring they are properly tightened or engaged. Test the stopper to ensure it functions correctly, flipping the lever or tab to open and close the drain.
Prior to any attempt to remove a bathroom sink plug, safety precautions are paramount. Begin by turning off the water supply to the sink. This prevents accidental flooding during the removal process. Locate the shut-off valves, usually found beneath the sink, and turn them clockwise until they are fully closed. If shut-off valves are not present or are malfunctioning, the main water supply to the house may need to be shut off. Additionally, wearing safety glasses is recommended to protect the eyes from any debris or splashes. Gloves are also advisable to protect the hands from dirt, grime, and potential contact with bacteria. Furthermore, ensure adequate lighting in the work area to improve visibility and prevent accidents. A flashlight or a work light can be used to illuminate the area under the sink. During the removal process, exercise caution when handling tools. Avoid applying excessive force, as this could damage the sink, drain assembly, or the tools themselves. If encountering any difficulties or uncertainties, consulting a plumbing professional is recommended. Attempting complex repairs without proper knowledge or experience can lead to further damage and potentially costly repairs.
Regular maintenance of the bathroom sink plug and drain can significantly reduce the likelihood of clogs and drainage problems. Cleaning the stopper and drain opening periodically, typically every few weeks or months, can prevent the accumulation of hair, soap scum, and other debris. A simple solution of hot water and dish soap can be used to flush the drain and remove minor buildup. For more persistent clogs, a mixture of baking soda and vinegar can be effective. Pour a cup of baking soda down the drain, followed by a cup of vinegar. Allow the mixture to fizz for about 30 minutes, then flush with hot water. Avoid using harsh chemical drain cleaners, as these can damage the pipes and pose environmental risks. In addition to regular cleaning, consider using a drain strainer or mesh screen to catch hair and other debris before they enter the drain. These strainers are inexpensive and easy to install, and they can significantly reduce the frequency of clogs. Furthermore, avoid pouring grease, oil, or food scraps down the drain, as these can solidify and contribute to blockages. By implementing these simple maintenance practices, the longevity and functionality of the bathroom sink drain can be significantly improved.

How To Replace A Sink Stopper Quick And Simple Home Repair

How To Remove A Sink Stopper The Home Depot

Sink Stopper Stuck Super Easy Fix Diy Savings 150

Quick Tip 26 Pop Up Stopper Sticks Misterfix It Com

How To Remove A Sink Stopper The Home Depot

How To Fix Pop Up Drain Waste Plug

Bathroom Sink Popup And Stopper Problems

Fixing Tricky Pop Up Drain Sink Stopper Mechanisms Efficient Plumber

How To Fix A Bathtub Or Sink Pop Up Stopper

How To Remove A Sink Stopper The Home Depot
Related Posts


