How To Remove a Nutone Bathroom Exhaust Fan
Removing a Nutone bathroom exhaust fan is a task many homeowners can undertake with the right tools, preparation, and understanding of the process. Replacing an outdated or malfunctioning fan can significantly improve bathroom ventilation, reducing moisture buildup and preventing mold growth. While some may prefer to hire a professional, a carefully planned and executed DIY approach can save money and offer a sense of accomplishment.
Before beginning, it is crucial to prioritize safety. Working with electrical components always carries inherent risks. Therefore, adhering to safety guidelines and taking necessary precautions are paramount. This includes disconnecting the power supply to the fan before any physical interaction with the unit.
Safety First: Disconnecting the Power Supply
The first and most critical step is to disconnect the power supply to the bathroom exhaust fan. This is typically achieved by locating the corresponding circuit breaker in the electrical panel and switching it to the "OFF" position. To ensure complete safety, utilize a non-contact voltage tester to verify that the power is indeed disconnected at the fan's location. Touch the tester to the wires leading to the fan unit. If the tester indicates a live current, double-check the correct breaker has been switched off. In older homes, the circuit breaker may not be clearly labeled, so a process of elimination may be necessary.
Once the power is confirmed to be off, it is wise to post a warning note on the electrical panel indicating that work is being done on the bathroom circuit. This prevents someone else from accidentally turning the breaker back on while the replacement is in progress. This crucial step eliminates the risk of electrical shock during the removal and subsequent installation phases.
Further safety measures include wearing appropriate personal protective equipment (PPE). This consists, at a minimum, of safety glasses to protect the eyes from debris and potentially gloves to insulate against any stray voltage that might be present. A dust mask is also recommended, as the process can stir up accumulated dust and particles from the attic or ceiling space.
The importance of disconnecting the power cannot be overstated. Even if you are confident in your electrical skills, a momentary lapse in concentration can lead to serious injury. Taking the time to properly disconnect the power is the foundation of a safe and successful fan removal process.
Identifying and Removing the Fan Cover and Housing
The next stage involves removing the fan cover. Nutone fan covers are typically held in place by spring clips, screws, or a combination of both. Start by gently pulling down on the cover. If it moves slightly, it is likely held by spring clips. Carefully locate the clips and gently push or squeeze them inward to release the cover. If the cover does not budge, inspect it closely for screws. These screws are often located on the sides or corners of the cover and can be removed using a screwdriver. Retain the screws in a safe place, as they may be needed if the replacement fan uses a similar mounting system.
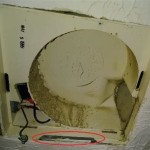
Once the cover is removed, the fan motor and housing will be visible. Before proceeding further, thoroughly inspect the area for any visible wiring connections. Take a digital photograph of the wiring configuration to ensure you can accurately reconnect the wires to the new fan. This photograph serves as a valuable reference during the installation process and prevents potential wiring errors.
The wiring will typically be connected using wire connectors, sometimes called wire nuts. Carefully unscrew the wire connectors to detach the wires from the fan motor. Ensure that the wires are separated from each other to prevent accidental contact during the next steps. It is advisable to use electrical tape to individually insulate the exposed ends of the wires to further enhance safety.
With the wiring disconnected, the fan housing can be removed. Nutone fan housings are generally secured to the ceiling joists using metal brackets, screws, or nails. Inspect the housing to determine the specific method of attachment. If screws are used, simply unscrew them using a screwdriver. If nails are used, a pry bar or similar tool can be used to gently remove them. Take care not to damage the surrounding ceiling drywall during this process.
Some Nutone fan housings are designed with telescoping brackets that extend and attach to the ceiling joists. In this case, locate the locking mechanisms on the brackets and release them. This will allow the brackets to retract, freeing the housing from the joists. It may be necessary to apply gentle pressure to the housing while releasing the brackets to facilitate removal.
Once all the screws or nails are removed, carefully lower the fan housing from the ceiling. The housing may be heavier than it appears, so it is crucial to have a firm grip and support the weight of the unit to prevent it from falling and causing damage or injury.
Addressing Ductwork and Preparing for Installation
After the fan housing is removed, the ductwork connection will be exposed. The ductwork is responsible for venting the moist air to the outside of the house. The duct is typically connected to the fan housing using clamps, tape, or a combination of both. Examine the connection method and carefully detach the duct from the old fan housing.
If the duct is connected with clamps, loosen the clamps using a screwdriver and gently pull the duct off the housing. If the duct is sealed with tape, use a utility knife to carefully cut through the tape. Take care not to damage the ductwork itself during this process. Once the duct is detached, inspect it for any tears or damage. If necessary, repair or replace the duct to ensure proper ventilation.
With the old fan and ductwork removed, inspect the opening in the ceiling for any damage or debris. Clean the area thoroughly to ensure a clean and smooth surface for the new fan. This may involve patching any holes in the drywall or removing any accumulated dust or insulation.
Before installing the new fan, carefully read the manufacturer's instructions. These instructions will provide specific guidance on how to install the particular model of fan you have purchased. Pay close attention to the wiring diagram and any specific mounting requirements.
Preparing the area thoroughly and understanding the installation instructions will greatly simplify the installation process and ensure that the new fan is installed correctly and safely. It is often recommended to dry-fit the new fan housing into the ceiling opening to ensure a proper fit before permanently securing it. This allows for any necessary adjustments to be made before the final installation.
Remember to consult with a qualified electrician if you are unsure about any aspect of the removal or installation process. Working with electricity can be dangerous, and it is always best to err on the side of caution.

Broan Nutone Bath Fan Model 765h80l Disassembly Repair Help

Mastering The Basics How To Remove Your Nutone Bathroom Fan Cover With Ease

How To Remove Broan Nutone Fan Assembly

How To Remove Nutone Bathroom Fan Cover Storables

Remove Install A Bathroom Fan Grille In 1 Min

Not Sure How To Remove Old Bathroom Fan Install New One Doityourself Com Community Forums

How To Clean Replace Light Broan Model 678 Exhaust Fan

Replace A Bathroom Fan Broan
How To Remove A Nutone Bathroom Fan Light Cover Quora

Can T Get The Grill Off Nutone Fan Light Doityourself Com Community Forums
Related Posts

