Bathroom Sink Faucet Gasket Replacement
A dripping faucet is a common household nuisance that wastes water and can drive anyone to distraction. Often, the culprit behind this persistent drip is a worn-out gasket. Fortunately, replacing a bathroom sink faucet gasket is a relatively simple DIY project that can save money on plumbing bills and restore peace and quiet to the bathroom. This article provides a step-by-step guide to replacing these essential components.
Gathering the Necessary Tools and Materials
Before beginning the repair, gather the following items:
- Replacement gaskets (specific to the faucet model)
- Flathead screwdriver
- Phillips head screwdriver
- Adjustable wrench
- Basin wrench (optional, but recommended)
- Pliers
- Penetrating oil (optional)
- Old towels or rags
- Small container or bucket
Turning Off the Water Supply
The first crucial step is to shut off the water supply to the faucet. Locate the shut-off valves under the sink. Turn both the hot and cold water valves clockwise until they stop. Turn on the faucet to release any remaining water pressure in the lines. This prevents unwanted spraying during the repair process and minimizes water wastage.
Removing the Faucet Handle(s)
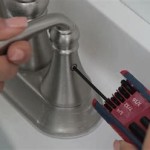
Most faucet handles are secured with screws hidden beneath decorative caps. Carefully pry off these caps using a flathead screwdriver to reveal the screws. Remove the screws using the appropriate screwdriver (usually a Phillips head). Some handles may require a slight twisting motion to pull them free from the faucet body. If the handles are stuck, apply penetrating oil and let it soak for a few minutes before attempting removal again.
Accessing the Faucet Cartridge or Stem
Once the handle is removed, the faucet cartridge or stem is exposed. This component houses the gaskets requiring replacement. Depending on the faucet model, the cartridge might be held in place by a retaining nut, a clip, or another securing mechanism. Use an adjustable wrench or basin wrench to loosen and remove the retaining nut. If a clip is present, carefully use pliers to remove it without damaging the surrounding components. Carefully lift the cartridge or stem out of the faucet body.
Identifying and Replacing the Gaskets
Examine the extracted cartridge or stem. The gaskets are typically small O-rings or rubber washers located at the base or within the cartridge. Compare the old gaskets with the new replacements to ensure they are the correct size and type. Using a small flathead screwdriver or your fingernail, carefully remove the old gaskets. Insert the new gaskets, ensuring they are seated correctly in their designated grooves or positions.
Reassembling the Faucet
Reassemble the faucet by reversing the disassembly steps. Insert the cartridge or stem back into the faucet body, ensuring it is properly aligned. Reinstall the retaining nut or clip, tightening it securely but avoiding over-tightening. Replace the faucet handles and screws, followed by the decorative caps.
Testing for Leaks
Once the faucet is reassembled, slowly turn the water supply back on by turning the shut-off valves counterclockwise. Observe the faucet carefully for any leaks. Check around the base of the faucet, the handle connections, and the spout. If leaks are detected, tighten any loose connections. If the leak persists, disassemble the faucet and double-check the gasket placement and seating.
Addressing Common Issues
While gasket replacement is usually straightforward, some issues may arise. If the retaining nut is difficult to remove due to corrosion or mineral buildup, apply penetrating oil and let it soak for several minutes. If the cartridge is stuck, gently rock it back and forth while pulling upward to free it. If the new gaskets don't resolve the leak entirely, additional internal components may need replacement, which might require professional assistance. For particularly stubborn leaks, consulting a licensed plumber is advisable.
Maintaining Your Faucet
Regular maintenance can prevent future leaks and extend the lifespan of your faucet. Periodically inspect the faucet for any signs of wear and tear. Clean the aerator regularly to remove mineral deposits that can restrict water flow and contribute to leaks. Avoid using excessive force when operating the faucet handles, as this can damage the internal components. By following these simple maintenance tips, you can keep your bathroom faucet functioning smoothly for years to come.

Repair Parts For One And Two Handle Delta Bathroom Faucets

Fix A Leaky Bathroom Faucet Replace Cartridge Quick Easy Home Repair

Valley Single Handle Bathroom Faucet Repair Parts

Bathroom Faucet Cartridge Replacement

How To Fix A Bathroom Faucet 14 Steps

Simple Ways To Fix A Leaky Delta Bathroom Sink Faucet

Delta Faucet Repair Parts Bathroom

Replacing A Bathroom Faucet Fine Homebuilding

Simple Ways To Fix A Leaky Delta Bathroom Sink Faucet

Sink Faucet Repair Delta Bathroom Drips
Related Posts


