Replacing a Tap in Your Bathroom: A Step-by-Step Guide
A leaky faucet in your bathroom can be a source of frustration and wasted water. Fortunately, replacing a bathroom tap is a relatively straightforward DIY project. This guide will provide a step-by-step walkthrough of the process, enabling you to tackle this common home improvement task confidently.
1. Gathering the Necessary Tools and Materials
Before embarking on the replacement, it's crucial to have the right tools and materials at your disposal. Here's a list of essential items:
- New bathroom tap (ensure compatibility with your existing plumbing system)
- Adjustable wrench
- Channel lock pliers
- Pipe wrench (for stubborn nuts)
- Plumber's tape (Teflon tape)
- Screwdriver (for removing the existing tap)
- Bucket (for catching water)
- Old rags or towels (for cleanup)
- Safety glasses (for eye protection)
Note: It's recommended to purchase a new faucet that is compatible with your existing supply lines. If you're unsure about the compatibility, consult a local hardware store or plumber.
2. Shutting Off the Water Supply
Safety is paramount. Before beginning the replacement process, ensure the water supply to the faucet is shut off. This is typically done by turning the valve located near the faucet or on the main water supply line. To verify that the water has been shut off completely, turn the faucet handle and confirm that no water flows.
3. Disconnecting the Old Tap
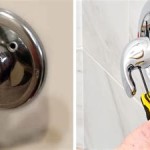
With the water supply off, you can proceed to remove the existing faucet. Begin by unscrewing the handle, which is often secured with a small screw. Once the handle is removed, use an adjustable wrench or channel lock pliers to loosen the nuts that connect the faucet body to the supply lines. Carefully remove the old tap and store it for potential future reference.
4. Installing the New Tap
Now, it's time to install the new faucet. Start by wrapping Teflon tape around the threads of the new faucet's inlets. This tape will provide a seal and prevent leaks. Next, attach the new faucet to the supply lines, ensuring a tight fit using the appropriate tools. After ensuring the faucet is securely in place, you can reconnect the water supply.
5. Testing and Finishing
With the water supply turned back on, carefully check for any leaks or drips at the connections. If any leaks are present, gently tighten the connections further. Once the faucet is leak-free, you can install the handle and any decorative accessories. Clean up any leftover debris or water, and admire your newly replaced bathroom faucet!
6. Important Considerations
Although replacing a bathroom tap can be a relatively simple task, it's important to remember that safety precautions should always be followed. Never proceed with the project if you are unsure about the process or if you are working with outdated or unfamiliar plumbing systems. If you have any doubts, consult a certified plumber for assistance.
Consider the style and functionality of your new tap. There are various designs and features available, so choose the one that best suits your needs and preferences. If you're replacing an old, inefficient faucet, opting for a low-flow model can help conserve water and lower your water bill.

How To Easily Replace Basin Taps Step By

The Bathroom And Tile Centre Darlington

How To Replace Bathroom Taps Big

Replace Your Tap
How To Change Bathroom Taps Everything You Need Know

How To Easily Replace Bath Taps Step By Victorian Plumbing

How To Replace A Basin Tap Big Bathroom

4 Mistakes Changing Basin Taps

How To Replace A Bathroom Faucet Removal And Installation

How To Replace A Bathroom Faucet Tinged Blue
Related Posts


