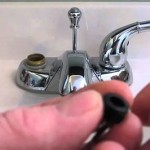
Replacing Faucets In Bathroom Sink
Upgrading the bathroom sink faucet can significantly enhance the aesthetics and functionality of a bathroom. Replacing an old, leaky, or outdated faucet with a new, modern one can revitalize the space and improve the user experience. This process, although requiring some basic plumbing knowledge and tools, is a relatively straightforward DIY project that most homeowners can tackle successfully. This article will guide you through the process of replacing a bathroom sink faucet, providing step-by-step instructions and essential tips.
1. Gathering Tools and Materials
Before embarking on the project, it is crucial to gather all the necessary tools and materials. This includes a basin wrench, adjustable wrench, pliers, channel-lock pliers, screwdriver set, pipe thread sealant tape, plumber's putty, and a new faucet kit. The new faucet kit should ideally include the faucet body, spout, handles, mounting hardware, and installation instructions specific to the chosen faucet model. It is essential to ensure compatibility between the new faucet and the existing sink and plumbing before purchasing the kit.
2. Shutting Off Water Supply and Draining the System
The first step in replacing a bathroom sink faucet is to shut off the water supply to the sink. This typically involves turning the shut-off valve located beneath the sink. If there is no shut-off valve, it will be necessary to shut off the main water supply for the entire house. Once the water supply is turned off, open the faucet to drain any remaining water in the pipes. This helps prevent water from spilling during the replacement process.
3. Disassembling the Old Faucet
With the water supply shut off and the system drained, the old faucet can be disassembled. Begin by using a basin wrench to loosen the mounting nuts underneath the sink that secure the faucet to the sink deck. These nuts are typically located between the faucet body and the sink. Once the mounting nuts are removed, the faucet body can be lifted away from the sink. Carefully remove the handle and spout from the faucet body, taking note of their positions and any washers or o-rings that may be present. It is important to retain these components for reference during the installation of the new faucet.
4. Preparing the Sink and Plumbing
After removing the old faucet, it is important to clean the sink deck and the faucet mounting holes. This can be achieved using a soft cloth and a mild cleaning solution. Any residue left on the sink deck or in the mounting holes could interfere with the installation of the new faucet. If the old faucet was mounted with plumber's putty, carefully remove it using a putty knife. The sink drain may also need to be cleaned and re-sealed with a new washer.
5. Installing the New Faucet
With the sink prepared, installation of the new faucet can commence. Begin by applying plumber's putty around the base of the faucet body. This helps prevent leaks and ensures a secure fit. Gently insert the faucet body through the mounting holes in the sink deck and align it with the plumbing connections. Secure the faucet body to the sink using the mounting nuts and basin wrench. Be careful not to overtighten the nuts, as this could damage the faucet or the sink. Next, attach the handles and spout to the faucet body, ensuring they are properly aligned. Tighten the handle screws and any other securing bolts to ensure a stable connection.
6. Connecting Plumbing Lines and Testing the Faucet
With the faucet body and accessories installed, it is time to connect the plumbing lines. Apply pipe thread sealant tape to the threads of the faucet's supply lines and then connect the lines to the shut-off valves or the water supply pipes. Be sure to tighten the connections securely to prevent leaks. Once the plumbing lines are connected, turn on the water supply and check for any leaks. If leaks are present, carefully tighten the connections or re-apply plumber's putty. After ensuring that the faucet is leak-free, test the hot and cold water flow and adjust the handles as needed. The new faucet should now be operational and ready for use.

How To Replace A Bathroom Faucet Removal And Installation

Diy How To Replace A Bathroom Sink Faucet Remove Install

How To Install A Bathroom Faucet The Home Depot

How To Replace A Bathroom Faucet Removal And Installation

How To Replace A Bathroom Faucet The Home Depot

How To Replace A Bathroom Faucet Tinged Blue

How To Install A Bathroom Faucet The Home Depot

How To Replace A Bathroom Faucet Home Repair Tutor

How To Replace A Bathroom Faucet The Home Depot

Replacing A Bathroom Faucet Fine Homebuilding
Related Posts


