Bathroom Exhaust Fan Thru Roof: Installation Guide and Considerations
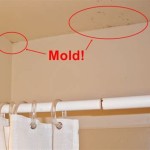
Bathroom exhaust fans play a crucial role in maintaining indoor air quality and preventing moisture buildup, which can lead to mold growth and other health concerns. When installing a bathroom exhaust fan, a common approach is to vent it through the roof. This method offers several advantages, including improved ventilation and aesthetics. This article provides a comprehensive guide to installing a bathroom exhaust fan through the roof, covering important considerations, installation steps, and essential tips for successful implementation.
Benefits of a Bathroom Exhaust Fan Thru Roof
Venting a bathroom exhaust fan through the roof offers several benefits compared to other venting methods, such as venting through a wall or the attic. These advantages include:
- Improved Ventilation: Roof venting allows for direct airflow, ensuring efficient removal of moisture, odors, and pollutants from the bathroom.
- Reduced Moisture Buildup: By expelling humid air directly outside, roof venting minimizes moisture accumulation within the bathroom, reducing the risk of mold and mildew growth.
- Improved Aesthetics: Venting through the roof eliminates the need for visible vent pipes on the exterior walls, maintaining the aesthetic appeal of the house.
Essential Considerations for Roof Venting
Before installing a bathroom exhaust fan through the roof, several factors need careful consideration. These include:
- Roof Material: Different roofing materials require specific venting methods and fasteners. For example, asphalt shingles may require a different approach than metal roofing.
- Roof Pitch: The slope of the roof affects the length and positioning of the vent pipe. A steeper roof pitch requires a shorter vent pipe, while a shallower pitch may require a longer one.
- Local Building Codes: Ensure compliance with local building codes regarding vent pipe size, material, and installation requirements. These regulations may vary from one location to another.
- Existing Roof Features: Consider the presence of any existing roof features that might interfere with the vent pipe installation, such as chimneys or skylights.
Step-by-Step Installation Process
After considering the essential factors, follow these steps to install a bathroom exhaust fan through the roof:
- Locate the Vent Point: Choose a suitable location on the roof for the vent pipe, considering factors like proximity to the bathroom, roof pitch, and existing roof features.
- Cut the Roof Opening: Use a circular saw or a roofing hole saw to create an opening in the roof for the vent pipe. Ensure the opening is slightly larger than the vent pipe diameter.
- Install the Flashing: Install a flashing around the vent pipe to prevent water from leaking through the roof opening. The flashing should be securely attached to the roof using roofing nails or screws.
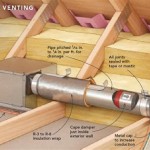
- Install the Vent Pipe: Connect the vent pipe to the exhaust fan and extend it through the roof opening. Use appropriate pipe connectors and sealing materials to create a leak-proof connection.
- Secure the Vent Pipe: Secure the vent pipe to the roof using vent pipe clamps or other approved methods to prevent movement and vibrations. Ensure the vent pipe is level and properly supported.
- Install the Vent Cap: Install a vent cap on the top of the vent pipe to prevent debris and animals from entering the pipe. Choose a cap that is compatible with the vent pipe size and material.
- Seal All Connections: Thoroughly seal all connections around the vent pipe with silicone caulk or a similar sealant to prevent leaks and drafts.
Tips for Success
To ensure a successful installation, follow these tips:
- Use High-Quality Materials: Choose durable vent pipe materials, such as PVC or ABS, for optimal performance and longevity.
- Properly Seal Connections: Pay close attention to sealing all connections around the vent pipe to prevent leaks and ensure proper ventilation.
- Maintain Proper Slope: Ensure the vent pipe has a slight downward slope to facilitate drainage and prevent water from accumulating inside the pipe.
- Inspect Regularly: Periodically inspect the vent pipe, flashing, and vent cap for any signs of damage, wear, or leaks. Promptly addressing any issues will prevent potential problems.

Installing A Bathroom Fan Fine Homebuilding

Bathroom Exhaust Fan Can Vent Out Through The Wall Or Up Roof Building America Solution Center

Venting A Bath Fan In Cold Climate Fine Homebuilding

Quick Tip 23 Fixing A Drip At The Bathroom Fan Misterfix It Com

Pin On Dream Home Collection

Bathroom Vent Piping To Near Exterior Inspecting Hvac Systems Internachi Forum

How To Replace And Install A Bathroom Exhaust Fan From Start Finish For Beginners Easy Diy

Why Does My Bathroom Ceiling Fan Drip Foothills Roofing Calgary

How To Use An In Line Exhaust Fan Vent Two Bathrooms Diy Family Handyman

Broan Nutone 3 In To 4 Roof Vent Kit For Round Duct Steel Black Rvk1a The Home Depot
Related Posts
