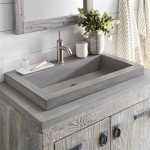
Revitalize Your Bathroom Sink with Contact Paper
Bathroom sinks, often subject to daily wear and tear, can become dull and lackluster over time. Traditional renovation methods, such as tiling or painting, are often time-consuming and expensive. However, a simple and cost-effective solution exists: contact paper. This versatile material offers a quick and easy way to transform the look of your bathroom sink, adding a touch of personality and freshness to the space.
The Benefits of Using Contact Paper on Bathroom Sinks
Contact paper offers a multitude of advantages for bathroom sink revitalization. It is an affordable and readily available material, making it a budget-friendly option. Unlike traditional renovation methods, contact paper installation is quick and easy, requiring minimal tools and effort. Additionally, contact paper is available in a wide array of colors, patterns, and textures, allowing for personalized customization to match any bathroom aesthetic.
Furthermore, contact paper is a durable and water-resistant material, specifically designed to withstand moisture and humidity. Its adhesive properties ensure a secure and long-lasting application, minimizing the risk of peeling or bubbling. The versatility of contact paper allows for easy removal when desired, leaving no residue behind, making it a perfect temporary solution for renters or homeowners who prefer a less permanent approach.
Steps for Applying Contact Paper to a Bathroom Sink
Applying contact paper to a bathroom sink is a straightforward process that can be completed with minimal effort. Begin by thoroughly cleaning the sink surface, removing any dirt, grease, or residue. Allow the surface to dry completely before proceeding. Next, measure the area of the sink that will be covered with contact paper, ensuring an accurate fit.
Using a sharp utility knife, cut the contact paper to the required size, leaving a slight excess for trimming later. Ensure that the adhesive side of the contact paper is facing upwards. Carefully peel back a portion of the backing paper, exposing the adhesive. Slowly apply the contact paper to the sink surface, starting from one edge and working your way across.
Use a squeegee or a smooth object to smooth out any air bubbles or wrinkles, ensuring a seamless and professional finish. Once the contact paper is fully applied, trim any excess with a utility knife, following the contours of the sink. Allow the adhesive to set for at least 24 hours before using the sink to maximize adhesion.
Design Considerations for Bathroom Sink Contact Paper
The choice of contact paper for your bathroom sink is an opportunity to express your personal style and create a cohesive aesthetic. Consider the overall theme and color palette of your bathroom when selecting a design. For a contemporary look, opt for solid colors or minimalist patterns in neutral shades. A traditional bathroom may benefit from floral motifs or vintage patterns.
Metallic finishes, such as gold or silver, can add a touch of glamour and sophistication. If you're seeking a more playful and vibrant ambiance, consider using bright colors or bold patterns. Remember to consider the size and shape of your bathroom sink when choosing a contact paper design. Small sinks may look cluttered with large, intricate patterns, while large sinks can handle more elaborate designs.

Transforming Bathroom Sink Diy With Marble Contact Paper

How To Do A Sy Stunning Granite Contact Paper Countertop Makeover

Marble Contact Paper Countertop 10 Months Later Anika S Diy Life

How To Do A Sy Stunning Granite Contact Paper Countertop Makeover

Transforming Bathroom Sink Diy With Marble Contact Paper

Marble Contact Paper Countertop 10 Months Later Anika S Diy Life

Diy Easy Bathroom Makeover Transformation Faux Marble Framed Mirror No Paint The Ann

Diy Easy Bathroom Makeover Transformation Faux Marble Framed Mirror No Paint The Ann

How To Do A Sy Stunning Granite Contact Paper Countertop Makeover

House Update Bathroom Vanity With Marble Contact Paper The Great Goodness
Related Posts