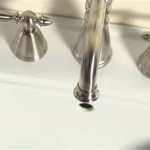
Addressing a Leaky Bathroom Sink Faucet: A Comprehensive Guide
A dripping faucet in a bathroom sink might seem like a minor inconvenience, but it can quickly escalate into a significant problem, leading to increased water bills, water damage, and the annoying, persistent sound of dripping. Identifying the cause of the leak and taking the necessary steps to repair it is crucial for both conserving water and maintaining the integrity of the plumbing system. This article provides a detailed overview of the common causes of leaky bathroom faucets and the methods for addressing them.
Identifying the Source of the Leak
Pinpointing the exact location of the leak is the first step in effectively resolving the issue. Common areas where leaks originate in bathroom faucets include the spout, the base of the handle, and underneath the sink where the water supply lines connect. Carefully observing where the water is escaping will provide vital clues about the underlying problem.
If water is dripping from the faucet spout, the issue likely resides within the faucet cartridge, valve seat, or O-rings. Leaks around the base of the handle often indicate a problem with the O-rings or cartridges specific to the handle mechanism. Water accumulating under the sink generally points to a loose connection at the supply lines, a corroded pipe, or a leak from the drain assembly.
Before attempting any repairs, it is imperative to shut off the water supply to the affected faucet. This is typically achieved by turning off the shut-off valves located under the sink. If individual shut-off valves are not present, the main water supply to the entire house must be turned off to prevent flooding and further water damage.
Common Causes and Solutions
Different types of faucets are prone to specific types of leaks, and understanding the faucet’s design is essential for selecting the appropriate repair method. The four primary types of bathroom sink faucets are compression faucets, ball faucets, cartridge faucets, and ceramic disc faucets. Each type has its own set of components and potential points of failure.
Compression Faucets: These are the oldest and simplest type of faucet, characterized by separate hot and cold water handles that are turned to tighten or loosen a valve seat. Leaks in compression faucets typically arise from worn-out rubber washers or O-rings. Replacing these components is usually a straightforward task. First, the faucet handle must be removed, often by unscrewing a set screw or removing a decorative cap. Once the handle is off, the stem can be unscrewed, exposing the washer. The worn washer is then replaced with a new one of the same size and type. Similarly, O-rings can be replaced by carefully rolling them off the stem and replacing them with new ones. It's beneficial to apply plumber's grease to the new O-rings to ensure a smooth seal and prevent future wear.
Ball Faucets: Ball faucets are characterized by a single handle that controls both water flow and temperature. They operate using a slotted ball that fits into the faucet body. Leaks in ball faucets are often caused by worn-out O-rings, seats, and springs located within the faucet body. A specialized repair kit designed for ball faucets is typically required to address these leaks. The kit usually includes replacement O-rings, seats, springs, and a faucet wrench. The repair process involves disassembling the faucet body, removing the ball, and replacing the worn components. Careful attention must be paid to the order in which the components are removed and reassembled to ensure proper functionality. It’s worth noting that working with ball faucets can be slightly more complex than other types, and consulting a repair guide or video tutorial is often helpful.
Cartridge Faucets: Cartridge faucets also use a single handle to control water flow and temperature, but instead of a ball, they rely on a cartridge that slides up and down within the faucet body. Leaks from cartridge faucets generally indicate a worn or damaged cartridge. Replacing the cartridge is the standard solution. First, the handle must be removed, which usually involves loosening a set screw or removing a decorative cap. Once the handle is off, a retaining clip or nut holds the cartridge in place. This clip or nut must be removed to allow the cartridge to be pulled out. The new cartridge should be identical to the old one, and it should be inserted in the same orientation. After the new cartridge is in place, the retaining clip or nut is reattached, and the handle is reinstalled.
Ceramic Disc Faucets: Ceramic disc faucets are known for their smooth operation and durability. They use two ceramic discs that slide over each other to control water flow. Leaks in ceramic disc faucets are relatively uncommon, but when they do occur, they are often caused by mineral buildup or damage to the ceramic discs. Cleaning the discs or replacing them is the usual remedy. To access the discs, the faucet handle and spout must be removed. The ceramic cylinder can then be lifted out, exposing the discs. The discs can be cleaned with a mild vinegar solution to remove mineral deposits. If the discs are damaged, they should be replaced. Ensure that the replacement discs are specifically designed for the faucet model. Careful handling is crucial when working with ceramic discs, as they are fragile and can easily crack.
In addition to issues within the faucet itself, leaks can also originate from the supply lines connecting the faucet to the water supply. These lines are typically made of flexible braided stainless steel or copper. Over time, these lines can corrode, crack, or become loose at the connections. Regularly inspecting the supply lines for signs of damage is essential. If leaks are detected, the lines should be replaced immediately. When replacing supply lines, ensure that the new lines are of the correct length and fitting size. It’s advisable to use Teflon tape on the threaded connections to create a watertight seal. Tighten the connections securely, but avoid over-tightening, which can damage the fittings.
Practical Repair Steps
After identifying the type of faucet and the source of the leak, the repair process involves specific steps tailored to the faucet's design. Before beginning any repairs, gather the necessary tools and materials. This typically includes a wrench, screwdriver, pliers, adjustable wrench, basin wrench (for reaching tight spaces under the sink), replacement parts (washers, O-rings, cartridges, or supply lines), plumber's grease, Teflon tape, and a container to catch any remaining water in the pipes.
Disassembly and Component Replacement: The first step is to carefully disassemble the faucet, following the instructions for the specific type of faucet. Take pictures or make notes during the disassembly process to aid in reassembly. When removing components, pay attention to their orientation and placement. Replace any worn or damaged components with new ones. Apply plumber's grease to O-rings and other moving parts to ensure smooth operation and prevent future wear. Use Teflon tape on threaded connections to create a watertight seal.
Mineral Deposit Removal: Mineral deposits can accumulate around faucet components, hindering their proper function and causing leaks. Soak the affected parts in a solution of vinegar and water to loosen the deposits. Use a toothbrush or small brush to scrub away any remaining residue. Rinse the parts thoroughly with clean water before reassembling the faucet.
Reassembly and Testing: Once the components have been replaced and cleaned, carefully reassemble the faucet, following the reverse order of disassembly. Ensure that all parts are properly aligned and securely fastened. After reassembly, slowly turn the water supply back on and check for leaks. If leaks persist, double-check the connections and components to ensure they are properly installed and tightened.
Drain Leaks: While the primary focus is on the faucet itself, a leaking drain assembly can also contribute to water accumulating under the sink. The drain assembly consists of several components, including the drain flange, drain pipe, P-trap, and tailpiece. Leaks can occur at the connections between these components due to loose nuts or worn-out washers. Tighten the nuts on the drain assembly and replace any worn washers. If the P-trap is cracked or damaged, it should be replaced.
In some cases, the persistent leak may stem from corrosion of the faucet body or internal components. Severe corrosion can compromise the integrity of the faucet, making a complete faucet replacement the most practical solution. Choosing a new faucet that matches the existing plumbing and décor is vital. When installing a new faucet, carefully follow the manufacturer's instructions and use Teflon tape on all threaded connections to ensure a watertight seal.
In all scenarios, it is important to prioritize safety. Before initiating any repairs, turning off the water supply is paramount. Wearing safety glasses can prevent debris or water from entering the eyes. If the repair involves working with electrical components (such as touchless faucets), ensure that the power is disconnected to avoid electric shock. If unsure about any aspect of the repair process, consulting a qualified plumber is always the best course of action.

5 Reasons Your Faucet Is Dripping Water How To Fix It

Properly Fixing A Leaky Sink Faucet Wallside Windows

How To Fix A Leaky Faucet 5 Easy Steps

3 Ways To Fix A Leaky Faucet Common Causes Of Leaks

How To Fix A Leaky Bathroom Sink Faucet

How To Fix A Leaky Faucet True Value

5 Reasons Your Faucet Is Dripping Water How To Fix It

Why Are My Faucets Leaking The Plumbing Works

How To Fix A Leaky Faucet Forbes Home

How To Fix A Leaky Faucet The Home Depot
Related Posts


