Bathroom Sink Pop-Up Drain Repair Kit: A Comprehensive Guide
A malfunctioning bathroom sink pop-up drain can be a frustrating inconvenience. Fortunately, a bathroom sink pop-up drain repair kit offers a cost-effective and relatively simple solution for most common issues. Understanding the components of these kits, the various types available, and the steps involved in a typical repair can empower homeowners to tackle this common plumbing problem.
Understanding the Pop-Up Drain Assembly
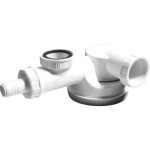
The pop-up drain assembly is a system of interconnected parts that work together to seal and drain the sink. The key components include the stopper, the pivot rod, the clevis strap, the lift rod, and the drain body. The stopper is the visible part that seals the drain opening. The pivot rod, connected to the lift rod, moves up and down, actuating the clevis strap. The clevis strap, in turn, pivots the stopper to open and close the drain. The entire assembly is housed within the drain body, which is installed within the sink drain opening.
Types of Bathroom Sink Pop-Up Drain Repair Kits
Several types of repair kits cater to different pop-up drain issues. The most basic kits typically include a new stopper, pivot rod, clevis strap, and necessary seals. More comprehensive kits might include a new drain body, particularly useful if the existing drain is corroded or damaged. Some specialized kits address specific problems like a broken lift rod or a faulty pop-up mechanism. Identifying the specific problem with the drain is crucial for selecting the appropriate repair kit.
Common Problems Addressed by Repair Kits
A variety of problems can be resolved with a bathroom sink pop-up drain repair kit. A leaky drain is often caused by worn-out seals, which are easily replaced with the new seals provided in the kit. A stopper that won't stay up or down might indicate a problem with the clevis strap or pivot rod, both typically included in standard kits. A slow-draining sink could be caused by a clogged drain, though this might require separate cleaning before addressing any mechanical issues with the pop-up mechanism.
Choosing the Right Repair Kit
Selecting the correct repair kit requires careful examination of the existing drain assembly. Determine the type of stopper, the style of the drain body, and the overall condition of the components. Measuring the diameter of the drain opening and the existing components can ensure compatibility with the new parts. If unsure, consulting with a plumbing professional or taking a photo of the existing assembly to a hardware store can assist in choosing the appropriate kit.
Tools Required for Repair
Before beginning the repair, gather the necessary tools. These typically include pliers, a basin wrench, a screwdriver, plumber's putty, and possibly a flashlight for better visibility under the sink. Having all the necessary tools readily available will streamline the repair process and prevent interruptions.
Steps for a Typical Repair
While specific steps may vary depending on the type of repair kit and the specific problem being addressed, a general process can be outlined. First, turn off the water supply to the sink. Next, remove the old drain assembly, which typically involves loosening the nut connecting the drain body to the sink using a basin wrench. Clean the sink drain opening thoroughly. Install the new drain body, applying plumber's putty to the underside of the flange for a watertight seal. Connect the new stopper, pivot rod, and clevis strap according to the kit instructions. Finally, reconnect the water supply and test the new assembly for proper operation.
Preventing Future Pop-Up Drain Problems
Regular maintenance can prevent future pop-up drain issues. Avoid pouring grease or oil down the drain, as these can clog the pipes and affect the drain mechanism. Periodically clean the drain with a mixture of baking soda and vinegar to remove any buildup that might hinder proper operation. Inspecting the drain assembly regularly for any signs of wear and tear can also help prevent more significant problems down the line.
Troubleshooting Common Installation Issues
Occasionally, issues may arise during installation. If the new drain leaks, ensure that plumber's putty was applied correctly and that all connections are tight. If the stopper doesn't seal properly, check the alignment of the stopper and the clevis strap. If the drain is still slow, ensure that no debris is obstructing the drain pipes. Consulting the repair kit instructions or seeking advice from a plumbing professional can help address any unexpected challenges.
Considering Professional Help
While many pop-up drain repairs are manageable for DIY enthusiasts, some situations may warrant professional assistance. If the problem is complex, if the drain is severely corroded, or if multiple attempts at repair have been unsuccessful, contacting a licensed plumber is recommended. A professional can diagnose the problem accurately and ensure a proper, long-lasting repair.

Pf Waterworks 1 5 In X 7 25 Abs Universal Pop Up Drain Repair Kit Pf0907 The Home Depot

Pf Waterworks 1 5 In X 7 25 Abs Universal Pop Up Drain Repair Kit Pf0907 The Home Depot

Pf Waterworks 1 5 In X 7 25 Abs Universal Pop Up Drain Repair Kit Pf0907 The Home Depot

Plumbcraft 5 In D Metal Bathroom Drain Repair Kit Com

Sink Drain Repair Parts At Com

Delta Faucet Repair Kit In The Kits Components Department At Com

Pf Waterworks Clogfree Never Clog Pop Up Drain Magnetic Stopper Transpa Abs W Overflow 1 6 2 Sink Hole Chrome Pf0324 The Home Depot

Retail First 249509 6 X In Sink Drain Repair Pop Kit 1 Ralphs

How To Fix A Bathtub Or Sink Pop Up Stopper Drain Bathroom

Sink Drains Stoppers At Com
Related Posts


