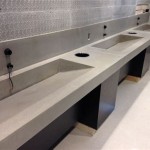
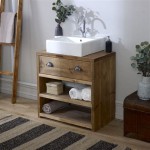
Can I Paint Bathroom Countertops? A Comprehensive Guide
The question of whether bathroom countertops can be painted is frequently posed by homeowners seeking budget-friendly renovation solutions. While painting countertops is a viable option, it's crucial to approach the project with realistic expectations and a thorough understanding of the process, materials, and potential limitations. The longevity and aesthetic appeal of a painted countertop depend heavily on meticulous preparation, the selection of appropriate coatings, and consistent maintenance. This article will explore the intricacies of painting bathroom countertops, addressing common concerns and providing a detailed roadmap for achieving satisfactory results.
It's important to acknowledge that painting is generally considered a temporary or cosmetic fix, especially for high-traffic areas like bathroom countertops. It isn't a permanent replacement for materials such as granite, quartz, or solid-surface options. The painted surface, even with the best sealants, will likely be more susceptible to scratches, stains, and chipping compared to traditional countertop materials. Understanding this inherent limitation is paramount before embarking on the project.
The success of painting relies on the existing countertop material. Certain materials are more conducive to paint adhesion than others. Laminate, for example, requires extensive preparation to ensure proper bonding. Porous materials like some types of tile will need a different approach than non-porous surfaces. A test area is always recommended to assess paint adhesion and the overall appearance before committing to the entire countertop.
Key Considerations Before Painting
Before picking up a brush, several factors must be carefully considered to determine if painting is the right solution for a particular bathroom countertop. These factors influence the durability, aesthetics, and overall feasibility of the project.
1. Countertop Material: The existing countertop material is the most crucial factor. Laminate countertops, while common, require thorough sanding and priming with a bonding primer to ensure the paint adheres properly. Ceramic tile countertops present the challenge of painting grout lines, demanding meticulous application and potential touch-ups. Solid-surface countertops like Corian may offer a smoother surface for painting, but still require proper preparation. Understanding the material's properties and its interaction with paint is essential. Avoid painting countertops made of natural stone like granite or marble, as the paint may not adhere properly and can be damaged. Furthermore, painting over these materials will cover their natural beauty which adds value to the bathroom.
2. Intended Use and Traffic: Bathroom countertops are subjected to constant use and exposure to water, soaps, and other cleaning products. The level of traffic and the type of activities performed on the countertop will significantly impact the durability of the painted finish. A lightly used guest bathroom countertop may withstand painting better than a heavily used master bathroom countertop. Consider the potential for spills, scratches from toiletries, and the frequency of cleaning when assessing the suitability of painting.
3. Desired Aesthetic and Longevity: Painting offers a cost-effective way to update the appearance of a bathroom countertop, but it's not a long-term solution. The painted surface will likely require touch-ups and eventual re-coating. If the goal is to achieve a high-end, durable finish that will last for many years, replacing the countertop with a more robust material is a better option. If the primary goal is to refresh the look of the bathroom on a budget and for a shorter timeframe, painting can be a viable alternative. Manage expectations regarding the longevity and aesthetic limitations of a painted surface.
Surface Preparation: The Foundation for Success
Proper surface preparation is arguably the most critical step in painting bathroom countertops. Inadequate preparation will almost certainly lead to paint failure, resulting in peeling, chipping, and an unsatisfactory appearance. This phase requires meticulous attention to detail and a commitment to thoroughness.
1. Cleaning and Degreasing: The first step is to thoroughly clean the countertop with a degreasing cleaner. This removes any dirt, grime, soap scum, and oils that could interfere with paint adhesion. Rinse the countertop thoroughly with clean water and allow it to dry completely. For stubborn stains, a specialized cleaner or a mild abrasive cleanser may be necessary. Ensure all traces of the cleaning agent are removed before proceeding.
2. Sanding: Sanding is essential for creating a slightly textured surface that allows the primer to grip the countertop. The grit of sandpaper needed depends on the countertop material. For laminate, start with a coarser grit (around 120) to remove the glossy finish, then move to a finer grit (around 220) to smooth the surface. For tile, sanding can help to roughen the surface of the tiles and remove any glaze. However, be cautious not to damage the grout. Dust thoroughly after sanding. A tack cloth is useful for removing fine dust particles.
3. Priming: Applying a high-quality bonding primer is crucial for ensuring the paint adheres properly to the countertop. Select a primer specifically formulated for the countertop material, such as a laminate primer or a multi-surface primer. Apply the primer in thin, even coats, following the manufacturer's instructions. Allow the primer to dry completely before proceeding to the next step. For particularly smooth surfaces, consider applying two coats of primer. Lightly sand the primed surface with fine-grit sandpaper (around 320) to create an even smoother base for the paint.
4. Repairing Imperfections: Before painting, address any chips, cracks, or imperfections in the countertop surface. Use a suitable filler or epoxy repair compound to fill in the damaged areas. Allow the filler to dry completely, then sand it smooth and flush with the surrounding surface. Clean the repaired areas thoroughly before priming.
Selecting the Right Paint and Sealant
The choice of paint and sealant is critical for achieving a durable and aesthetically pleasing finish. Choosing the wrong products can lead to premature failure and a disappointing result. Several factors influence the selection process, including durability, water resistance, and desired appearance.
1. Type of Paint: For bathroom countertops, the best paint options are typically epoxy paints or specialized countertop painting kits. Epoxy paints offer excellent durability and water resistance, making them well-suited for high-moisture environments. Countertop painting kits often include a pre-mixed epoxy coating and clear topcoat specifically designed for countertop applications. Avoid using standard latex paints, as they are not durable enough to withstand the rigors of bathroom use. Another alternative would be a high-quality acrylic paint designed for interior use, followed by multiple layers of a water-based polyurethane sealant. Ensure the paint is suitable for application on the primed surface.
2. Finish: The sheen of the paint affects both the appearance and the durability of the finish. Semi-gloss or gloss finishes are generally recommended for bathroom countertops because they are more water-resistant and easier to clean than matte finishes. However, glossier finishes can also highlight imperfections in the surface. A satin finish may offer a good compromise between durability and appearance. Consider the overall aesthetic of the bathroom and choose a finish that complements the existing décor.
3. Sealant: A high-quality sealant is essential for protecting the painted surface from water damage, stains, and scratches. Choose a sealant specifically designed for use on painted surfaces or countertops. Polyurethane or epoxy-based sealants are generally recommended for their durability and water resistance. Apply multiple thin coats of sealant, allowing each coat to dry completely before applying the next. Follow the manufacturer's instructions carefully. Consider using a sealant with UV protection to prevent the paint from fading over time.
4. Color Selection: The color is a subjective choice, but it is important to consider how the color will interact with the existing bathroom décor. Light colors can brighten up a small bathroom, while darker colors can add a touch of elegance. Take into account the lighting in the bathroom and how it will affect the appearance of the color. Obtain paint samples and test them in the bathroom to ensure the color is satisfactory before committing to the entire project. Consider the undertones of the color and how they will complement the other colors in the room.
Application Techniques and Best Practices
The application process significantly impacts the final result. Attention to detail and adherence to best practices are essential for achieving a smooth, even, and durable finish.
1. Application Method: A high-quality brush, roller, or paint sprayer can be used to apply the paint. A brush is suitable for small areas and for applying detail work. A roller is ideal for covering large, flat surfaces quickly and evenly. A paint sprayer can provide the smoothest finish, but requires more preparation and skill to use effectively. Select the appropriate application method based on the size and complexity of the countertop. If using a brush or roller, choose high-quality tools designed for use with the chosen paint. For epoxy paints, consider using disposable brushes or rollers, as they can be difficult to clean.
2. Number of Coats: Applying multiple thin coats of paint is generally better than applying one thick coat. Thin coats dry more evenly and are less likely to drip or sag. Apply at least two coats of paint, allowing each coat to dry completely before applying the next. Lightly sand between coats with fine-grit sandpaper (around 320) to create a smoother surface for the subsequent coat.
3. Drying Time: Allow each coat of paint and sealant to dry completely before proceeding to the next step. Follow the manufacturer's recommended drying times. Drying times can vary depending on the temperature and humidity. Rushing the drying process can lead to paint failure. Ensure adequate ventilation in the bathroom to promote proper drying.
4. Curing Time: After applying the final coat of sealant, allow the countertop to cure completely before using it. Curing times can vary depending on the type of sealant used. Consult the manufacturer's instructions for specific curing times. Avoid placing heavy objects on the countertop or exposing it to water or chemicals during the curing process. This will allow the paint and sealant to fully harden and bond to the surface.
Maintenance and Long-Term Care
Proper maintenance is essential for prolonging the life of a painted countertop and preserving its appearance. Gentle cleaning and regular inspections can help prevent damage and extend the lifespan of the finish.
1. Cleaning: Clean the painted countertop regularly with a mild soap and water solution. Avoid using harsh chemicals, abrasive cleaners, or scouring pads, as they can scratch or damage the painted surface. Wipe up spills immediately to prevent staining. Use a soft cloth or sponge to clean the countertop. For stubborn stains, try a solution of baking soda and water. Always rinse the countertop thoroughly with clean water after cleaning.
2. Protection: Use cutting boards and trivets to protect the painted countertop from scratches and heat damage. Avoid placing hot pans or sharp objects directly on the surface. Use placemats or coasters to protect the countertop from spills and rings. Consider applying a protective film or coating to the countertop for added protection.
3. Inspection and Touch-Ups: Regularly inspect the painted countertop for signs of wear and tear, such as scratches, chips, or peeling paint. Touch up any damaged areas promptly to prevent further damage. Use a small brush to apply a thin coat of paint to the damaged area. Allow the paint to dry completely, then apply a thin coat of sealant. Even with diligent maintenance, the paint will inevitably need re-coating after several years.
:strip_icc()/101922779-2cbc45e123c34827afb4f601723b03ca.jpg?strip=all)
How To Paint Bathroom Countertops

How To Easily Spray Paint Bathroom Countertops My Homier Home

Paint Bathroom Vanity Countertop Sink So Easy A Piece Of Rainbow

Should You Be Painting Your Bathroom Countertops Caesarstone

Paint Bathroom Vanity Countertop Sink So Easy A Piece Of Rainbow

How To Easily Spray Paint Bathroom Countertops My Homier Home

Paint Bathroom Vanity Countertop Sink So Easy A Piece Of Rainbow

How To Paint A Countertop Don T Make These Mistakes Blessed Beyond Crazy

Can You Paint A Countertop Re Sick Of Absolutely Recreated Designs

How To Paint Tile Countertops And Our Modern Bathroom Reveal Bright Green Door
Related Posts


