Delta Bathroom Faucet Aerator Removal: A Step-by-Step Guide
Delta bathroom faucets, known for their quality and design, sometimes require maintenance or replacement of their aerator. The aerator, a small component at the faucet's spout, mixes water with air to create a smooth, even flow. If your Delta faucet experiences low water pressure, sputtering, or a forceful spray, removing the aerator might be necessary. This article will guide you through the process of removing a Delta bathroom faucet aerator, equipping you with the necessary knowledge and tools for a successful endeavor.
Essential Tools and Materials
Before commencing the removal process, gather the following tools and materials to ensure a smooth operation:
- Adjustable wrench or pliers: These are crucial for gripping and unscrewing the aerator from the faucet spout.
- Cleaning cloth: Used to wipe away any debris or water droplets while working on the faucet.
- Optional: A small container or bowl to collect any water that might drain from the faucet during the process.
It is advisable to shut off the water supply to the faucet before proceeding, preventing any unwanted water spills. This can be done by turning off the corresponding valve on the water supply line. Remember to check the water supply valve to ensure it is completely shut off before starting the removal process.
Step-by-Step Removal Instructions
Follow these steps carefully to successfully remove the Delta bathroom faucet aerator:
- Locate the aerator: The aerator is typically situated at the end of the faucet spout, where water exits. It often has a distinctive design, often featuring a small, textured cap or ring.
- Grip the aerator: Use the adjustable wrench or pliers to firmly grasp the aerator. Ensure a secure hold to prevent slipping or damaging the aerator.
- Unscrew the aerator: Turn the wrench or pliers counter-clockwise to unscrew the aerator from the faucet spout. It might require some force, but avoid applying excessive pressure to prevent damaging the faucet spout.
- Remove the aerator: Once the aerator is fully unscrewed, gently pull it off the faucet spout. You might encounter some water resistance as the water inside the spout drains out.
Inspecting and Replacing the Aerator
Once the aerator is removed, it's crucial to inspect its condition. If the aerator is clogged, it might be the reason for the faucet's malfunction. You can try cleaning the aerator by removing any mineral deposits or debris using a small brush or toothbrush. However, if the aerator is severely damaged or beyond repair, it's best to replace it with a new one.
When selecting a replacement aerator, ensure it is compatible with your Delta bathroom faucet. Check the manufacturer's website or documentation for details on compatible aerator models. When installing a new aerator, ensure you tighten it securely with the wrench or pliers, but avoid overtightening to prevent damage.
After replacing or cleaning the aerator, turn the water supply back on and test the faucet for proper function. If you experience any issues, review the installation procedure or contact a qualified plumber for assistance.

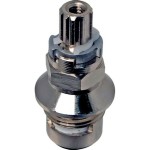
Aerator Removal Wrench Rp52217 Delta Faucet

Delta Faucet Aerator Removal On 9113 Dst Or Rp80524

How To Clean And Replace An Aerator By Delta

Delta Faucet Aerator Removal Tool Irv2 Forums

Delta Faucet Aerator Cleaning How To Remove Clean Install New Replace Aerators

Delta Rp76076 Aerator And Wrench Build Com

Cache Aerators Recessed Or Faucet Faqs

Delta Cache Aerator Wrench Rp52217 The Home Depot

What Does Delta Use For A Tool Their Long Handled Kitchen Faucets Aerators Infinity

How To Fix Kitchen Faucet Water Running Slow Clogged Aerator Using Delta Wrench Rp52217