DIY Bathroom Air Vent
Proper ventilation is crucial for maintaining a healthy and comfortable bathroom environment. Excess moisture from showers and baths can lead to mold growth, mildew, and structural damage. A well-functioning bathroom exhaust fan is the primary defense against these issues, and understanding how to install or maintain one is a valuable skill for any homeowner. This article offers a guide for DIY bathroom air vent projects, covering various aspects from choosing the right fan to installation and maintenance.
Selecting the proper bathroom exhaust fan depends primarily on the bathroom's size. Fans are rated by their airflow capacity, measured in cubic feet per minute (CFM). Building codes often dictate minimum CFM requirements based on square footage. A general rule of thumb is to have 1 CFM per square foot of bathroom area. For bathrooms with high ceilings or frequent use, a higher CFM rating is recommended.
Beyond CFM ratings, several other factors influence fan selection. Noise levels, measured in sones, are an important consideration. Lower sone ratings indicate quieter operation. Features such as built-in lights, heaters, humidity sensors, and motion detectors can add convenience and functionality. Energy Star certified models offer improved energy efficiency, reducing long-term operating costs.
Before beginning any electrical work, ensure the power to the bathroom circuit is turned off at the breaker panel. Verify the power is off using a non-contact voltage tester. If replacing an existing fan, remove the old unit carefully, disconnecting the wiring and detaching the housing from the ceiling joists. For new installations, the location of the fan should be between the shower/tub area and the toilet, ideally closer to the source of moisture.
The installation process typically begins with preparing the ceiling opening. For new installations, this involves cutting a hole of the appropriate size based on the fan's housing dimensions. Use a template provided with the fan or carefully measure and mark the area to be cut. A reciprocating saw or drywall saw can be used to create the opening. Ensure the opening provides access to a suitable ceiling joist for secure mounting.
Wiring the exhaust fan correctly is paramount for safe and proper operation. Most fans require a dedicated circuit wired directly to the electrical panel. Follow the manufacturer's instructions carefully, connecting the wires according to the wiring diagram. Typically, this involves connecting black wires to black (hot), white wires to white (neutral), and green or bare copper wires to ground. Secure all wire connections with wire nuts.
Once the wiring is complete, the fan housing can be mounted to the ceiling joist. Use the provided screws and ensure the housing is flush with the ceiling. Attach the ductwork to the fan housing using duct tape or metal clamps, ensuring a tight and secure connection. The ductwork should be routed to the exterior of the building, terminating with a proper vent cap to prevent backdrafts and pest entry.
After securing the housing and ductwork, install the vent grille and any additional components such as lights or heaters. Restore power to the circuit and test the fan operation. Verify the fan turns on and off correctly and that the airflow is adequate. Check for any unusual noises or vibrations, which may indicate improper installation.
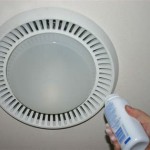
Regular maintenance can prolong the lifespan of a bathroom exhaust fan and ensure optimal performance. Dust and debris can accumulate on the fan blades and motor, reducing efficiency. Periodically cleaning the fan with a vacuum cleaner and a damp cloth can help remove these obstructions. Inspect the ductwork for any leaks or blockages and clean or repair as needed.
Choosing the right vent and carefully following the installation instructions are critical for successful DIY bathroom air vent projects. While this article provides general guidance, always consult the manufacturer's instructions for specific details and safety precautions. If unsure about any aspect of the installation, consulting a qualified electrician is recommended.
Proper grounding and adherence to local building codes are essential for safety. Working with electricity can be hazardous, and taking the necessary precautions is paramount. Using appropriate safety equipment, such as gloves and eye protection, is always advisable.
Different types of ductwork are available, including flexible duct and rigid metal duct. The choice of ductwork depends on the specific installation requirements and the length of the run. Shorter runs benefit from rigid ductwork as it minimizes airflow resistance, while flexible ductwork offers more versatility for navigating complex spaces. Insulating the ductwork can help prevent condensation and improve energy efficiency, particularly in colder climates.

Diy Bathroom Fan Vent Cover Blog Homeandawaywithlisa

Diy Bathroom Fan Vent Cover Blog Homeandawaywithlisa

10 Clever Diy Projects To Hide Household Eyesores Bathroom Vent Fan Cover

How To Install An Exhaust Fan Diy

How To Install A Bathroom Fan Homeserve Usa

Diy Decorative Vent Cover Home Improvement Covers

How To Install A Bathroom Fan Diy Family Handyman

How To Make A Est Exhaust Fan For Room Washroom

Installation

Average Cost To Install A Bathroom Fan Forbes Home
Related Posts
