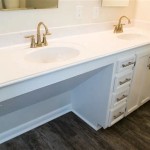
How To Install Vinyl Plank Flooring In A Bathroom
Vinyl plank flooring has become a popular choice for bathrooms due to its water resistance, durability, and ease of installation. Unlike traditional hardwood or laminate, vinyl plank can withstand the moisture and humidity common in bathroom environments, making it a practical and aesthetically pleasing option. This article provides a comprehensive guide on how to install vinyl plank flooring in a bathroom, covering everything from preparation to finishing touches.
Preparation: Assessment and Material Acquisition
Before commencing the installation process, proper preparation is crucial. This involves assessing the existing bathroom floor, calculating material requirements, and gathering the necessary tools and materials. A thorough assessment of the subfloor is paramount to ensure a smooth and level surface for the vinyl plank flooring.
First, remove all existing flooring. This could involve tile, linoleum, or other materials. Take care to avoid damaging the subfloor during this process. If the existing flooring is difficult to remove, consider using a floor scraper or heat gun to soften the adhesive. Ensure all debris, nails, staples, and adhesive residue are completely removed.
Next, inspect the subfloor for any signs of damage. Look for cracks, holes, unevenness, or water damage. Address any issues before proceeding. Small cracks can be filled with a floor-leveling compound. Larger cracks or holes may require patching with plywood or cement board, depending on the subfloor material. Uneven areas should be leveled using a self-leveling compound. This ensures a uniform and stable surface for the vinyl plank, preventing future issues such as gapping or buckling.
Once the subfloor is prepared, calculate the amount of vinyl plank flooring needed. Measure the length and width of the bathroom and multiply these dimensions to determine the square footage. Add an extra 10-15% to account for waste due to cuts and pattern matching. It is always better to have extra material than to run short during the installation.
Gather the necessary tools and materials. Essential tools include a utility knife with extra blades, a measuring tape, a pencil, a straightedge or T-square, a tapping block, a rubber mallet, spacers, and safety glasses. Depending on the type of vinyl plank flooring, you may also need adhesive. Acquiring quality tools is often directly correlated with the quality of the final product.
Materials required include the vinyl plank flooring itself, a moisture barrier (if not integrated into the planks), floor leveling compound (if needed), and transition strips (if transitioning to another type of flooring). Choosing the right type of vinyl plank flooring is also important. Consider factors such as thickness, wear layer, and locking mechanism. Thicker planks generally offer better durability and sound insulation, while a thicker wear layer provides greater resistance to scratches and scuffs.
Installation: The Step-by-Step Process
With the subfloor prepared and all materials gathered, the installation process can begin. The following steps detail the procedure for installing vinyl plank flooring in a bathroom. This focuses on click-lock vinyl plank, the most common type for DIY installations.
Acclimate the vinyl planks to the bathroom environment for at least 48 hours before installation. This allows the planks to adjust to the temperature and humidity levels, minimizing expansion or contraction after installation. Store the planks in the bathroom, laying them flat and spreading them out to allow for proper air circulation. Avoiding this step can lead to problems with the flooring later.
Start by planning the layout of the planks. Determine the direction in which you want the planks to run. Typically, running the planks parallel to the longest wall creates a more visually appealing effect. Consider any obstacles, such as toilets or vanities, and plan how to work around them. It is wise to dry-lay a few rows of planks to visualize the final layout and ensure a balanced appearance.
Begin the installation in a corner of the room. Place spacers along the walls to maintain an expansion gap. This gap allows the floor to expand and contract with temperature changes without buckling or warping. The size of the expansion gap typically ranges from 1/4 to 3/8 inch, depending on the manufacturer's recommendations.
Install the first row of planks, aligning the tongue or groove edges. Use the click-lock mechanism to connect the planks. Angle the plank slightly and press it into place until it clicks. If necessary, use a tapping block and rubber mallet to gently tap the planks together for a secure fit. Avoid using excessive force, as this can damage the locking mechanism.
Continue installing subsequent rows, staggering the end joints of the planks. This creates a more visually appealing and structurally sound floor. A common practice is to start each new row with the leftover piece from the previous row, provided it is at least 6 inches long. Ensuring the joints are staggered minimizes the visibility of the seams and enhances the overall appearance of the floor.
When encountering obstacles such as toilets or vanities, carefully measure and cut the planks to fit. Use a utility knife and straightedge to score the plank along the cut line. Snap the plank along the score line. For more intricate cuts, consider using a jigsaw or coping saw. Precision is key when cutting around fixtures to ensure a seamless and professional-looking finish.
For adhesive-backed vinyl planks, peel off the backing and carefully position the plank onto the subfloor. Press firmly to ensure proper adhesion. Use a roller to apply even pressure across the entire surface of the plank. Work in small sections to prevent the adhesive from drying out before the plank is properly positioned.
Finishing Touches: Trim and Sealing
Once all the vinyl planks are installed, the final step involves adding finishing touches such as trim and sealant to complete the project. These elements enhance the aesthetic appeal of the floor and provide additional protection against moisture and damage.
Install baseboards or quarter-round molding around the perimeter of the room to cover the expansion gap between the floor and the wall. This provides a clean and polished look. Choose trim that complements the style of the vinyl plank flooring and the overall aesthetic of the bathroom. Attach the trim using nails or adhesive, ensuring it is securely fastened to the wall, not the floor.
Install transition strips where the vinyl plank flooring meets other types of flooring, such as tile or carpet. Transition strips create a smooth and safe transition between the different floor surfaces. Select transition strips that match the color and style of the vinyl plank flooring. These strips are typically installed using screws or adhesive, depending on the type of transition strip and the subfloor material.
Apply a bead of sealant around the perimeter of the bathroom, where the floor meets the walls and fixtures. This creates a watertight seal that prevents water from seeping under the floor and causing damage. Use a high-quality sealant specifically designed for bathrooms, such as a mildew-resistant silicone caulk. Apply the sealant smoothly and evenly, and wipe away any excess with a damp cloth.
Allow the sealant to cure completely before using the bathroom. The curing time typically ranges from 24 to 48 hours, depending on the type of sealant used. Avoid exposing the floor to excessive moisture during the curing process. After the sealant has cured, the vinyl plank flooring is ready for use.
Clean the newly installed vinyl plank flooring with a mild detergent and water. Avoid using harsh chemicals or abrasive cleaners, as these can damage the surface of the floor. Regularly sweep or vacuum the floor to remove dirt and debris. With proper care and maintenance, vinyl plank flooring can provide years of beautiful and durable performance in a bathroom environment.

How To Install Vinyl Plank Flooring In A Bathroom Fixthisbuildthat

How To Install Vinyl Plank Flooring In A Bathroom

How To Install Vinyl Plank Flooring In A Bathroom

How To Install Vinyl Plank Flooring In A Bathroom Fixthisbuildthat

How To Install Vinyl Plank Flooring In A Bathroom Fixthisbuildthat

Installing Vinyl Plank Flooring Lifeproof Waterproof Rigid Core Sustain My Craft Habit

How To Install Vinyl Plank Flooring In A Bathroom Fixthisbuildthat

Dos And Don Ts For Installing Vinyl Plank Floors In The Bathroom Advice Homeowners

Installing Vinyl Plank Flooring Lifeproof Waterproof Rigid Core Sustain My Craft Habit

How To Install Vinyl Plank Flooring In A Bathroom Fixthisbuildthat
Related Posts


