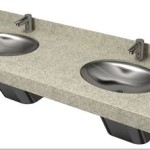
How to Caulk a Drop-In Bathroom Sink Drain
Maintaining a functional and presentable bathroom requires attention to detail, including the proper sealing of fixtures. One common point of potential leakage is the area where a drop-in bathroom sink drain meets the countertop. Caulking this area effectively prevents water damage, mold growth, and unsightly grime buildup. This comprehensive guide explores the necessary steps to ensure a watertight seal around your bathroom sink drain.
Essential Supplies
Before embarking on the caulking process, gather the following essential supplies for a seamless experience:
- Caulk: Choose a high-quality silicone caulk specifically designed for bathroom applications. Opt for a mildew-resistant formula for enhanced longevity.
- Caulk Gun: This handheld tool dispenses the caulk evenly and efficiently.
- Caulk Remover: This tool helps remove any existing caulk around the drain opening.
- Utility Knife: A sharp utility knife will facilitate precise trimming of excess caulk.
- Cleaning Cloth: A microfiber cloth will help clean up any spills and residue after applying the caulk.
- Masking Tape: Optional but often recommended, masking tape can help create a clean and precise line for applying the caulk.
- Gloves: Protect your hands from the caulk, particularly if you have sensitive skin.
Preparation: Cleaning and Removing Old Caulk
Proper preparation is paramount for a successful caulking job:
- Turn Off Water Supply: Locate the water shut-off valve for your bathroom sink and turn off the water supply.
- Clean the Area: Use a cleaning cloth and a mild detergent to thoroughly clean the surface around the drain opening. Be sure to remove any debris, soap scum, or residue. Let the area dry completely.
- Remove Existing Caulk: If there is old caulk, use a caulk remover tool to carefully remove it. Make sure to get rid of all the old caulk, including any residue that may be left behind.
- Inspect the Drain: Once the old caulk is removed, carefully inspect the drain for any cracks, damage, or loose parts. Repair any issues before proceeding with caulking.
Applying the Caulk
Now, it's time to apply the caulk:
- Prepare the Caulk Gun: Insert the caulk cartridge into the caulk gun and cut a small opening at the tip.
- Apply a Bead: Begin applying a continuous, even bead of caulk around the drain opening. Make sure to fill the gap between the sink drain and the countertop completely.
- Smooth Out the Caulk: Use a damp finger or a caulk tool to smooth out the bead of caulk, ensuring a uniform and neat finish.
- Remove Excess Caulk: After smoothing the caulk, use a utility knife to carefully trim any excess caulk.
- Allow to Dry: Let the caulk fully dry according to the manufacturer's instructions. This typically takes around 24 hours.
Finishing Touches
After the caulk has dried, it's time to complete the process:
- Clean Up: Remove any remaining residue or smudges with a damp cloth.
- Test the Seal: Turn the water supply back on and test for any leaks. If you notice any leaks, carefully reapply caulk as needed.
- Regular Maintenance: For optimal performance, periodically inspect the caulk for any cracks or damage. Reapply caulk as needed to maintain a watertight seal.
By following these steps, you can effectively caulk a drop-in bathroom sink drain, preventing water damage, mold growth, and aesthetic issues. Remember to use high-quality caulk, prepare the area thoroughly, and allow ample time for the caulk to dry fully. Regular maintenance will ensure the longevity of your bathroom sink and its surroundings.

How To Caulk A Bathroom Sink

How To Caulk A Bathroom Sink 12 Steps With Pictures Wikihow

How To Caulk A Bathroom Sink 12 Steps With Pictures Wikihow

How To Caulk A Bathroom Sink

Ge Sealants How To Install A Drop Sink

How To Caulk A Bathroom Sink 12 Steps With Pictures Wikihow

Drop In Bathroom Sink Replacement

How To Caulk A Drain 14 Steps With Pictures Wikihow Life

How To Replace A Drop In Bathroom Sink Step By

How To Caulk A Drain 14 Steps With Pictures Wikihow Life
Related Posts


