How to Change a 3-Piece Bathroom Faucet
Replacing a 3-piece bathroom faucet can be a daunting task for the uninitiated. However, with the right tools and a clear understanding of the process, even a novice can accomplish this project. This guide will walk you through the steps of changing a 3-piece bathroom faucet, ensuring a smooth and successful installation.
Gather Your Tools and Materials
Before you begin, it's essential to have all the necessary tools and materials readily available. This will streamline the process and prevent any frustrating delays. Here's what you'll need:
- New 3-piece bathroom faucet
- Adjustable wrench
- Channel-lock pliers
- Phillips screwdriver
- Flathead screwdriver
- Plumber's tape (Teflon tape)
- Basin wrench
- Bucket
- Towels
- Safety glasses
- Gloves (optional)
It's a good idea to take a picture of the existing faucet configuration before disassembling it. This will help you remember the order of the parts when installing the new faucet.
Step-by-Step Instructions
Now, let's break down the process of replacing your 3-piece bathroom faucet into manageable steps:
1. Turn Off the Water Supply
The first step is to shut off the water supply to the faucet. Locate the shut-off valves for the hot and cold water lines beneath the sink or on the wall. Turn both valves clockwise until they are completely closed. To ensure the water is completely off, turn on the faucet and check for any leaks. If there are leaks, tighten the valves further.
2. Drain the Faucet
With the water supply off, open the faucet to drain any remaining water. This will prevent water from spilling onto the floor during the disassembly process.
3. Remove the Existing Faucet
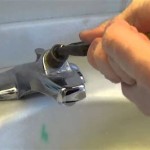
Now, it's time to dismantle the existing faucet. Start by removing the handle and spout. For most faucets, these parts are secured by screws. Use a screwdriver to loosen and remove these screws. Once the handle and spout are removed, you can move on to the faucet body.
The faucet body is attached to the sink or countertop with nuts. These nuts are usually located beneath the faucet body. Use an adjustable wrench or channel-lock pliers to loosen and remove these nuts. Depending on the faucet design, you might need to use a basin wrench to reach and loosen the nuts. To access the nuts, you may need to remove the sink's drain assembly.
4. Install the New Faucet
Once the old faucet is completely removed, you can start installing the new one. Apply plumber's tape (Teflon tape) to the threads of the new faucet body to ensure a watertight seal. Wrap the tape clockwise around the thread, leaving a small gap between each layer.
Next, thread the new faucet body onto the water supply lines. Make sure the faucet body is securely attached. Use the adjustable wrench or channel-lock pliers to tighten the nuts beneath the faucet body. Do not overtighten as this can damage the faucet.
5. Connect the Handle and Spout
Attach the new handle and spout to the faucet body. If they come with screws, align the holes and screw them in securely.
6. Turn on the Water Supply
Finally, turn the water supply back on. Start by opening the hot water valve slowly. Check for any leaks around the faucet body, handle, and spout. If you find any leaks, tighten the corresponding nuts or screws. Once the hot water supply is secure, open the cold water valve. Again, check for any leaks and tighten as necessary.
Additional Tips
Here are a few additional tips for successful faucet replacement:
- Always use a clean cloth to dry the faucet and surrounding area before and after applying plumber's tape.
- Do not use excessive force when tightening nuts or screws. Overtightening can damage the faucet.
- If you're unsure about any part of the installation process, it's best to consult a licensed plumber.

How Do You Change A 3 Hole Faucet To 1 At Home With Ashley

How To Install A Widespread Faucet The Home Depot

How Do You Change A 3 Hole Faucet To 1 At Home With Ashley

How Do You Change A 3 Hole Faucet To 1 At Home With Ashley

How Do You Change A 3 Hole Faucet To 1 At Home With Ashley

How Do You Change A 3 Hole Faucet To 1 At Home With Ashley

How To Remove And Install A Bathroom Faucet

The Plumber Swap Faucet But Save Sink

How To Replace 3 Hole Bathroom Sink Faucet

How Do You Change A 3 Hole Faucet To 1 At Home With Ashley
Related Posts


