How to Change a Bathroom Vanity Top
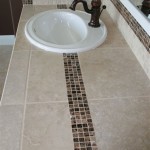
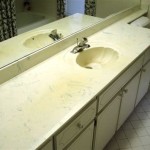
A bathroom vanity top is a crucial component of a bathroom's functionality and aesthetics. Over time, a vanity top might become damaged, worn, or simply outdated. Replacing it can give your bathroom a fresh look and improve its practicality. Whether you're dealing with a cracked countertop, a worn finish, or simply want to update your bathroom's style, this guide provides comprehensive steps on how to change a bathroom vanity top.
1. Gather the Necessary Tools and Materials
Before embarking on the project, ensure that you have all the necessary tools and materials at hand. This will streamline the process and prevent unnecessary delays. You will need:
- New vanity top
- Caulk gun
- Silicone caulk
- Utility knife
- Measuring tape
- Level
- Drill with a drill bit appropriate for the countertop fastening screws
- Screwdriver
- Safety glasses
- Work gloves
- Drop cloth
- Cleaning supplies (rags, soap, water)
It's essential to choose the right materials for your bathroom vanity top. Consider the following factors:
-
Material:
Vanity tops are available in a wide array of materials, including granite, marble, quartz, laminate, and cultured marble. Each material offers distinct properties in terms of durability, aesthetics, and maintenance requirements. -
Size and Shape:
Accurate measurements are crucial to ensure that the new vanity top fits perfectly. Be sure to factor in the sink cutout and any other necessary holes for fixtures. -
Style and Finish:
The style of your vanity top should complement the overall design theme of your bathroom. Choose a finish that suits your preference and complements the existing fixtures.
2. Remove the Old Vanity Top
The first step is to remove the existing vanity top safely and efficiently. This might involve disconnecting plumbing fixtures, removing the sink, and detaching the countertop from the base cabinet. Follow these steps:
-
Turn off the water supply:
Locate the water shut-off valve for the sink and turn it off. Drain the sink to avoid water damage. -
Disconnect the plumbing fixtures:
Unscrew the faucet and drain lines, taking care not to damage the pipes. If you have a pop-up drain stopper, disconnect it as well. -
Remove the sink:
The sink might be secured with clamps or screws from underneath the vanity top. Gently loosen and remove these fasteners. Depending on the type of sink, you may need to use a putty knife or a specialized tool to separate it from the countertop. -
Detach the countertop:
Identify the fasteners that secure the countertop to the vanity base cabinet. They may be screws, clips, or brackets. Carefully detach these fasteners to remove the countertop. -
Dispose of the old vanity top:
Once removed, safely dispose of the old vanity top according to local regulations.
3. Prepare the Vanity Base
Before installing the new vanity top, it's essential to ensure that the vanity base is clean and level. You might need to clean any debris or residue from the old countertop, and address any imperfections in the base. Follow these steps:
-
Clean the vanity base:
Thoroughly clean the surface of the vanity base where the new countertop will rest. Use a cleaning solution and a damp cloth to remove any dirt, grime, or adhesive residue. -
Inspect for imperfections:
Look for any cracks, gaps, or uneven surfaces. These imperfections should be addressed before installing the new countertop. You can use wood filler or epoxy to repair minor damage. -
Level the vanity base:
Use a spirit level to ensure that the vanity base is level. If it's not level, you can adjust the legs or shims to correct it. This ensures that the new countertop sits evenly and securely.
4. Install the New Vanity Top
Now, it's time to install the new vanity top. This process might vary depending on the type of countertop and the specific installation instructions. Follow these general steps:
-
Position the new vanity top:
Carefully place the new vanity top onto the vanity base, ensuring that it's centered and aligned. -
Secure the countertop:
Fasten the new vanity top to the vanity base using the appropriate screws or fasteners. Refer to the manufacturer's instructions for specific details. You might need to predrill holes for the screws to avoid cracking the countertop. -
Apply sealant:
Apply a bead of silicone caulk along the back edge of the vanity top where it meets the vanity base. This creates a watertight seal to prevent leaks. -
Reinstall the sink:
Carefully place the new sink into the cutout in the countertop. Secure it with clamps or screws, aligning it properly. -
Reconnect the plumbing fixtures:
Reconnect the faucet, drain lines, and pop-up drain stopper, ensuring that the connections are tight and secure. -
Turn the water supply on:
Slowly turn the water supply back on and check for any leaks. Tighten the connections if necessary.
5. Finishing Touches
After installing the new vanity top, it's important to add the finishing touches to ensure a professional and functional result. Follow these steps:
-
Clean up:
Remove any excess caulk or debris left behind during installation. Wipe down the entire vanity top and base with a damp cloth. -
Adjust fixtures:
Ensure that all plumbing fixtures are functional and properly aligned. -
Test the functionality:
Run water through the faucet and drain to confirm that everything is working properly.

Replace Vanity Top And Faucet Diy Network

Replace Granite Countertops Transform Your Bathroom S Look

How To Remove Replace A Vanity Top Easy Bathroom Sink Remodel

How To Install A Bathroom Vanity

How To Remove A Countertop From Vanity Decor Adventures

Diy Vanity Tops For Your Bathroom

How To Replace A Bathroom Countertop Homeadvisor

Replace Vanity Top And Faucet Diy Network

Replace Vanity Top And Faucet Diy Network

How To Replace A Vanity Top And Save Craving Some Creativity
Related Posts


