How to Clean a Broan Bathroom Exhaust Fan
A clean bathroom exhaust fan is crucial for maintaining proper ventilation and preventing moisture buildup, which can lead to mold and mildew growth. Regular cleaning also ensures the fan operates efficiently and quietly. This guide provides a comprehensive approach to cleaning a Broan bathroom exhaust fan, addressing both surface cleaning and internal component maintenance.
Gathering Necessary Supplies
Before beginning the cleaning process, gather the following items:
- Stepladder or sturdy stool
- Vacuum cleaner with crevice attachment and dusting brush
- All-purpose cleaner
- Mild dish soap
- Warm water
- Microfiber cloths or soft rags
- Screwdriver (if necessary for removing the fan cover)
- Safety glasses
- Gloves
Turning Off the Power
Safety is paramount when working with electrical appliances. Before touching the exhaust fan, locate the corresponding circuit breaker in your electrical panel and turn it off. This prevents electric shock during the cleaning process. Double-checking the power is off by attempting to turn on the fan light (if equipped) is also recommended.
Removing the Fan Cover
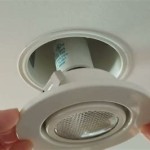
Most Broan bathroom exhaust fans feature a removable cover for easy access to the interior components. The method of removal varies depending on the model. Some covers are held in place with spring clips, while others require screws. Consult your fan’s instruction manual for specific removal instructions. Carefully detach the cover, noting how it is attached for easy reinstallation.
Vacuuming Loose Dust and Debris
With the cover removed, use the vacuum cleaner's dusting brush attachment to remove loose dust and debris from the fan blades, motor housing, and the interior of the fan housing. This initial cleaning step removes the bulk of the accumulated dirt and facilitates more thorough cleaning.
Cleaning the Fan Blades
Dust and grime often adhere stubbornly to the fan blades. Two effective cleaning methods are recommended:
- Washing: Carefully remove the fan blades (if possible) and wash them in warm soapy water. Rinse thoroughly and allow them to dry completely before reinstallation.
- Wiping: If the blades are not removable, dampen a microfiber cloth with all-purpose cleaner and carefully wipe down each blade, removing any clinging dirt and grease. For stubborn grime, allow the cleaner to sit for a few minutes before wiping.
Cleaning the Fan Housing
The fan housing can also accumulate significant dust and grime. Use a damp cloth with all-purpose cleaner to wipe down the interior and exterior of the housing. Pay attention to the vents and grilles, ensuring they are clear of obstructions. Avoid getting any liquid into the motor housing.
Cleaning the Fan Cover
Clean the fan cover separately using warm soapy water and a soft cloth or sponge. Rinse thoroughly and dry completely before reattaching it to the fan unit. For tough stains or grease buildup, allow the soapy water to soak on the cover for a few minutes before scrubbing.
Reassembling the Fan
Once all components are clean and dry, reassemble the fan in the reverse order of disassembly. Ensure the fan cover is securely attached and all screws or clips are properly fastened. Consult the instruction manual for specific reassembly instructions if needed.
Restoring Power and Testing the Fan
After reassembling the fan, return to the electrical panel and turn the circuit breaker back on. Test the fan to ensure it is operating correctly and quietly. If unusual noises or vibrations occur, recheck the assembly to ensure everything is secure.
Regular Maintenance Schedule
To maintain optimal performance and prevent excessive buildup, regular cleaning is recommended. A good practice is to clean the bathroom exhaust fan every three to six months, or more frequently if the bathroom experiences heavy use or high humidity.
Addressing Persistent Issues
If the fan continues to operate noisily or inefficiently after cleaning, further investigation may be necessary. Consult a qualified electrician to address any potential mechanical or electrical problems. Continuing to operate a malfunctioning fan can lead to further damage or safety hazards.
Replacing the Fan
Over time, bathroom exhaust fans can wear out and require replacement. Signs of a failing fan include excessive noise, reduced airflow, and persistent overheating. If cleaning and maintenance fail to resolve these issues, replacing the fan is the best course of action to ensure proper ventilation and safety.

How To Clean Replace Light Broan Model 678 Exhaust Fan

How To Clean Replace Light Broan Model 678 Exhaust Fan

Surfaceshield Antibacterial Roomside Fan

Broan Nutone 110 Cfm Bathroom Exhaust Fan With Led Lighted Cleancover Grille Energy Star Ae110lk The Home Depot

Broan 110 Cfm White Decorative Square Ventilation Fan Light For Bathrooms Aer110lk Rona

Remove Install A Bathroom Fan Grille In 1 Min

Broan Nutone 688 Bathroom Exhaust Fan With Duct Com
Broan Ultra Quiet Humidity Sensing Bath Ventilation Fan With Led Light Costco

Broan Invent Series 2 Sone 80 Cfm White Bathroom Fan In The Fans Heaters Department At Com

Broan Flex Series 110 Cfm 1 0 Sones Ventilation Fan With Cleancover Energy Star Ae110k Rona
Related Posts


