How To Fix a Low Flow Bathroom Faucet
Low water pressure from a bathroom faucet can be a frustrating problem. It can prolong simple tasks like washing hands or brushing teeth, leading to wasted time and water. Identifying the cause of the low flow is the first step in resolving the issue. The problem might stem from a variety of factors ranging from a simple clogged aerator to more complex plumbing problems within the house or even the municipal water supply.
Before initiating any repair work, it's crucial to determine if the low flow is isolated to a single faucet or affects multiple fixtures in the house. If multiple fixtures exhibit low pressure, the problem is likely upstream of the faucet itself, possibly within the main water supply line or the pressure regulator. In the case of a widespread problem, investigating the main water valve, checking for leaks in the main supply line, or contacting the local water utility might be necessary. However, if only one faucet is affected, the solution likely lies within the faucet assembly itself.
This article will provide a comprehensive guide to diagnosing and resolving low flow issues specifically related to bathroom faucets. It will cover common causes, troubleshooting techniques, and step-by-step instructions for performing basic repairs. Safety is paramount; always shut off the water supply to the faucet before disassembling any components. Wear appropriate safety glasses to protect eyes from debris. If unfamiliar with plumbing repairs, consult a qualified plumber.
Identifying Common Causes of Low Flow
Several common issues can contribute to low water flow in a bathroom faucet. Thoroughly investigating these potential causes is essential before proceeding with more complex troubleshooting steps. Understanding the root of the problem directs the repair efforts and increases the likelihood of a successful resolution.
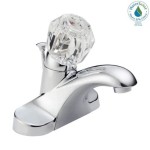
One of the most frequent culprits is a clogged aerator. The aerator, typically located at the tip of the faucet spout, mixes air with water to create a non-splashing, consistent stream. Over time, mineral deposits (calcium, magnesium), sediment, and other debris can accumulate in the aerator screen, restricting water flow. This buildup is particularly common in areas with hard water.
Another potential cause is debris lodged within the faucet cartridge or valve. Many modern faucets utilize a cartridge system to control water flow and temperature. Older faucets might use separate hot and cold water valves with rubber washers. Regardless of the system type, sediment and mineral deposits can accumulate within these components, obstructing the water passages and reducing flow. Additionally, deteriorated rubber washers in older valve systems can break down and further restrict flow.
Flexible supply lines connecting the faucet to the water shut-off valves under the sink can also be a source of restricted flow. These lines, often made of braided stainless steel or flexible plastic, can become kinked or twisted, hindering the passage of water. Internal corrosion or buildup within the supply lines can also significantly reduce the inner diameter, leading to decreased flow. Furthermore, the shut-off valves themselves can sometimes become partially closed or corroded internally, restricting water flow even when fully open.
Finally, in some cases, the water pressure throughout the entire plumbing system might be inadequate. This could be due to issues with the municipal water supply, a faulty pressure regulator on the main water line entering the house, or even partially closed main water valve. While less likely to be the sole cause for a single faucet issue, it's a factor to consider, especially if other fixtures in the house are also exhibiting reduced flow.
Troubleshooting and Repairing a Clogged Aerator
Addressing a clogged aerator is often the simplest and most effective way to restore adequate water flow to a bathroom faucet. The process generally involves removing the aerator, cleaning it, and reinstalling it. This is a relatively straightforward task that requires minimal tools and can be completed in a short amount of time.
The first step is to locate the aerator at the tip of the faucet spout. Most aerators are threaded and can be unscrewed by hand. However, some aerators might be tightly secured or have a unique design that requires a specialized aerator wrench or a pair of pliers. If using pliers, it's advisable to wrap the jaws with tape to prevent scratching or damaging the aerator's finish. Gently unscrew the aerator in a counter-clockwise direction.
Once removed, the aerator can be disassembled into its component parts, typically including a housing, a screen or multiple screens, and a rubber washer. Examine each component for mineral deposits, sediment, or other debris. Use a small brush, such as an old toothbrush, to scrub away any visible buildup. For stubborn deposits, soaking the components in a solution of white vinegar or a dedicated lime and calcium remover for several hours can help dissolve the buildup.
Rinse each component thoroughly under running water to remove any remaining debris or cleaning solution. Ensure that all the small holes in the screen are clear and unobstructed. If the aerator screen is severely damaged or corroded, it might be necessary to replace it. Replacement aerators are readily available at most hardware stores and plumbing supply stores.
Once all the components are clean and clear, reassemble the aerator in the correct order. Make sure the rubber washer is properly seated to create a watertight seal. Carefully screw the aerator back onto the faucet spout, tightening it by hand until snug. Avoid over-tightening, as this could damage the aerator or the faucet spout. Turn the water supply back on slowly and check for leaks around the aerator. If leaks are present, tighten the aerator slightly until the leak stops.
If cleaning the aerator doesn't completely restore the water flow, it's likely that other issues are contributing to the problem, such as debris in the cartridge or supply lines.
Cleaning or Replacing the Faucet Cartridge/Valve
If cleaning the aerator doesn't resolve the low flow issue, the problem might lie within the faucet cartridge or valve. This involves disassembling the faucet to access and clean or replace the cartridge or valve assembly. This task requires a bit more technical skill and might require specific tools depending on the faucet model.
Before starting, turn off the water supply to the faucet using the shut-off valves typically located under the sink. If these valves are not present or are malfunctioning, shut off the main water supply to the house. Cover the sink drain to prevent small parts from falling in. Depressurize the faucet by opening it to release any remaining water pressure.
Carefully remove the faucet handle(s). The method for removing the handle varies depending on the faucet design. Some handles are held in place by a setscrew, which can be loosened using an Allen wrench. Other handles might have a decorative cap that needs to be pried off to reveal a screw beneath. Still others are simply threaded onto the valve stem and can be unscrewed directly.
Once the handle(s) are removed, the faucet cartridge or valve assembly will be exposed. Cartridges are typically held in place by a retaining clip or nut. Remove the clip or nut using pliers or a wrench. Carefully pull the cartridge straight up and out of the faucet body. For older faucets with separate hot and cold water valves, the valve stems will need to be unscrewed. Be mindful of the order in which the parts are removed, as they will need to be reassembled in the same way.
Examine the cartridge or valve assembly for any signs of mineral deposits, sediment, or damage. If possible, disassemble the cartridge or valve further to clean individual components. Soak the components in a solution of white vinegar or a lime and calcium remover to dissolve stubborn deposits. Use a small brush to scrub away any remaining debris. Inspect the rubber washers for wear or damage. If the washers are cracked, brittle, or deformed, they should be replaced.
If the cartridge is severely damaged or corroded, it's best to replace it altogether. Take the old cartridge to a hardware store or plumbing supply store to ensure that you purchase the correct replacement. Reassemble the faucet by reversing the disassembly steps. Make sure all components are properly seated and tightened. Turn the water supply back on slowly and check for leaks around the faucet handle and spout.
If, even after cleaning or replacing the cartridge/valve, the faucet still exhibits low flow, the flexible supply lines should be checked for obstructions.
Inspecting and Replacing Flexible Supply Lines
If the aerator and cartridge/valve have been addressed, and the water flow remains insufficient, the flexible supply lines connecting the faucet to the shut-off valves are the next area to investigate. These lines are susceptible to kinking, internal corrosion, and sediment buildup, all of which can restrict water flow.
Begin by visually inspecting the supply lines for any obvious kinks, twists, or damage. Ensure that the lines are not bent at sharp angles, as this can significantly reduce water flow. If a kink is present, carefully straighten the line. If the line is severely damaged or cannot be straightened, it should be replaced.
To check for internal corrosion or buildup, disconnect the supply lines from both the faucet and the shut-off valves. Place a bucket under the lines to catch any remaining water. Examine the inside of the lines for any signs of rust, scale, or sediment. If buildup is present, try flushing the lines with water. Connect one end of the line to a faucet and run water through it to dislodge any loose debris. If the buildup is severe or cannot be removed by flushing, the supply lines should be replaced.
When replacing supply lines, it's important to choose the correct size and type. Measure the length of the old lines to ensure that the new lines are the same length. The fittings on the new lines should also match the fittings on the faucet and shut-off valves. Flexible supply lines are typically available in braided stainless steel or flexible plastic. Braided stainless steel lines are more durable and resistant to kinking, while flexible plastic lines are less expensive. Ensure the new supply lines are certified to national plumbing codes.
When installing the new supply lines, hand-tighten the fittings first, then use a wrench to tighten them an additional quarter turn. Avoid over-tightening, as this could damage the fittings or the supply lines. Turn the water supply back on slowly and check for leaks around the fittings. If leaks are present, tighten the fittings slightly until the leak stops.
By systematically addressing these common causes, it is possible to restore a bathroom faucet to its optimal flow rate. If the problem persists after performing these procedures, it might indicate a more complex plumbing issue requiring the attention of a qualified plumber.

How To Fix Faucet Slow Water Flow Easy Steps Solve From Taps

How To Fix Low Water Pressure In Faucet

How To Fix Low Water Pressure In Faucet

How To Fix Low Water Pressure Taps And Shower Head

What Slow Flow From Your Faucet Means Flader Plumbing

How To Fix Low Water Pressure In Faucet

Fix Low Flow Faucet Plumbing Clip

Low Water Pressure In Bathroom Sink 4 Reasons And 8 Fixes Bargain

Bathroom Getting Less Water Or Flow Seems Low

How To Repair A Delta Faucet With Low Pressure And Flow Replace The Aerator
Related Posts


