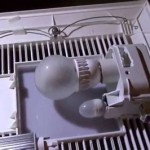
How to Install a Bathroom Ceiling Vent Fan
Installing a bathroom ceiling vent fan is a relatively simple DIY project that can improve ventilation, reduce moisture, and prevent mold growth. This guide provides a comprehensive step-by-step process for installing a new fan, ensuring a successful outcome.
1. Choose the Right Fan
Selecting the right fan is crucial for effective ventilation. Consider the following factors:
- Size: The fan's size should correspond to the bathroom's cubic footage. Choose a fan with a cubic feet per minute (CFM) rating sufficient for your bathroom's size.
- Noise Level: Consider the noise level and choose a fan with a decibel rating suitable for your comfort.
- Features: Some fans come with additional features like humidity sensors, lights, and timers, which can be beneficial depending on your needs.
Once you've chosen a fan, gather the necessary tools and materials.
2. Gather Tools and Materials
Before starting the installation, make sure you have the following tools and materials:
- New bathroom vent fan: Ensure it comes with all the necessary mounting hardware.
- Screwdriver: A Phillips head screwdriver is typically required for assembling the fan and mounting it.
- Wire strippers: You'll need these to expose the wires for electrical connections.
- Wire connectors: Use wire connectors to join the wires for a secure connection.
- Voltage tester: This is essential for verifying the electrical power supply.
- Level: A level ensures the fan is installed straight and level.
- Safety glasses: Wear safety glasses to protect your eyes from debris and flying objects.
- Ladder: A sturdy ladder provides safe access to the ceiling for installation.
- Optional: A stud finder to locate ceiling joists for secure mounting.
3. Installation Process
Follow these steps for a successful installation:
- Turn off the power: Locate the circuit breaker controlling the bathroom's electrical power and switch it off.
- Remove the old fan: If you're replacing an existing fan, remove it carefully by disconnecting the electrical wires and unscrewing the mounting screws.
- Locate the ceiling joists: Use a stud finder to locate the ceiling joists for secure mounting.
- Install the mounting bracket: Attach the mounting bracket to the ceiling joists using screws provided with the fan. Ensure the bracket is level before securing it.
- Connect electrical wires: Connect the electrical wires from the new fan to the existing wiring, ensuring you match the correct wires (typically black to black, white to white, and ground to ground). Use wire connectors to secure the connections.
- Secure the fan: Secure the fan to the mounting bracket using screws provided with the fan.
- Install the vent cover: Attach the vent cover to the fan unit, covering the exposed wiring and mounting hardware.
- Test the fan: Turn the power back on and test the fan. Check for any issues like noise, functionality, or leaks.
This comprehensive guide provides detailed steps for installing a bathroom ceiling vent fan. By following these instructions, you can successfully install a new fan and enjoy the benefits of improved ventilation and a healthier bathroom environment.

How To Install A Bathroom Fan Step By Guide Bob Vila

How To Install A Bathroom Fan Homeserve Usa

How To Install A Bathroom Fan Diy Family Handyman

Install A New Bathroom Vent Fan Light

Remove Install A Bathroom Fan Grille In 1 Min

How To Install A Bathroom Fan Step By Guide Bob Vila

Air Sealing Bathroom And Kitchen Exhaust Fans Building America Solution Center

Installing An Exhaust Fan During A Bathroom Remodel Energy Vanguard

Average Cost To Install A Bathroom Fan Forbes Home

Quick Tip 23 Fixing A Drip At The Bathroom Fan Misterfix It Com
Related Posts


