How to Install a Bathroom Exhaust Fan: A Comprehensive Guide
Installing a bathroom exhaust fan is a valuable home improvement project that significantly contributes to indoor air quality and structural integrity. By removing excess moisture and odors, these fans prevent mold growth, reduce humidity-related damage to walls and ceilings, and create a more comfortable bathroom environment. This article provides a detailed, step-by-step guide on how to properly install a bathroom exhaust fan, covering essential considerations, necessary tools, and safety precautions.
Planning and Preparation
Before commencing the installation process, thorough planning is crucial. This includes selecting the appropriate fan size, determining the optimal location, and gathering the necessary tools and materials. Neglecting these preparatory steps can lead to complications and inefficiencies during the installation itself.
Choosing the Right Size Fan: The effectiveness of a bathroom exhaust fan is directly related to its capacity, which is measured in Cubic Feet per Minute (CFM). The ideal CFM rating depends on the size of the bathroom. A general rule of thumb is to have a fan that provides at least one CFM per square foot of bathroom area. For example, a 50-square-foot bathroom requires a 50 CFM fan. For bathrooms larger than 100 square feet, consider using the following formula: CFM = (Bathroom length x Bathroom width x Ceiling height) x 0.13. This calculation accounts for the higher volume of air in larger spaces. Additionally, if the bathroom contains a separate toilet room or shower stall, adding 50 CFM for each fixture is recommended.
Selecting the Installation Location: The optimal location for a bathroom exhaust fan is typically near the shower or toilet, where moisture and odors are most concentrated. Ideally, the fan should be positioned in the center of the bathroom ceiling to ensure even air circulation. However, structural considerations, such as the location of joists and existing wiring, may necessitate adjustments to the planned location. It is important to ensure that the chosen location allows for adequate ventilation to the outside, either through the roof or an exterior wall.
Gathering Tools and Materials: The following tools and materials are essential for a successful bathroom exhaust fan installation:
*New bathroom exhaust fan kit (including fan, housing, and mounting hardware)
*Screwdrivers (Phillips and flathead)
*Drill with various drill bits
*Stud finder
*Pencil or marker
*Drywall saw or utility knife
*Wire stripper/crimper
*Wire connectors (wire nuts)
*Electrical tape
*Duct tape or foil tape
*Ductwork (rigid or flexible – rigid is preferred for optimal airflow)
*Exterior vent cap (for roof or wall)
*Ladder
*Safety glasses
*Gloves
*Voltage tester
Safety First: Disconnecting Power: Before commencing any electrical work, it is imperative to disconnect the power supply to the bathroom circuit at the breaker box. Use a voltage tester to confirm that the power is off before proceeding. This step is crucial to prevent electrical shock and ensure personal safety.
Installation Process
The installation process involves several key steps, including cutting the ceiling opening, installing the fan housing, connecting the ductwork, and wiring the fan.
Cutting the Ceiling Opening: Using a stud finder, locate the ceiling joists near the planned installation location. Mark the outline of the fan housing on the ceiling, ensuring that it is positioned between the joists. Use a drywall saw or utility knife to carefully cut along the marked outline, creating an opening for the fan housing. Exercise caution to avoid damaging any existing wiring or plumbing within the ceiling cavity.
Installing the Fan Housing: Insert the fan housing into the ceiling opening. Secure the housing to the adjacent joists using screws or mounting brackets provided in the fan kit. Ensure that the housing is level and securely attached to prevent vibration and noise. If necessary, use shims to level the housing before securing it.
Connecting the Ductwork: Attach the ductwork to the fan housing's exhaust port. Use duct tape or foil tape to create an airtight seal, preventing air leakage and maximizing the fan's efficiency. Run the ductwork to the exterior vent cap, ensuring that it is properly supported along its entire length. Avoid sharp bends in the ductwork, as these can restrict airflow and reduce the fan's effectiveness.
Installing the Exterior Vent Cap: The exterior vent cap is crucial for preventing backdrafting and protecting the ductwork from the elements. Depending on the location (roof or wall), install the appropriate vent cap according to the manufacturer's instructions. Ensure that the vent cap is properly sealed to prevent water intrusion and air leakage.
Wiring the Fan: Connect the electrical wiring according to the manufacturer's instructions and local electrical codes. Typically, this involves connecting the black (hot) wire, white (neutral) wire, and green (ground) wire from the fan to the corresponding wires in the junction box. Use wire connectors (wire nuts) to securely join the wires and wrap them with electrical tape for added insulation. Double-check all connections to ensure they are secure and properly insulated.
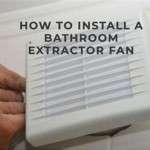
Installing the Fan Motor and Grill: Once the wiring is complete, carefully insert the fan motor into the housing. Secure it in place according to the manufacturer's instructions. Finally, attach the grill to the housing, ensuring that it is properly aligned and securely fastened.
Testing and Finishing
After completing the installation, thoroughly test the fan to ensure it is functioning correctly. This includes verifying that the fan operates smoothly, the airflow is adequate, and there are no unusual noises or vibrations.
Testing the Fan: Restore power to the bathroom circuit at the breaker box. Turn on the fan and listen for any unusual noises or vibrations. Check the airflow at the exterior vent cap to ensure that the fan is effectively exhausting air. If the fan does not operate properly, re-check all wiring connections and ductwork to identify and correct any issues.
Sealing and Finishing: Seal any gaps around the fan housing with caulk to prevent air leakage and maintain an airtight seal. Repair any damage to the ceiling around the installation area with drywall compound and paint to match the existing finish. Clean up any debris and dispose of all waste materials properly.
Troubleshooting Common Issues
Even with careful planning and execution, some common issues may arise during or after the installation process. These issues can often be resolved with simple troubleshooting steps.
Fan Not Working: If the fan does not turn on after restoring power, check the following:
*Verify that the breaker is not tripped.
*Check all wiring connections to ensure they are secure.
*Use a voltage tester to confirm that power is reaching the fan.
*Consult the manufacturer's troubleshooting guide for specific instructions.
Fan is Noisy: Excessive noise can indicate several potential problems:
*Check for loose screws or mounting hardware.
*Inspect the fan blades for obstructions or damage.
*Ensure that the fan housing is securely mounted and level.
*Consider replacing the fan with a quieter model if the noise persists.
Poor Airflow: Insufficient airflow can be caused by:
*Restricted ductwork (sharp bends or obstructions).
*Air leakage in the ductwork or around the fan housing.
*Inadequate CFM rating for the bathroom size.
*Dirty or clogged fan blades.
By addressing these common issues promptly, you can ensure that your bathroom exhaust fan operates efficiently and effectively, providing long-lasting benefits for your home.

Install A New Bathroom Vent Fan Light

Bathroom Exhaust Fan Installation Repair Replacement Services Captain Electric

Quick Tip 23 Fixing A Drip At The Bathroom Fan Misterfix It Com

Bathroom Exhaust Fans Building America Solution Center

How To Install A Bathroom Fan Step By Guide Bob Vila

How To Replace A Bathroom Exhaust Fan Without Attic Access 12 Step Guide Home Inspector Secrets

How To Install A Bathroom Fan Roof Vent Comprehensive Guide Kyinbridges Com

How To Install A Bath Exhaust Fan Diy

Bathroom Exhaust Fan With Humidity Sensor On One Switch Home Improvement Stack Exchange

Exhaust Fan Wiring Single Switch Bathroom Light
Related Posts