How To Install A Bathroom Exhaust Vent In The Roof
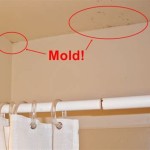
A well-functioning bathroom exhaust fan is crucial for maintaining a healthy and comfortable bathroom environment. It removes excess moisture, preventing mold and mildew growth, and eliminates unpleasant odors. Installing a bathroom exhaust vent in the roof is often the most efficient way to vent your bathroom effectively. This article will guide you through the process, providing essential steps and safety precautions.
1. Planning and Preparation
Before embarking on the installation, carefully plan and prepare the work area.
1.1 Determine the Vent Location:
Select a suitable location for the roof vent. Ensure it is a minimum of 10 feet away from any windows or other vents to prevent cross-ventilation. The roof vent should be placed on a section of the roof with a pitch of at least 4:12, allowing for proper water runoff.
1.2 Gather Materials:
Acquire all necessary materials, including:- Roof vent: Choose a vent that meets local building codes and is compatible with your roofing material.
- Flashing: Select flashing that is compatible with your roof type and vent.
- Vent pipe: PVC or ABS vent pipe with the necessary fittings (elbows, adapters) to connect to the fan and roof vent.
- Roofing nails or screws: Use the appropriate type for your roof material.
- Caulk: Use a sealant compatible with your roof material.
- Safety gear: Ladder, safety harness, gloves, eye protection, and a respirator.
1.3 Obtain Permits:
Check with your local building department for any necessary permits and inspections.
1.4 Clear the Work Area:
Ensure the area around the roof vent location is clear of any obstacles.2. Installing the Roof Vent
After gathering the necessary materials and preparing the work area, you can begin installing the roof vent.
2.1 Cut the Roof Opening:
Using a circular saw or a specialized roof cutting tool, cut a precisely sized hole in the roof. The hole should be slightly larger than the vent base to accommodate flashing and sealant.
2.2 Install Flashing:
Carefully position the flashing around the vent opening, ensuring a tight and waterproof seal. Secure the flashing to the roof using roofing nails or screws. Align the flashing with the roof pitch, ensuring it slopes towards the vent opening to prevent water from reaching the vent.
2.3 Install the Roof Vent:
Attach the vent to the flashing, using the included fasteners or screws. Ensure the vent is centered over the opening and is flush with the roof surface. Apply sealant around the vent base to prevent water from entering the roof.3. Connecting the Vent Pipe
The vent pipe connects the bathroom exhaust fan to the roof vent, allowing moist air to be exhausted from the bathroom.
3.1 Cut the Vent Pipe:
Measure the distance between the exhaust fan and the roof vent. Cut the vent pipe to the appropriate length, ensuring it is long enough to reach the vent but not excessively long, as this can create unnecessary resistance.
3.2 Connect the Vent Pipe to the Fan:
Attach the vent pipe to the exhaust fan using the appropriate fittings and sealant. Ensure that the pipe is securely connected to the fan and that the seal is airtight.
3.3 Connect the Vent Pipe to the Roof Vent:
Connect the vent pipe to the roof vent using the appropriate fittings and sealant. Ensure the connection is secure and airtight to prevent leaks.
3.4 Secure the Vent Pipe:
Secure the vent pipe to the roof rafters or joists using straps or clips, preventing sagging and potential leaks.
3.5 Install a Backdraft Damper:
A backdraft damper is essential to prevent cold air from entering the bathroom. Install the damper between the exhaust fan and the vent pipe.4. Testing the Ventilation
Once the installation is complete, test the ventilation system to ensure it works correctly.
4.1 Run the Exhaust Fan:
Turn on the exhaust fan and check for proper operation. Ensure the fan runs without noise and that the air is being effectively exhausted through the vent.
4.2 Check for Leaks:
Inspect the vent pipe connections, flashing, and the roof vent for any signs of leaks. If any leaks are found, reseal them immediately.
4.3 Inspect the Roof:
Check the roof for any damage or signs of moisture buildup around the vent area. Repair and reseal any issues promptly.Installing a bathroom exhaust vent in the roof requires careful planning, proper materials, and careful installation techniques. Following these steps will help ensure a safe and effective ventilation system for your bathroom. Always consult with a professional for assistance with complicated or challenging installations or if you have any doubts about your abilities.

Installing A Bathroom Fan Fine Homebuilding

How To Install Roof Vents Bathroom Fan Attic Ventilation Etc Jonny Diy

How To Install A Bathroom Exhaust Fan Lowe S

I Am Stuck On A Bathroom Exhaust Vent Installation Doityourself Com Community Forums

Roof Flashing For Bathroom Fans

How To Install A Bathroom Fan Diy Family Handyman

Where Do Bathroom Vents Go Lopco Contracting Ri

Cincinnati Nky Louisville Roof Ventilation Deer Park Roofing Llc

Blog

Venting A Bathroom Through Sips Fine Homebuilding
Related Posts


