How to Install Bathroom Glass Shelf: A Comprehensive Guide
Bathroom organization is frequently a challenge, especially in smaller spaces. Installing a glass shelf offers a sleek and practical solution, providing additional storage without sacrificing aesthetics. This article provides a detailed, step-by-step guide on how to install a bathroom glass shelf safely and effectively, ensuring a durable and visually appealing addition to any bathroom.
Before embarking on the installation, it is crucial to gather all necessary tools and materials. This preparation will streamline the process and minimize potential disruptions. The required tools typically include a level, measuring tape, pencil, drill with appropriate drill bits (suitable for the wall type), screwdriver (matching the screw heads supplied with the shelf), safety glasses, and possibly a stud finder. The materials consist of the selected glass shelf kit (containing the glass shelf, mounting brackets, screws, and wall anchors if necessary), and potentially painter's tape for marking purposes.
The selection of the glass shelf itself is a critical first step. Consider the overall bathroom design, the intended use of the shelf, and the available space. Glass shelves are available in various sizes, thicknesses, and styles. Tempered glass is highly recommended for its durability and safety characteristics; in the event of breakage, it shatters into small, relatively harmless pieces. The weight capacity of the shelf should also be considered in relation to the items it will support. Overloading a shelf can lead to damage or even failure, posing a safety hazard. Carefully review the manufacturer's specifications for weight limits before making a purchase.
Equally important is the selection of appropriate mounting hardware. The type of wall on which the shelf will be installed (e.g., drywall, tile, plaster) dictates the type of wall anchors needed. Using the wrong type of anchor can result in an unstable installation. For drywall, specialized drywall anchors or toggle bolts are generally recommended. For tile, carbide-tipped drill bits and appropriate tile anchors are necessary to prevent cracking or chipping the tile. Consult with a hardware professional if unsure about the correct type of anchor for a specific wall type.
Key Point 1: Planning and Measurement
Accurate planning and precise measurement are essential for a successful installation. Begin by determining the desired location of the glass shelf. Consider factors such as accessibility, proximity to other fixtures (e.g., sink, toilet), and aesthetic appeal. Use a measuring tape and pencil to mark the intended location of the shelf on the wall. It's crucial to ensure the marks are level; using a level will guarantee a straight and even shelf installation.
Once the shelf location is marked, use the mounting brackets as templates to mark the screw hole locations. Hold the bracket against the wall at the marked location and use a pencil to trace the outlines of the screw holes. Double-check the alignment of the marks to ensure they are level and properly spaced. Painter's tape can be applied to the wall to create a more visible and erasable surface for marking.
Before drilling any holes, it's imperative to check for hidden wires or pipes behind the wall. Using a stud finder can help locate wall studs, which can provide a more secure mounting point for the shelf. If drilling into a stud is not possible, appropriate wall anchors must be used to support the weight of the shelf and its contents. It is also advisable to consult building plans, if available, to ascertain the location of plumbing or electrical conduits.
Consider the spacing between multiple shelves if installing more than one. Consistent spacing creates a visually appealing and organized look. Measure and mark the locations of all shelves before beginning the drilling process. Taking the time to carefully plan and measure will prevent costly mistakes and ensure a professional-looking result.
Key Point 2: Drilling and Anchoring
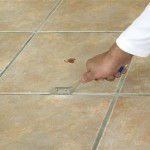
Drilling pilot holes is a crucial step in preparing the wall for the mounting hardware. Select a drill bit that is slightly smaller than the diameter of the screws or wall anchors being used. For tile, use a carbide-tipped drill bit specifically designed for drilling through ceramic or porcelain. Apply gentle pressure and drill slowly to prevent cracking or chipping the tile. A small amount of water can be applied to the drill bit to help keep it cool and lubricated.
After drilling the pilot holes, insert the wall anchors into the holes. The type of wall anchor used will vary depending on the wall material. For drywall, use drywall anchors or toggle bolts. Follow the manufacturer's instructions for installing the specific type of anchor being used. Ensure the anchors are securely seated in the wall before proceeding.
If drilling into a wall stud, pre-drilling a pilot hole is still recommended. This will make it easier to drive the screws straight and prevent the wood from splitting. Use a drill bit that is slightly smaller than the diameter of the screws. Drive the screws directly into the stud, ensuring they are securely fastened.
For heavier shelves or installations that require extra support, consider using larger wall anchors or multiple anchors per bracket. Distributing the weight across multiple anchors will increase the overall stability of the shelf. Always test the anchors by gently pulling on them to ensure they are securely holding in the wall before mounting the brackets.
Key Point 3: Mounting the Brackets and Installing the Shelf
With the pilot holes drilled and the wall anchors installed (if necessary), the next step is to mount the brackets to the wall. Align the brackets with the pre-drilled holes and insert the screws through the brackets and into the wall anchors or studs. Use a screwdriver to tighten the screws, ensuring the brackets are securely fastened to the wall. Avoid over-tightening the screws, as this can damage the brackets or the wall anchors.
Once the brackets are securely mounted, carefully place the glass shelf onto the brackets. Most glass shelves are designed to rest on the brackets, with rubber or plastic bumpers providing cushioning and preventing the shelf from sliding. Some shelves may have small set screws or clips that secure the shelf to the brackets. If present, tighten these set screws or clips according to the manufacturer's instructions.
After the shelf is in place, double-check its stability. Gently press down on the shelf to ensure it is firmly supported by the brackets. If the shelf wobbles or feels unstable, re-tighten the screws on the brackets or consider adding additional support. A small level can be used to ensure the shelf is perfectly level. If necessary, use shims to adjust the level of the shelf.
Finally, clean the glass shelf with a glass cleaner to remove any fingerprints or smudges. Inspect the installation for any imperfections or potential issues. Address any concerns promptly to ensure the shelf is safe and secure. This includes checking the tightness of all screws and the stability of the wall anchors. Once the installation is complete, the glass shelf is ready for use.
Consider the weight distribution of the items placed on the glass shelf. Avoid placing heavy objects near the edges of the shelf, as this can create excessive stress and potentially lead to breakage. Distribute the weight evenly across the surface of the shelf to maximize its load-bearing capacity. Regularly inspect the shelf for any signs of damage, such as cracks or chips. Replace the shelf if any damage is detected.
Regular maintenance will help prolong the life of the glass shelf and keep it looking its best. Clean the shelf regularly with a glass cleaner and a soft cloth. Avoid using abrasive cleaners or scouring pads, as these can scratch the surface of the glass. Inspect the mounting hardware periodically to ensure the screws are still tight and the wall anchors are secure. Replace any worn or damaged hardware as needed.
By following these detailed instructions, anyone can successfully install a bathroom glass shelf, adding both functionality and aesthetic appeal to their bathroom space. Remember to prioritize safety, take accurate measurements, and use appropriate hardware for the specific wall type. The result will be a durable and attractive storage solution that enhances the overall organization and style of the bathroom.

Glass Shelves For Bathroom Storage Diy Family Handyman

Glass Shelves For Bathroom Storage Diy Family Handyman

How To Hang Glass Shelves Four Generations One Roof In Bathroom Renovation Diy

Glass Shelving For A Shower How To Install Plan Learn Build

Glass Shelves As The Ultimate Storage Solution Everything You Need To Know Abc Mirror

Against The Grain Diy Bathroom Shelf

How To Install Glass Shelves Doctor

6 Ways To Install A Shower Corner Shelf Wikihow

Glass Shelves As The Ultimate Storage Solution Everything You Need To Know Abc Mirror

How To Install An Adjustable Shelf Bracket Flooring Supply Blog
Related Posts