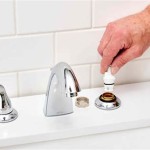
How to Install a Drop-In Sink in a Bathroom
Installing a drop-in sink in a bathroom can be a rewarding DIY project that transforms the look of your space. Drop-in sinks offer a classic and versatile style, fitting seamlessly into various bathroom designs. This guide provides a comprehensive breakdown of the installation process, outlining essential steps and considerations for a successful outcome.
Step 1: Gather Your Tools and Materials
Before embarking on the installation, ensuring you have all the necessary tools and materials is crucial. This will streamline the process and minimize disruptions. Here's a checklist to get you started:
- Drop-in sink
- Sink drain assembly
- Faucet
- Faucet supply lines
- Silicone sealant
- Caulk gun
- Level
- Measuring tape
- Utility knife
- Screwdrivers
- Wrench
- Plumber's tape
- Safety glasses
- Work gloves
Having these tools readily available will ensure a smooth and efficient installation process.
Step 2: Prepare the Countertop
The countertop serves as the base for the drop-in sink, so proper preparation is essential. This step involves:
- Measure and mark the sink cutout: Using the sink as a template, carefully mark the countertop with a pencil where the sink will be placed. Remember to account for the sink's overhang.
- Cut the opening: Use a jigsaw or a circular saw with a hole-saw attachment to cut out the marked area. Ensure a smooth and precise cut, as this will affect the sink's fit and the overall aesthetic.
- Smooth the edges: After cutting, carefully smooth any rough edges using sandpaper to prevent scratching or damaging the sink.
Taking care during this step will ensure a seamless fit for the sink and prevent any potential issues during installation.
Step 3: Install the Faucet
Before installing the drop-in sink, it's advisable to mount the faucet onto the countertop. This allows for easier access during the sink installation process. Follow these steps:
- Mark the faucet location: Use the faucet's template or instructions to determine the ideal location for the faucet on the countertop. Ensure it's within reach and centered appropriately.
- Drill holes for the faucet: Drill holes in the countertop, following the marked location, to accommodate the faucet base. Use drill bits specifically designed for countertop materials.
- Secure the faucet: Install the faucet base into the drilled holes and tighten it securely using a wrench. Refer to the manufacturer's instructions for specific details.
- Connect the supply lines: Attach the faucet supply lines to the faucet and the water shutoff valves. Wrap plumber's tape around the threaded connections to prevent leaks.
By installing the faucet first, you ensure a smooth and convenient transition to the sink installation.
Step 4: Secure the Sink
Once the faucet is in place and the countertop is prepared, you can begin securing the sink. This process involves:
- Apply sealant: Apply a generous bead of silicone sealant around the perimeter of the sink's underside, ensuring a watertight seal. This will prevent leaks and ensure durability.
- Position the sink: Carefully lower the sink into the cutout in the countertop, ensuring it's level and centered. Press down gently to ensure a secure fit.
- Secure with clips or brackets: Some drop-in sinks come with clips or brackets that provide added support. Install these as per the manufacturer's instructions.
- Clean excess sealant: Remove any excess sealant with a damp cloth to maintain a clean and professional finish.
These steps ensure a strong and secure installation for your drop-in sink.
Step 5: Install the Drain Assembly
The final step involves installing the drain assembly. This process is as follows:
- Connect the drain parts: Assemble the sink drain components, including the drain pipe, tailpiece, and strainer, following the manufacturer's instructions.
- Install the drain: Position the drain assembly through the sink's drain hole and secure it with the appropriate hardware, such as a locknut.
- Attach the drainpipe: Connect the drainpipe to the drain assembly and secure it firmly.
- Test for leaks: Turn on the water supply and carefully check for any leaks around the drain assembly and the sink's perimeter. Address any leaks immediately.
By carefully following these steps, you can ensure a watertight and efficient drain system.
Installing a drop-in sink requires careful planning and execution, but the results are worth the effort. A properly installed sink enhances the functionality and aesthetic appeal of your bathroom.

Ge Sealants How To Install A Drop Sink

How To Install A Bathroom Sink Step By Guide

How To Install A Drop In Bathroom Sink

How To Replace A Drop In Bathroom Sink Step By

How To Replace A Drop In Bathroom Sink Step By

How To Install A Drop In Bathroom Sink

Drop The Bathroom Sink Into Vanity Countertop Rona

How To Replace And Install A Bathroom Sink

How To Install A Bathroom Vanity

Drop In Bathroom Sink Pros Cons How To Install
Related Posts


