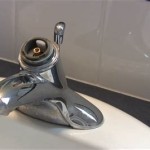
How to Paint Chrome Bathroom Fixtures Black
Painting chrome bathroom fixtures black offers a simple and cost-effective way to update the look of your bathroom. It can instantly transform the space, creating a more modern and sophisticated aesthetic. Black fixtures blend seamlessly with various design styles, from minimalist to industrial. This guide will outline the steps involved in successfully painting your chrome fixtures, ensuring a durable and professional-looking finish.
1. Preparation is Key
Before beginning the painting process, proper preparation is crucial for a successful outcome. This involves thoroughly cleaning the fixtures and ensuring they are free from any residue that could interfere with the paint adhesion. The steps are as follows:
1.
Gather Supplies:
You will need painter's tape, a drop cloth, a cleaning solution (dish soap and water or a degreaser), a soft cloth, sandpaper (fine grit), a primer specifically designed for metal surfaces, and black spray paint formulated for metal. 2.Prepare the Area:
Cover the surrounding area with a drop cloth to protect it from paint splatters. 3.Clean the Fixtures:
Use a cleaning solution to remove any dirt, grime, soap scum, or other residue from the fixtures. Be sure to rinse the fixtures thoroughly with water and allow them to dry completely. 4.Sand the Surface:
Use fine-grit sandpaper to lightly roughen the surface of the chrome fixtures. This will help the primer and paint adhere better. Wipe away any sanding dust with a clean cloth. 5.Mask Off Areas:
Use painter’s tape to mask off areas that you do not want to paint, such as the handles of faucets or the showerhead. Be sure to press the tape firmly to prevent paint from bleeding underneath. 6.Prime the Fixtures:
Apply a thin, even coat of metal primer to the entire surface of the fixtures. Allow the primer to dry completely according to the manufacturer's instructions.2. Applying the Black Paint
With the fixtures prepped and primed, you are ready to apply the black paint. This step requires patience and attention to detail to ensure an even and smooth finish. Follow these steps for the best results:
1.
Choose a Well-Ventilated Area:
Ensure adequate ventilation while spraying paint. 2.Shake the Paint Can:
Shake the paint can vigorously for the time recommended by the manufacturer to ensure the paint is well mixed. 3.Apply Thin Layers:
Hold the spray can about 10-12 inches away from the fixture and apply thin, even coats of paint. Avoid spraying too much paint at once, as this can cause drips or runs. 4.Allow Each Layer to Dry:
Allow each layer of paint to dry completely before applying the next. It is recommended to apply two to three layers of paint for a good, opaque finish. 5.Remove Tape Carefully:
Once the paint is completely dry, carefully remove the painter's tape. 6.Let the Paint Cure:
Allow the painted fixtures to cure for at least 24 hours before using them. This allows the paint to harden and become more durable.3. Maintaining Your Painted Fixtures
To keep your painted fixtures looking their best, follow these simple maintenance tips:
1.
Avoid Harsh Cleaners:
Use gentle cleaning solutions to avoid damaging the paint. Avoid abrasive cleaners and scrubbing pads. 2.Wipe Away Water Spots:
Wipe away any water spots or fingerprints immediately to prevent them from etching into the paint. 3.Apply a Protective Coating:
Consider applying a clear sealant or protective coating to your painted fixtures to add extra durability and protect the paint from scratches and wear and tear.
How To Spray Paint The Bathroom Faucet Accessories My Homier Home

Painted Bathroom Faucets Shower Enclosure Addicted 2 Decorating

How To Spray Paint Shower Fixtures Easy Diy Method Bless Er House

The Best Way To Spray Paint A Faucet Average But Inspired

The Best Way To Spray Paint A Faucet Average But Inspired

How To Spray Paint Chrome Black

Refinshing A Faucet With Spray Paint

Diy Faucet Transformation For Under 15 How To Paint A Bathtub Filler

Spray Painted Faucet Durability Update 8 Months

Bathroom Light Makeover With Paint Girl Just Diy
Related Posts