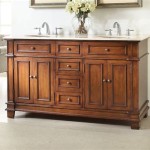
How to Paint Oak Bathroom Cabinets White with Complementary Walls
Oak bathroom cabinets, while durable, can often appear dated with their prominent grain and warm, yellow undertones. Painting them white offers a simple yet effective way to revitalize the space, creating a brighter and more modern aesthetic. This article details the process of achieving a professional-looking paint job on oak bathroom cabinets, coupled with considerations for selecting wall colors to create a cohesive and visually appealing bathroom.
The transformation of oak cabinets requires meticulous preparation, careful execution, and the selection of appropriate materials. Rushing the process or skimping on quality can result in a subpar finish that detracts from the overall look of the bathroom. This guide outlines each step, ensuring a durable and beautiful result.
Preparation: The Foundation for a Flawless Finish
Proper preparation is paramount to the success of any painting project. Inadequately prepared surfaces will lead to poor adhesion, uneven coverage, and a finish that is susceptible to chipping and peeling. This stage involves cleaning, sanding, and priming, each playing a crucial role in the final outcome.
The first step is to remove all cabinet doors and drawers. Label each piece with tape and a marker to ensure they are reinstalled in their original locations. Remove all hardware, including knobs, pulls, hinges, and latches. Store the hardware in a secure location to prevent loss or damage. Clean the cabinets and drawers thoroughly with a degreasing cleaner. Grease, grime, and soap residue can interfere with paint adhesion. Rinse with clean water and allow the surfaces to dry completely.
Once dry, begin sanding the oak surfaces. Oak's prominent grain requires specific attention. Use a medium-grit sandpaper (120-150 grit) to lightly scuff the existing finish. This creates a "tooth" for the primer to grip onto. Focus on sanding down any existing glossy or uneven areas. Following the medium-grit sanding, switch to a finer-grit sandpaper (220 grit) to smooth the surface and remove any sanding marks. This will result in a smoother, more uniform finish. Remember to vacuum up all the sanding dust, followed by wiping down the surfaces with a tack cloth. The tack cloth will pick up any remaining dust particles, leaving a clean surface ready for priming.
Priming is an essential step, especially when painting oak. Oak's porous nature can absorb paint unevenly, leading to a blotchy finish. A high-quality primer seals the wood grain, prevents tannin bleed-through (which can cause discoloration), and provides a uniform base for the paint to adhere to. Opt for an oil-based or a stain-blocking primer specifically designed for wood. Apply the primer in thin, even coats, following the manufacturer's instructions. Allow the primer to dry completely, as specified on the product label. Once dry, lightly sand the primed surface with fine-grit sandpaper (220 grit or higher) to remove any imperfections and create an even smoother surface. Clean the surface again with a tack cloth before proceeding to painting.
Painting: Applying the Color
After the preparation phase, the actual painting process begins. This requires careful application techniques and the selection of the right type of paint to achieve a durable and aesthetically pleasing finish.
Select a high-quality paint specifically formulated for cabinets and woodwork. Acrylic latex paints are a popular choice for their durability, ease of cleaning, and low VOC (volatile organic compound) content. Consider paints labeled as "cabinet paint" or "furniture paint" as they are designed to withstand the wear and tear of everyday use. Semi-gloss or satin finishes are typically recommended for bathroom cabinets. These sheens offer a balance between durability and ease of cleaning, and they also provide a subtle sheen that enhances the overall look. Avoid using flat or matte finishes, as they are more susceptible to staining and are harder to clean.
Apply the paint in thin, even coats using a high-quality brush, roller, or sprayer. A brush is best for working into intricate details and corners, while a roller is ideal for covering larger flat surfaces. A paint sprayer provides the most uniform finish, but it requires more skill and experience to operate effectively. If using a brush or roller, choose one with a fine nap or bristles to minimize brushstrokes or roller marks. Apply the first coat of paint in the direction of the wood grain. Allow the paint to dry completely according to the manufacturer's instructions. After the first coat is dry, lightly sand the surface with fine-grit sandpaper (320 grit or higher) to remove any imperfections and create a smooth surface for the second coat. Clean the surface with a tack cloth to remove any sanding dust.
Apply the second coat of paint using the same technique as the first coat. Ensure complete and even coverage, paying attention to any areas that may have been missed. Allow the second coat to dry completely. Inspect the painted surfaces for any imperfections, such as drips, runs, or brushstrokes. If necessary, lightly sand the affected areas and apply a third coat of paint for a flawless finish. Once the paint is completely dry, apply a clear topcoat for added protection and durability. A polyurethane topcoat is a good option, as it provides a tough, scratch-resistant surface. Apply the topcoat in thin, even coats, following the manufacturer's instructions. Allow the topcoat to dry completely before reassembling the cabinets.
Reinstall the hardware and cabinet doors/drawers. Take care to align the hardware properly and tighten all screws securely. Clean the finished cabinets with a mild soap and water solution. Avoid using harsh chemicals or abrasive cleaners, as these can damage the paint finish. With proper care and maintenance, the newly painted oak bathroom cabinets will provide years of beauty and functionality.
Complementary Wall Colors for White Cabinets
Painting the oak cabinets white creates a neutral canvas that allows for a wide range of wall color options. The choice of wall color can dramatically impact the overall feel of the bathroom, influencing its brightness, warmth, and style. Consider the size of the bathroom, the amount of natural light it receives, and personal preferences when selecting a wall color.
For a bright and airy bathroom, consider using light and neutral wall colors. Pale blues, soft greens, and light grays can create a calming and refreshing atmosphere. These colors complement the white cabinets without overwhelming the space. Alternatively, off-white shades, such as cream or ivory, can create a warm and inviting feel. These colors offer a subtle contrast to the white cabinets, adding depth and dimension to the room.
To add a touch of drama and sophistication, consider using bolder wall colors. Deep blues, rich greens, or charcoal grays can create a luxurious and spa-like atmosphere. These colors work well in larger bathrooms with ample natural light. However, be mindful of using dark colors in smaller bathrooms, as they can make the space feel smaller and more cramped. If opting for a darker color, consider painting an accent wall to add visual interest without overwhelming the entire room. Consider the undertones of the white paint when selecting a darker wall color. A cool white paint will pair well with cool-toned blues and grays, while a warm white paint will complement warmer greens and browns.
Accessorizing the bathroom with complementary colors can further enhance the overall aesthetic. Choose towels, bath mats, and shower curtains that coordinate with the wall color and white cabinets. Metallic accents, such as brushed nickel or gold hardware, can add a touch of elegance and sophistication. Plants can also add a pop of color and bring a sense of nature into the bathroom. When selecting accessories, consider the overall style of the bathroom. For a modern bathroom, opt for sleek and minimalist accessories. For a more traditional bathroom, choose classic and ornate accessories.
Ultimately, the choice of wall color is a matter of personal preference. Experiment with different color combinations and consider the overall desired aesthetic to create a bathroom that is both beautiful and functional. Sample paint colors on the wall before committing to a full paint job to ensure that the color looks good in the bathroom's lighting conditions. Take into account the existing fixtures and décor when making the final decision. With careful planning and execution, painting oak bathroom cabinets white and selecting complementary wall colors can transform a dated bathroom into a modern and inviting space.

Painting Bathroom Cabinets A Beginner S Guide Chrissy Marie Blog

How To Paint Bathroom Cabinets Without Sanding 8 Vital Steps Grace In My Space

7 Easy Steps To Paint Bathroom Cabinets Without Sanding Cottage Living And Style

16 Modern Bathroom Cabinet Vanity Makeover Ideas The Diy Nuts

Painting Bathroom Cabinets Sometimes Homemade

How To Paint Bathroom Cabinets Without Sanding 8 Vital Steps Grace In My Space

House Home See How Warm Wood Wows In These 75 Kitchens Bathrooms

Painting Bathroom Cabinets A Beginner S Guide Chrissy Marie Blog

How To Paint A Bathroom Vanity Secrets For Perfect Finish

Updating A Bathroom Vanity
Related Posts