How To Put A Bathroom Vent Cover On
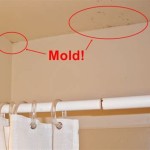
A bathroom vent cover is a crucial part of any bathroom, as it helps to remove moisture and prevent mold and mildew growth. Replacing an old or damaged vent cover is a simple DIY project that can significantly improve the appearance and functionality of your bathroom. This article will guide you through the process of removing an old vent cover and installing a new one.
Gather Your Supplies
Before starting the process, gather the necessary tools and materials. You will need:
- A new bathroom vent cover
- A screwdriver (Phillips head)
- A pair of pliers (optional)
- A level
- A pencil
- A ladder (if necessary)
It is essential to ensure that the new vent cover is compatible with your existing vent. Measure the dimensions of the existing vent opening before purchasing a new cover.
Removing the Old Vent Cover
The first step is to remove the old vent cover. This process may vary depending on the type of cover you have. Typically, vent covers are secured with screws or clips.
- Locate the screws or clips holding the vent cover in place. These are usually located on either side or the bottom of the cover.
- Use a screwdriver to remove the screws or use pliers to gently pry off the clips. Be careful not to damage the surrounding area.
- Once the vent cover is loose, carefully pull it away from the wall.
- Clean the vent opening with a damp cloth to remove any dust or debris before installing the new cover.
Installing the New Vent Cover
After removing the old vent cover, you can proceed with installing the new one. The installation process is generally straightforward and similar to removing the old cover.
- Align the new vent cover with the vent opening, making sure it is level and centered. Use a level to confirm the alignment.
- If your new vent cover has screws, insert the screws through the holes in the cover and into the wall. Tighten the screws securely but avoid overtightening, which could damage the cover or the wall.
- If the vent cover has clips, simply snap the clips into place along the edges of the cover.
- Once the new vent cover is installed, test it by turning on the fan to ensure it is working correctly.
Remember to consult the manufacturer’s instructions for your specific vent cover, as installation procedures may vary depending on the model.
Maintenance and Care
To ensure that your bathroom vent cover continues to function efficiently and looks its best, regular cleaning and maintenance are recommended. Dust and dirt can accumulate on the cover, affecting its performance and appearance. Clean your vent cover regularly with a damp cloth and mild detergent.
It is also important to regularly check the vent fan for any signs of damage or malfunction. If the fan is not working properly, it could lead to moisture build-up in the bathroom, creating a breeding ground for mold and mildew. If you suspect a problem with the fan, consult a qualified electrician for inspection and repair.

Remove Install A Bathroom Fan Grille In 1 Min

How To Install A Bathroom Fan Homeserve Usa

How To Install A Bathroom Exhaust Fan

How To Install A Bathroom Fan Step By Guide Bob Vila

Installing A Bathroom Fan Fine Homebuilding

How To Replace Bathroom Exhaust Fan Cover

How To Clean A Bathroom Fan Diy Family Handyman

Installation

How To Clean A Bathroom Fan Diy Family Handyman

Broan Nutone Fgr101s Economy Replacement Square Ceiling Bathroom Ventilation And Exhaust Fans Easy Diy Installation White Grille Cover Com
Related Posts


