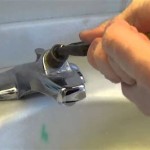
How to Remove a Bathroom Drop-In Sink Drain
Removing a bathroom drop-in sink drain is a relatively straightforward task that can be accomplished with basic tools and a little patience. This process often becomes necessary when replacing the sink itself, the faucet, or the drain assembly. It is also essential maintenance when addressing leaks, clogs, or general wear and tear in the drain system. This article will guide you through the steps involved in removing a bathroom drop-in sink drain safely and effectively.
1. Gather Necessary Tools and Materials
Before beginning, gather the following tools and materials to ensure a smooth and efficient process:
- Adjustable wrench
- Channel-lock pliers
- Flathead screwdriver
- Phillips head screwdriver
- Bucket or container to catch water
- Shop towels or rags
- Optional: Safety glasses and gloves
Having these tools readily available will greatly speed up the removal process and prevent unnecessary delays.
2. Prepare the Sink Area
Before disassembling the drain, it's crucial to prepare the sink area for the removal process. This step helps prevent potential damage and ensures the removal goes smoothly:
- Turn off the water supply: Locate the shut-off valve for the sink and turn it off completely. This will prevent water from flowing through the drain during removal.
- Empty the sink: Remove any remaining water in the sink to prevent spills or messes during the removal process.
- Protect the surrounding area: Place a bucket or container underneath the sink to catch any dripping water. This will help protect the floor or surrounding area from potential damage.
Preparing the sink area in this manner ensures safety and minimizes the chance of any unintended consequences.
3. Remove the Drain Assembly
Once the sink is ready, you can begin removing the drain assembly. This process typically involves the following steps:
- Loosen the drain nut: Locate the drain nut underneath the sink. Depending on the type of drain, it may be held in place by a lock nut or a threaded collar. Use an adjustable wrench to loosen the drain nut by turning it counterclockwise.
- Remove the drain stopper: The drain stopper is typically held in place by a small screw or nut. Use a flathead screwdriver or pliers to remove the screw or nut, then lift out the drain stopper.
- Disconnect the tailpiece: Once the drain nut is loosened, carefully remove the tailpiece from the drain body. The tailpiece connects the drain body to the drainpipe.
- Remove the drain body: The drain body is the main part of the drain assembly. Depending on the model, it may simply lift out, or it may require some additional loosening of the drain nut.
When removing the drain assembly, it's important to work slowly and carefully to avoid damaging any parts. If you encounter resistance, it's best to stop and try to identify the issue before forcing the components.
4. Clean and Inspect
After removing the drain assembly, it's a good time to inspect it for any signs of wear, tear, or damage. This is especially helpful if replacing the drain due to leaks or clogs. Additionally, clean the drain assembly using a mild cleaner to remove any debris or buildup. This will help ensure that the replacement drain, if necessary, will function smoothly and efficiently.
5. Reinstall the Drain Assembly (If Applicable)
If you are not replacing the drain, you can reinstall the old assembly following the steps in reverse. Ensure that all parts are properly seated and tightened securely to prevent leaks.
If you are installing a new drain assembly, ensure that the new drain is compatible with your sink and plumbing system. Consult the manufacturer's instructions for installation details.
When installing a new drain, ensure all parts are aligned correctly before tightening the drain nut. Use the appropriate tools and ensure that all parts are tightened securely to prevent leaks.
After reinstalling the drain assembly, turn the water supply back on and check for any leaks. If there are any leaks, you may need to retighten the drain nut or address other issues.
Always remember to prioritize safety when working with plumbing. If you are unsure about any aspect of the process, it's always best to consult with a qualified plumber.

How To Replace A Drop In Bathroom Sink Step By

Drop In Bathroom Sink Replacement

How To Replace A Drop In Bathroom Sink Step By

Drop In Bathroom Sink Replacement

How To Remove And Replace A Bathroom Sink Diy

What Happens If You Drop Something Down The Sink Bfp

How To Get Something Dropped Down Sink Bobby L Greene

How To Drop In A New Pop Up Sink Drain Smart Tips

How To Remove A Drain From Bathroom Sink Inside Out Property Inspectors

How To Replace And Install A Bathroom Sink
Related Posts


