How to Remove a Bathroom Vessel Sink
Vessel sinks, with their sleek and modern designs, have become a popular choice for bathroom renovations. However, situations might arise where you need to remove a vessel sink, whether for repairs, replacement, or simply to change the look of your bathroom. Removing a vessel sink can seem daunting, but with the right tools and approach, it's a manageable DIY project.
1. Gather the Necessary Tools and Materials
Before you start, ensure you have the following tools and materials at hand:
- Adjustable wrench
- Channel-lock pliers
- Screwdriver (Phillips and flathead)
- Utility knife
- Caulk remover tool
- Bucket
- Sponge
- Protective gloves
- Safety glasses
Depending on the installation method, you might also need:
- Pliers
- Hammer
- Chisel
- Silicone sealant
2. Shut Off the Water Supply
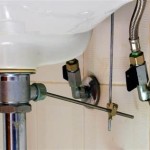
The first step is to shut off the water supply to the sink. Locate the shut-off valve for your bathroom sink, usually found beneath the sink or on the wall. Turn the valve clockwise to completely close the water flow. To ensure no water remains in the pipes, open the faucet to drain any residual water.
3. Disconnect the Drain
Next, disconnect the drain pipe from the vessel sink. The drain assembly typically consists of a pop-up drain stopper, a tailpiece, and a drainpipe. Depending on the installation method, you might need to unscrew the drain stopper and remove the tailpiece. If the drainpipe is connected to a P-trap, loosen the nuts connecting them.
To safely remove the tailpiece, loosen the nut on the underside of the sink. If the tailpiece is attached with a compression nut, you can use channel-lock pliers to loosen and turn it counterclockwise. Be careful not to damage the sink or surrounding surfaces.
4. Remove the Faucet
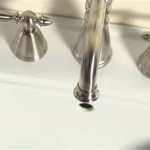
If the faucet is attached to the sink, you need to remove it. Turn off the water supply to the faucet using the shut-off valves under the sink. Depending on the faucet design, you might need to loosen the set screws or nuts holding the faucet in place. Use an adjustable wrench to loosen these fasteners and remove the faucet assembly.
5. Disconnect the Sink
The next step is to disconnect the sink from the countertop. Depending on the installation method, this might involve loosening nuts, bolts, or clips.
If the sink is clamped to the counter, locate the clamps and use an adjustable wrench to loosen the clamping nuts. If the sink is secured with screws, use a screwdriver to remove the screws. If the sink is glued or sealed to the countertop, you might need to use a utility knife or caulk remover tool to carefully cut or loosen the sealant.
6. Remove the Sink From the Countertop
Once you have disconnected the sink from the countertop, carefully lift it off. Have someone assist you with the lifting to prevent damage to the sink or countertop. Carefully place the sink in a safe location until you are ready to reinstall it or dispose of it.
7. Clean Up and Dispose of Debris
After removing the sink, clean up any debris or sealant residue left behind. Use a sponge and water to clean the countertop and surrounding surfaces. You can dispose of the old sink and any other removed parts according to your local waste disposal regulations.
By following these steps, you can successfully remove a bathroom vessel sink. Remember to prioritize safety throughout the process and to double-check connections before proceeding to the next step. With careful planning and execution, you can achieve a smooth and successful removal without encountering any unexpected problems.

How To Replace Vessel Bathroom Sink
Removal Of Vessel Sink Diy Home Improvement Forum

How To Replace Vessel Bathroom Sink

How To Replace Vessel Bathroom Sink

How To Install A Vessel Sink Faucet

How Do I Clean This Water Off A Glass Vessel Bowl Sink Hometalk

How To Install A Vessel Sink

How To Install A Bathroom Sink Homeadvisor

How To Install A Vessel Sink Faucet

Can You Replace Bathroom Sinks Without Replacing The Counter Aquarina
Related Posts


