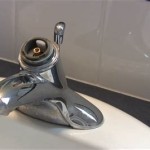
How to Remove a Bathroom Sink Faucet
Replacing a bathroom sink faucet is a common home improvement project that can be tackled by most homeowners with basic plumbing skills. Removing the old faucet is the first step in this process, and it requires careful attention to avoid damaging the sink or surrounding fixtures. This guide will provide a step-by-step process for safely removing a bathroom sink faucet.
Gather the Necessary Tools
Before beginning the removal process, it is crucial to gather the necessary tools. This will ensure a smoother operation and prevent unnecessary delays. The following tools are essential for removing a bathroom sink faucet:
- Adjustable wrench
- Channel-lock pliers
- Phillips head screwdriver
- Flat head screwdriver
- Basin wrench
- Plumber's tape (optional)
- Bucket
- Towel
A basin wrench is particularly useful for accessing nuts located beneath the sink that are difficult to reach with other wrenches. The bucket is used to catch any water that may drain from the pipes, and the towel can be used to wipe up any spills.
Shut Off the Water Supply
The first step in removing a bathroom sink faucet is to shut off the water supply. This will prevent water damage during the removal process. Locate the shut-off valves for the hot and cold water lines supplying the sink. These valves are typically located beneath the sink or on the wall behind it. Turn both valves clockwise until they are completely closed.
Once the valves are closed, open the faucet to allow any remaining water to drain out. This step is crucial to ensure that no water is left in the pipes, which could cause leaks during the removal process.
Disconnect the Drain Pipe
After shutting off the water supply and draining the faucet, the next step is to disconnect the drain pipe. This is usually a P-trap, a curved pipe that allows wastewater to flow out of the sink and prevents sewer gases from entering the house. The drain pipe is connected to the faucet's spout with a threaded connection.
To disconnect the drain pipe, use an adjustable wrench to loosen the nut connecting the pipe to the spout. Once the nut is loose, the pipe can be pulled away from the spout. It is important to support the pipe with your hand as you loosen the nut to prevent it from falling into the sink.
Disconnect the Supply Lines
The next step is to disconnect the supply lines that connect to the faucet. These lines are typically made of copper or flexible braided stainless steel. They are attached to the faucet with compression nuts, which can be loosened with an adjustable wrench or channel-lock pliers.
Before disconnecting the supply lines, it is important to wrap the wrench jaws with a piece of plumber's tape to prevent scratching the metal. To loosen the nuts, turn them counterclockwise. Once the nuts are loose, the lines can be pulled away from the faucet.
Remove the Faucet from the Sink
With the supply lines and drain pipe disconnected, the faucet is ready to be removed from the sink. This is often the most challenging part of the process. Look for any decorative caps or screws holding the faucet in place. These may need to be removed first.
The faucet is typically secured to the sink with a set of mounting nuts located beneath the sink. These nuts are usually difficult to reach with conventional wrenchs, so a basin wrench is typically needed. The basin wrench has a long, hinged arm that allows it to reach the nuts from above the sink. Use the basin wrench to loosen and remove the mounting nuts. Once the nuts are removed, the faucet can be lifted out of the sink.
Inspect the Faucet and the Sink
After removing the faucet, it is important to inspect both the faucet and the sink for any signs of damage. If the faucet is corroded or leaking, it will need to be replaced. If the sink has any cracks or chips, it may also need to be repaired or replaced.
If the sink and faucet are in good condition, they can be cleaned before being reassembled. To clean the faucet, use a mild cleaner and a soft cloth. To clean the sink, use a non-abrasive cleaner.
Once the faucet and the sink are clean, they can be reassembled. The process of reassembly is essentially the reverse of the removal process. When reconnecting the supply lines, make sure to use plumber's tape on the threads to prevent leaks.
After reassembling the faucet, turn the water supply back on and check for any leaks. If there are any leaks, tighten the connections until they stop. If the leaks persist, contact a licensed plumber for assistance.

Diy How To Replace A Bathroom Sink Faucet Remove Install

How To Replace A Bathroom Faucet Home Repair Tutor

How To Remove And Install A Bathroom Faucet

How To Remove And Install A Bathroom Faucet

How To Replace A Bathroom Faucet Home Repair Tutor

Replacing A Bathroom Faucet Fine Homebuilding

How Do I Replace Bathroom Sink Faucet Handles Cleaning More

How To Remove And Install A Bathroom Faucet

How To Replace A Bathroom Faucet Home Repair Tutor

Installing A New Bathroom Faucet
Related Posts


