How to Remove an Old 3-Piece Bathroom Faucet
Replacing an old bathroom faucet is a common DIY project that can enhance the look and functionality of your bathroom. While the process may seem daunting, removing a 3-piece bathroom faucet is a straightforward task with the right tools and understanding. This article will guide you through the process step-by-step, providing a comprehensive understanding of how to remove the faucet efficiently and safely.
Step 1: Gather Necessary Tools and Materials
Before embarking on the removal process, ensure you have the following tools and materials at hand:
- Adjustable wrench
- Channel-lock pliers
- Flat-head screwdriver
- Phillips-head screwdriver
- Basin wrench
- Pipe wrench (optional)
- Bucket
- Towels
- Gloves (optional)
Having these tools readily available will make the removal process smoother and more efficient.
Step 2: Turn Off the Water Supply
Safety is paramount during any plumbing work. Before proceeding, turn off the water supply to the faucet. This is typically achieved by locating the shut-off valve for the bathroom sink, which is often found beneath the sink or on the wall. Turn the valve counterclockwise to completely shut off the water flow.
Once the water supply is off, open the faucet to drain any remaining water in the lines. This will minimize water damage and make the process less messy.
Step 3: Disconnect the Faucet from the Plumbing
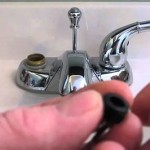
With the water supply off, you can now begin disconnecting the faucet from the plumbing system. The 3-piece bathroom faucet typically consists of three parts: the spout, handles, and the mounting plate.
Disconnecting the Spout
The spout is usually connected to the mounting plate with a nut. Use an adjustable wrench to loosen and remove this nut. Some spouts may have a decorative escutcheon that needs to be removed first. Gently pry off the escutcheon using a flat-head screwdriver.
Disconnecting the Handles
The handles are usually connected to the faucet base with a set screw or a decorative cap. Remove the set screw or cap using a Phillips-head screwdriver or a flat-head screwdriver, depending on the design. Once the screw or cap is removed, you can pull the handles off.
Disconnecting the Mounting Plate
The mounting plate is attached to the sink with mounting nuts underneath the sink. To access these nuts, you will need to use a basin wrench. Position the open jaws of the wrench around the nut and turn it counterclockwise to loosen it. Once the nut is loosened, you can remove the mounting plate.
Step 4: Remove the Faucet From the Sink
With all the connections disconnected, the faucet can now be removed from the sink. Gently lift the faucet assembly upward, taking care not to damage the sink.
Step 5: Clean Up and Dispose of the Old Faucet
Once the faucet is removed, clean up any debris or water spills. Dispose of the old faucet properly, ensuring it is recycled if possible.
Before installing a new faucet, ensure the sink and surrounding area are clean and dry. This will make the installation process easier and prevent potential problems.
Replacing a bathroom faucet can be a rewarding DIY project. By following these steps, you can successfully remove an old 3-piece bathroom faucet, paving the way for a new and stylish upgrade.

How To Replace A Bathroom Faucet Home Repair Tutor

How To Remove And Install A Bathroom Faucet

How To Replace A Bathroom Faucet Tinged Blue

The Pro Way To Replace A Bathroom Faucet Diy 760 594 1226

How To Remove And Install A Bathroom Faucet

How To Remove Bathroom Faucet Easy Simple

How To Replace A Bathroom Faucet Home Repair Tutor

How To Remove A Bathroom Faucet

How To Replace A Bathroom Faucet Removal And Installation

Replacing A Bathroom Faucet Fine Homebuilding
Related Posts


