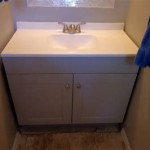
How To Repaint Bathroom Vanity Cabinets
Repainting bathroom vanity cabinets can dramatically enhance a bathroom's aesthetic appeal and increase the longevity of the existing cabinetry. This project, while requiring some effort, is achievable for most homeowners with basic DIY skills. Careful preparation and the right materials contribute significantly to a professional-looking finish.
The first step involves assessing the current state of the vanity cabinets. Examine the surfaces for any damage, such as cracks, chips, or water damage. These imperfections need addressing before painting commences. Fill minor cracks and chips with wood filler, allowing it to dry completely and sanding it smooth. Significant damage may necessitate professional repair.
Next, remove all hardware from the cabinets, including knobs, pulls, hinges, and doors. Labeling each piece and its corresponding location can simplify reassembly. If painting the inside of the cabinet doors, remove any shelves or drawers as well. This organized approach helps ensure a streamlined process.
Thorough cleaning is crucial for proper paint adhesion. Use a degreasing cleaner to remove any dirt, grime, or soap residue. A tack cloth can effectively remove any remaining dust particles after cleaning. A clean surface is essential for a smooth, even paint application.
Protecting surrounding areas is essential to prevent accidental paint splatters. Cover the countertop, sink, floor, and adjacent walls with drop cloths or painter's tape. Proper masking prevents unwanted paint from adhering to surfaces and minimizes cleanup time.
Depending on the existing finish of the vanity cabinets, priming may be necessary. If the current finish is glossy or a significantly different color than the chosen paint, a primer will improve adhesion and coverage. Apply the primer evenly, following the manufacturer's instructions for drying time. A high-quality primer ensures a professional-looking finish.
Once the primer is dry, lightly sand the cabinets with fine-grit sandpaper to create a smooth surface for the paint. This sanding process promotes better adhesion and eliminates any brushstrokes or imperfections left by the primer application. Wipe away any sanding dust with a tack cloth before proceeding.
Selecting the right paint is critical for durability and longevity in the humid bathroom environment. A semi-gloss or high-gloss latex paint is generally recommended for its moisture resistance and ease of cleaning. Choose a paint specifically formulated for cabinets and trim, as these typically offer better durability and resistance to chipping.
When applying the paint, use a high-quality brush or roller designed for smooth finishes. Apply thin, even coats to prevent drips and ensure proper coverage. Allow each coat to dry completely according to the manufacturer's instructions before applying subsequent coats. Multiple thin coats provide a more durable and professional-looking finish than one thick coat.
The number of coats required depends on the chosen paint color and the existing cabinet color. Typically, two to three coats are sufficient for adequate coverage. Allow the final coat to dry thoroughly before reinstalling hardware or returning items to the cabinets. Proper drying time ensures the paint cures completely and prevents damage.
Once the paint is fully cured, carefully reinstall the hardware, ensuring it aligns correctly with the pre-existing holes. Replace any shelves, drawers, or doors removed earlier. Take care during reinstallation to avoid scratching the freshly painted surfaces.
Consider adding protective topcoats for increased durability, especially in high-use areas. A water-based polyurethane sealer provides a protective barrier against moisture and wear. Follow the manufacturer's instructions for application and drying times. This additional step can significantly extend the lifespan of the newly painted cabinets.
Regular cleaning and maintenance will help preserve the newly painted finish. Wipe down the cabinets regularly with a damp cloth and mild cleaner. Avoid abrasive cleaners or scouring pads, as these can damage the paint. Promptly address any spills or splatters to prevent staining or discoloration.
By following these steps, repainting bathroom vanity cabinets can be accomplished successfully, resulting in an updated and refreshed bathroom space. The careful attention to detail in preparation and application will contribute to a durable and aesthetically pleasing finish for years to come. Choosing the right materials and tools for the project ensures a professional-looking result.

How To Paint Bathroom Cabinets Without Sanding 8 Vital Steps Grace In My Space
.jpg?strip=all "Painting A Bathroom Vanity Again Dream Green Diy")
Painting A Bathroom Vanity Again Dream Green Diy

Home How To Repaint A Bathroom Cabinet Cabinets Diy Painting

How To Quickly Paint A Bathroom Vanity Cabinet Entri Ways

Painting Bathroom Cabinets Nq Property Care

How To Paint Bathroom Vanity Cabinets Tutorial Benjamin Moore

How To Paint A Bathroom Vanity Love Remodeled

How To Paint Laminate Cabinets Love Renovations

How To Paint Cabinets Last Painting A Bathroom Vanity Maison De Pax

21 Beautiful Painted Bathroom Cabinet Ideas
Related Posts