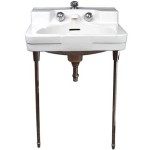
How to Repair a Chip in Your Bathroom Sink Drain
A chip in a bathroom sink drain, while seemingly a minor cosmetic flaw, can lead to more significant problems if left unaddressed. Beyond the aesthetic impact, a chip exposes the underlying material to moisture, increasing the risk of corrosion, rust, and eventual leaks. Addressing the chip promptly prevents further degradation and maintains the integrity of the drain assembly. This article details the process of repairing a chip in a bathroom sink drain, outlining the necessary materials, preparation steps, and repair techniques for a durable and aesthetically pleasing outcome.
Before undertaking any repair, accurately assessing the extent of the damage is crucial. A small, superficial chip may require a simple filling compound, while a larger, more significant chip might necessitate a more robust epoxy-based repair. Determining the material of the drain is also essential. Most bathroom sink drains are made of chrome-plated brass, stainless steel, or plastic. The repair method and materials should be compatible with the drain’s material to ensure a lasting bond and avoid further damage.
Safety is paramount when working on plumbing fixtures. Before commencing any repair, the water supply to the sink must be turned off. This can typically be achieved by closing the shut-off valves located beneath the sink. If shut-off valves are not present or are malfunctioning, the main water supply to the house may need to be turned off. Additionally, wearing gloves protects hands from chemicals and sharp edges, and eye protection is recommended to prevent debris from entering the eyes during the repair process.
The following steps outline how to repair the chip and restore the integrity of the drain. The tools and materials include: Cleaning supplies (degreaser, mild soap, water), Sandpaper (various grits: 120, 220, 400), a Putty knife or small applicator, a Repair compound (epoxy putty, porcelain repair kit, or specialized metal filler depending on the drain material), a Cleaning cloths or paper towels, and a Color-matching paint (optional, for aesthetic purposes).
Preparation is Key: Cleaning and Sanding the Damaged Area
Proper preparation of the damaged area is arguably the most important step in achieving a successful and long-lasting repair. Contaminants such as soap scum, grease, and rust can interfere with the adhesion of the repair compound, leading to premature failure. A thorough cleaning ensures a clean, stable surface for the repair to adhere to.
The first step involves cleaning the area around the chip with a degreaser. This removes any grease or oil that may be present. Follow the degreaser with a mild soap and water solution to remove any remaining dirt or residue. Rinse the area thoroughly with clean water and dry it completely with a clean cloth or paper towel. Ensure the surface is completely dry before proceeding to the next step.
Once the area is clean and dry, it needs to be sanded to create a slightly roughened surface. This provides a better grip for the repair compound. Start with a coarser grit sandpaper, such as 120 grit, to remove any loose or flaking material around the chip. Be careful not to apply too much pressure, as this could further damage the surrounding area. Sand in a circular motion, feathering the edges of the chip to create a smooth transition between the damaged and undamaged areas.
After sanding with the 120-grit sandpaper, move to a finer grit, such as 220 grit, to smooth out the scratches left by the coarser sandpaper. Again, sand in a circular motion, focusing on blending the edges of the chip. Finally, use a very fine grit sandpaper, such as 400 grit, to further refine the surface and create a smooth, even texture. This step is particularly important if the repair will be painted or coated, as it will help to ensure a smooth, professional finish.
After sanding, thoroughly clean the area again to remove any sanding dust. Use a clean cloth or paper towel dampened with water to wipe away the dust. Ensure the area is completely dry before proceeding to the next step. This ensures the repair compound adheres properly to the surface and prevents any contaminants from interfering with the bond.
Applying the Repair Compound: Filling the Chip
The selection of the appropriate repair compound is critical for a successful repair. Epoxy putty is a versatile option suitable for a variety of drain materials and chip sizes. Porcelain repair kits are specifically designed for porcelain sinks and drains and offer a color-matched finish. Metal fillers are suitable for metal drains, offering durability and resistance to corrosion. Carefully consider the drain material and the size of the chip when selecting the repair compound.
Before applying the repair compound, carefully read and follow the manufacturer's instructions. Most epoxy putties require mixing two components together. Ensure the components are thoroughly mixed according to the instructions to achieve the proper consistency and curing properties. Some porcelain repair kits may require a similar mixing process, while others may be ready to use directly from the container.
Using a putty knife or small applicator, carefully apply the repair compound to the chipped area. Fill the chip completely, ensuring the compound is pressed firmly into the void. Overfill the chip slightly, as the compound may shrink slightly as it cures. Avoid getting the compound on the surrounding undamaged area of the drain. If excess compound gets on the surrounding area, wipe it away immediately with a clean cloth or paper towel dampened with the appropriate solvent (usually water or mineral spirits, depending on the type of compound used).
Once the chip is filled, use the putty knife or applicator to smooth the surface of the repair compound. Feather the edges of the compound into the surrounding undamaged area to create a seamless transition. The goal is to create a smooth, even surface that is flush with the surrounding drain material. If necessary, use multiple applications of the repair compound to achieve the desired result. Allow each application to cure partially before applying the next coat.
After smoothing the surface, allow the repair compound to cure completely according to the manufacturer's instructions. The curing time can vary depending on the type of compound used and the ambient temperature. Do not disturb the repair during the curing process. Protect the area from moisture and direct sunlight during curing. Rushing the curing process can compromise the strength and durability of the repair.
Finishing Touches: Sanding and Painting (Optional)
Once the repair compound has fully cured, it may be necessary to sand the surface to achieve a perfectly smooth and even finish. Start with a fine grit sandpaper, such as 400 grit, to remove any imperfections or ridges in the repair. Sand in a circular motion, being careful not to sand through the repair compound and expose the underlying drain material. Feather the edges of the repair to blend seamlessly with the surrounding area.
After sanding with 400 grit sandpaper, move to an even finer grit, such as 600 grit or higher, to polish the surface and create a glossy finish. This step is particularly important if the repair will not be painted, as it will help to match the sheen of the surrounding drain material. Continue sanding until the surface is smooth and even and the edges of the repair are imperceptible.
If desired, the repair can be painted to match the color of the surrounding drain material. This is particularly important if the repair compound is a different color than the drain. Select a paint that is specifically designed for use on the drain material. For example, use a chrome-colored paint for chrome-plated drains, a stainless steel-colored paint for stainless steel drains, or a specialized porcelain paint for porcelain drains.
Before painting, thoroughly clean the repaired area with a degreaser and a mild soap and water solution. Rinse the area thoroughly with clean water and dry it completely. Mask off the surrounding area with painter's tape to protect it from overspray. Apply the paint in thin, even coats, allowing each coat to dry completely before applying the next. Follow the manufacturer's instructions for drying time and application techniques.
After the paint has completely dried, carefully remove the painter's tape. Inspect the repair for any imperfections or runs in the paint. If necessary, lightly sand the area with a fine grit sandpaper to smooth out any imperfections. Apply a final coat of paint if needed. Allow the paint to cure completely before using the sink. This ensures a durable and aesthetically pleasing repair that will last for years to come.

How To Fix A Chipped Sink

How To Fix A Chipped Sink

How To Fix Chipped Porcelain Ceramic Sink Or Bath Tub With Milliput Putty

How To Patch A Porcelain Sink Himg Surface Repair

How To Fix A Ed Porcelain Sink 8 Steps Prudent Reviews

Sink Repair Happy Tubs Bathtub

How To Fix A Chipped Sink

Gorgeous Shiny Things How To Repair A Porcelain Sink

Ask The Builder Replacing A Ed Undermount Sink Spokesman Review

How To Fix A Ed Porcelain Sink 8 Steps Prudent Reviews


