How to Replace a Bathroom Fan Roof Vent
Replacing a bathroom fan roof vent is a home improvement project that can improve ventilation, prevent moisture damage, and enhance the overall air quality within a home. A properly functioning bathroom fan and vent system is crucial for removing excess humidity generated during showers and baths, which can lead to mold growth and structural issues. This article provides a comprehensive guide on how to replace a bathroom fan roof vent, covering the necessary tools, safety precautions, and step-by-step instructions. Understanding the purpose and functionality of the vent, selecting the correct replacement, and executing the installation process diligently are all critical for a successful outcome.
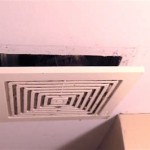
Before commencing any work, it is imperative to understand the existing system. The bathroom fan draws moist air from the bathroom and directs it through ductwork to the roof vent. The roof vent then expels the air outside the home. Over time, weather exposure, debris accumulation, and physical damage can compromise the vent's integrity, necessitating replacement. Signs of a failing vent include visible cracks, rust, or damage, as well as moisture stains on the ceiling around the bathroom fan.
Preparing for the Replacement
Prior to undertaking the replacement, gather the necessary tools and materials. Ensuring all items are readily available will streamline the process and minimize potential delays. The required tools typically include:
- A new bathroom fan roof vent (matching the size and style of the existing vent)
- A flathead screwdriver
- A Phillips head screwdriver
- A utility knife
- A hammer
- A pry bar (or shingle removal tool)
- Caulking gun and exterior-grade caulk
- Roofing nails
- Safety glasses
- Work gloves
- A ladder (meeting safety standards)
- Measuring tape
- A pencil or marker
Selecting the correct replacement vent is equally important. Measure the existing vent's base and collar diameter to ensure the new vent is compatible with the existing ductwork and roof opening. Consider the roof pitch and material when choosing a new vent. Vents are typically designed for specific roof types, such as asphalt shingles, tile, or metal. Consult with a hardware store professional if needed to determine the appropriate vent for the specific application.
Safety is paramount. Before climbing onto the roof, ensure the ladder is stable and positioned on a solid, level surface. Inform others in the household about the work being performed and establish a clear line of communication. Avoid working on the roof during inclement weather, such as rain, snow, or high winds. Wear appropriate footwear with good traction to prevent slips and falls. It is advisable to have a helper present during the project, especially for tasks requiring heavy lifting or maneuvering.
Removing the Old Vent
Once the tools and materials are gathered and safety precautions are in place, the removal of the old vent can begin. Start by carefully inspecting the existing vent and surrounding shingles. Identify the nails or screws securing the vent to the roof. Use a flathead screwdriver or pry bar to gently lift the edges of the surrounding shingles, exposing the fasteners. Exercise caution to avoid damaging the shingles.
Using a screwdriver or drill, remove the fasteners securing the vent to the roof. In some cases, the vent may also be sealed with caulk. Use a utility knife to carefully cut through the caulk along the perimeter of the vent. Once the fasteners are removed and the caulk is cut, gently lift the vent from the roof. If the vent is stuck, use a pry bar to carefully loosen it. Avoid using excessive force, which could damage the roof sheathing.
After removing the vent, inspect the underlying roof sheathing for any signs of rot or water damage. If damage is present, repair or replace the affected areas before installing the new vent. Clean the area around the vent opening to remove any debris, such as old caulk, leaves, or dirt. This will ensure a proper seal between the new vent and the roof.
Once the area is cleaned and repaired, measure the vent opening to confirm it matches the dimensions of the new vent. If the opening is too small, carefully enlarge it using a saw or other appropriate tool. If the opening is too large, fill the gaps with wood shims or other suitable material to create a snug fit for the new vent.
Installing the New Vent
With the old vent removed and the roof surface prepared, the new vent can be installed. Position the new vent over the opening, ensuring the base is aligned correctly with the surrounding shingles. Check that the vent collar is securely connected to the bathroom fan ductwork. Verify this connection from inside the attic, if accessible.
Once the vent is properly positioned, secure it to the roof using roofing nails. Drive the nails through the vent's base and into the roof sheathing. Use a hammer to drive the nails straight and flush with the vent surface. Avoid overdriving the nails, which could damage the vent or the roof sheathing. Space the nails evenly around the vent's perimeter, following the manufacturer's recommendations.
After securing the vent with nails, apply a bead of exterior-grade caulk around the vent's base, where it meets the shingles. This will create a watertight seal and prevent water from penetrating under the vent. Use a caulking gun to apply the caulk evenly and smoothly. Smooth the caulk with a finger or a putty knife to create a clean, professional finish. Pay particular attention to the areas where the shingles overlap the vent, ensuring a complete and continuous seal.
Carefully replace the surrounding shingles, overlapping them over the vent's base. Use roofing nails to secure the shingles to the roof sheathing. Ensure the shingles are properly aligned and that the nail heads are covered by the overlapping shingle courses. This will prevent water from entering the nail holes and causing leaks.
Once the shingles are replaced, inspect the entire installation for any gaps or imperfections. Apply additional caulk as needed to ensure a watertight seal. Clean up any debris from the roof, such as loose nails, caulk tubes, or shingle scraps. Inspect the area around the ladder for any dropped items. Store all tools and materials in a safe and secure location.
Testing the Ventilation System
After the new vent is installed, it is crucial to test the ventilation system to ensure it is functioning correctly. Turn on the bathroom fan and check for airflow at the vent. Place a piece of tissue near the vent to confirm that air is being drawn out of the bathroom. If there is no airflow or the airflow is weak, inspect the ductwork for any obstructions or leaks. Ensure the fan motor is functioning properly and that the fan blades are clean and unobstructed.
Visually inspect the vent from inside the attic (if accessible) to confirm that the ductwork is properly connected and that there are no air leaks. Seal any leaks with duct tape or other appropriate sealant. Check for any signs of moisture accumulation around the vent or ductwork. If moisture is present, identify the source and address it promptly to prevent mold growth and structural damage.
Monitor the bathroom's humidity levels after showers and baths. If the humidity dissipates quickly, the ventilation system is likely functioning correctly. If the humidity lingers for an extended period, re-evaluate the system and make any necessary adjustments. Consider upgrading the bathroom fan to a more powerful model if the existing fan is inadequate for the size of the bathroom.
Regular maintenance of the bathroom fan and roof vent is essential for ensuring long-term performance. Clean the fan blades and vent openings periodically to remove dust and debris. Inspect the vent for any signs of damage or deterioration. Replace the vent as needed to maintain proper ventilation and prevent moisture problems. By following these guidelines, the bathroom fan roof vent replacement will be successful and contribute to a healthier and more comfortable living environment.

Installing A Bathroom Fan Fine Homebuilding

How To Repair A Bathroom Fan Diy Family Handyman

Blog

How To Install A Bathroom Exhaust Fan Lowe S

How To Install Roof Vents Bathroom Fan Attic Ventilation Etc Jonny Diy

How To Install A Bathroom Fan Diy Family Handyman

Roof Ventilation Tile Bathroom Exhaust Vent Extractor

How To Use An In Line Exhaust Fan Vent Two Bathrooms Diy Family Handyman

Install Diagram Of A Ceiling Fan Bathroom Ventilation Exhaust

How To Install A Roof Vent Diy Family Handyman
Related Posts