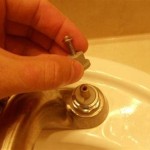
How to Replace a Bathroom Sink Washer
A leaky bathroom sink faucet can be a constant source of annoyance and frustration. Often, the culprit behind this leaky problem is a worn-out washer. This small, rubber component sits inside the faucet stem and helps create a seal when the faucet is turned off. Over time, the washer can become brittle, cracked, or deformed, leading to leaks. Fortunately, replacing a bathroom sink washer is a relatively simple DIY task that anyone can handle with the right tools and instructions.
Understanding the Process
Before embarking on the replacement process, it's crucial to understand the basic anatomy of a bathroom sink faucet and the role of the washer. Most bathroom sink faucets use a compression system, where a stem with a washer inside compresses against a seat to stop the flow of water. When the washer wears out, it can no longer create a tight seal, resulting in leaks. Replacing the washer involves accessing the stem, removing the old washer, and installing a new one. The process often requires turning off the water supply, dismantling parts of the faucet, and potentially using specialized tools.
Steps for Replacing a Bathroom Sink Washer
To effectively replace a bathroom sink washer, follow these steps:
1. Turn off the Water Supply
Begin by locating the water shut-off valve for the bathroom sink. This valve is usually found beneath the sink or on the wall near the faucet. Turn the valve clockwise to shut off the water supply completely. To ensure that no water remains in the faucet, run the faucet briefly to drain any residual water.
2. Remove the Faucet Handle
The next step involves removing the faucet handle. This process typically involves unscrewing the handle using a screwdriver, wrench, or Allen key, depending on the specific faucet design. If the handle is held by a set screw, use a small screwdriver to loosen the screw before removing the handle.
3. Remove the Stem
Once the handle is removed, you can access the stem. The stem is a metal rod that connects the handle to the faucet valve. Depending on the faucet type, the stem may be secured with a nut, a set screw, or a packing nut. Using the appropriate tool, loosen and remove the stem from the faucet body.
4. Remove the Old Washer
With the stem removed, you can now access the old washer. The washer is typically a small, rubber or plastic disc located at the end of the stem. Carefully remove the old washer using a small screwdriver or pliers. Inspect the washer for signs of wear, cracks, or deformation.
5. Install the New Washer
Once the old washer is removed, install the new washer onto the stem. Ensure that the washer is installed correctly and securely. Most washers are designed with a specific orientation, so consult the instructions provided with the new washer if you're unsure about its placement.
6. Reassemble the Faucet
After installing the new washer, reassemble the faucet in reverse order. Carefully slide the stem back into the faucet body and secure it with the appropriate nut, screw, or packing nut. Replace the faucet handle and tighten it securely.
7. Turn on the Water Supply
Finally, carefully turn the water supply back on and check for any leaks. If there are still leaks, it's possible that the washer is improperly installed or the faucet seat is damaged. Inspect the washer and the faucet seat again, and make any necessary adjustments.
Important Considerations
When replacing a bathroom sink washer, it's essential to consider these aspects:
1. Choose the Right Washer
Select a new washer that is compatible with your faucet type. Check the size, material, and shape of the old washer to ensure you purchase the correct replacement.
2. Use Proper Tools
Use appropriate tools to avoid damaging the faucet during disassembly and reassembly. If you are unfamiliar with the tools or the process, it's best to consult a professional plumber.
3. Practice Patience
Replacing a bathroom sink washer may seem like a simple task, but it requires patience and attention to detail. Take your time, follow the steps carefully, and don't hesitate to seek help if you encounter any problems.
By following these steps and considering the essential pointers, you can effectively replace a worn-out bathroom sink washer and enjoy leak-free functionality in your bathroom.

Can Washer Be Replaced In This Type Of Bathroom Sink Fauced Doityourself Com Community Forums

How To Replace A Washer In Leaky Faucet For Dummies

How To Change A Washer On Mixer Tap Living By Homeserve

Leaking Tap Learn How To Change A Washer

Learn The 7 Diy Steps To Replace Your Tap Washer Blog

How To Replace A Washer In An Oldfashioned Leaky Faucet

How To Replace A Tap Washer In 10 Easy Steps Hpg Solutions

How To Change A Washer On Mixer Tap Bathroom Ideas

How To Replace A Washer In Leaky Faucet For Dummies

How To Change A Washer On Mixer Tap Bathroom Ideas
Related Posts


