How To Replace a Bathroom Vent Fan Cover
A functioning bathroom vent fan is crucial for managing moisture and preventing mold and mildew growth. While the fan's motor does the heavy lifting, the cover plays a vital role in directing airflow and maintaining a clean, aesthetic appearance. Over time, vent fan covers can become discolored, damaged, or simply outdated. Replacing the cover is a relatively simple DIY project that can significantly improve the look and functionality of your bathroom.
1. Safety First: Turn Off the Power
Before touching any electrical component, ensure the power to the vent fan is completely shut off. Locate the corresponding circuit breaker in your home's electrical panel and flip it to the "off" position. Double-check that the power is off by attempting to turn on the vent fan switch. If the fan doesn't run, it's safe to proceed.
2. Examine the Existing Cover
Carefully examine how the current vent fan cover is attached. Common methods include spring clips, screws, or a combination of both. Some covers may require gentle twisting or sliding to release them. Note the type of attachment to prepare for installing the new cover.
3. Remove the Old Cover
If the cover is held by spring clips, locate them on the sides or corners. Gently compress the clips towards the center of the cover while pulling down or away from the ceiling. For covers secured by screws, use a screwdriver to remove them. Once the screws are removed, the cover should come off easily. Some covers may have a combination of clips and screws. If your cover feels stuck, consult the manufacturer's instructions.
4. Clean the Vent Opening
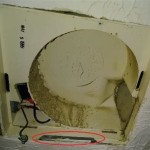
Once the cover is removed, use a vacuum cleaner with a brush attachment or a damp cloth to clean any dust, debris, or cobwebs accumulated around the vent opening. This is a good opportunity to inspect the fan itself for any visible damage or excessive dust buildup. If the fan blades are particularly dirty, consider cleaning them carefully with a damp cloth, ensuring the power remains off.
5. Measure the Vent Opening
While most replacement covers are designed to fit standard vent openings, it's essential to measure the opening to ensure a proper fit. Measure the length and width of the vent opening to confirm the dimensions match those of your new cover. Note that some covers are measured diagonally. Check the packaging of your new cover to determine the appropriate measurement method.
6. Install the New Cover
Align the new cover with the vent opening. If the cover uses spring clips, carefully push the cover towards the ceiling until the clips snap into place. Ensure all clips are securely engaged. If the cover uses screws, use a screwdriver to install them, taking care not to overtighten. If necessary, consult the instructions provided with the new cover. Test the fit by gently tugging on the cover to ensure it is securely attached.
7. Restore Power and Test
Once the new cover is installed, return to the electrical panel and flip the circuit breaker back to the "on" position. Turn on the vent fan switch to test the installation. The cover should remain securely in place, and the fan should operate normally. Check for any unusual noises or vibrations. If the fan operates as expected, the installation is complete.
Troubleshooting
If the new cover doesn't fit properly, double-check the measurements of the vent opening and the cover. Ensure you've purchased the correct size. If the fan doesn't operate after restoring power, confirm that the circuit breaker is in the "on" position. If the problem persists, consult a qualified electrician.
Choosing the Right Cover
When selecting a replacement cover, consider factors such as material, style, and features. Covers are typically made of plastic or metal. Plastic covers are more common and affordable, while metal covers offer greater durability. Choose a style that complements your bathroom decor. Some covers feature built-in lights or humidity sensors, which can enhance functionality. Consider the specific needs and aesthetics of your bathroom when making your selection.
Regular Maintenance
To keep your vent fan operating efficiently and prolong the life of the cover, regular cleaning is essential. Dust the cover periodically with a soft cloth. For more thorough cleaning, remove the cover and clean it with warm soapy water. Regular maintenance will help prevent dust buildup and maintain optimal airflow.

Remove Install A Bathroom Fan Grille In 1 Min

How To Replace Bathroom Exhaust Fan Cover

Update An Existing Bathroom Exhaust Fan Cover Remodelaholic

Update An Existing Bathroom Exhaust Fan Cover Remodelaholic

How To Clean Replace Light Broan Model 678 Exhaust Fan

Tips For Installing Or Replacing A Bathroom Fan Forbes Home

How To Install A Bathroom Fan Homeserve Usa

How To Replace And Install A Bathroom Exhaust Fan Quiet Motion Sensor Diy Tutorial

How To Install A Bathroom Fan Step By Guide Bob Vila

Update An Existing Bathroom Exhaust Fan Cover Remodelaholic
Related Posts


