How To Stop A Bathroom Exhaust Fan From Squeaking
A squeaking bathroom exhaust fan can be a persistent and irritating problem. The noise, often high-pitched and grating, can disrupt the tranquility of a bathroom and even carry into adjacent rooms. Understanding the potential causes of the squeak and implementing appropriate solutions is crucial for restoring peace and quiet. This article provides a comprehensive guide to diagnosing and rectifying a squeaking bathroom exhaust fan, covering various troubleshooting steps and maintenance procedures.
Identifying the Source of the Squeak
Before attempting any repairs, it is essential to pinpoint the exact location of the squeak. This will help narrow down the potential causes and ensure that the correct corrective measures are taken. The squeak is typically emanating from one of three areas: the motor, the fan blades, or the housing.
To isolate the sound, begin by turning on the exhaust fan. Listen closely to determine whether the squeak is coming from within the fan housing itself, or seems to be linked to the motor area. If the squeak appears most pronounced when the fan initially starts or changes speed, the motor is the likely culprit. A consistent, rhythmic squeak that corresponds with the rotation of the fan blades often points to a problem with the blades themselves or their connection to the motor shaft.
Consider the age of the exhaust fan. An older fan is naturally more susceptible to wear and tear, leading to component degradation and a higher likelihood of squeaking. Newer fans, while less prone to age-related issues, can still squeak due to manufacturing defects or installation problems.
Another important factor to consider is the environment in which the fan operates. Bathrooms are typically high-humidity environments, which can accelerate corrosion and component failure. Moisture can particularly affect the motor bearings, leading to rust and increased friction, ultimately resulting in a squeaking noise. Regular cleaning and maintenance can help mitigate the effects of humidity and prolong the life of the fan.
Addressing Common Causes and Solutions
Once the source of the squeak has been identified, various methods can be employed to resolve the issue. The following sections outline common causes of squeaking and provide detailed instructions for implementing the appropriate solutions.
Lubrication of the Motor: One of the most frequent causes of a squeaking exhaust fan is dried-out motor bearings. Over time, the lubricant within the bearings deteriorates, leading to increased friction and the characteristic squeaking noise. Applying a suitable lubricant can often resolve this problem.
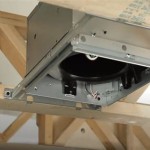
To lubricate the motor, begin by turning off the power to the exhaust fan at the circuit breaker. This is a critical safety precaution to prevent electrical shock. Once the power is off, remove the fan cover. The cover is usually held in place by clips or screws, depending on the model. Consult the manufacturer's instructions for specific removal procedures.
With the cover removed, the motor assembly will be visible. Locate the motor bearings. These are typically small, circular openings or access points on the motor housing. Use a lightweight machine oil, such as 3-in-1 oil, or a specialized electric motor lubricant. Do not use WD-40, as it is primarily a solvent and can actually wash away existing lubricant, making the problem worse in the long run. Apply a few drops of oil to each bearing, allowing it to penetrate the mechanism. Avoid over-lubricating, as excess oil can attract dust and debris, potentially exacerbating the problem.
After lubricating the bearings, manually rotate the fan blades a few times to distribute the oil evenly. Reinstall the fan cover and restore power to the circuit. Turn on the exhaust fan and listen for any improvement in the noise level. If the squeaking persists, further investigation may be necessary.
Cleaning the Fan Blades: Dust and debris accumulation on the fan blades can also contribute to squeaking. The accumulated grime can create an imbalance in the fan's rotation, causing vibrations and associated noises. Regular cleaning can help prevent this issue.
As with motor lubrication, begin by turning off the power to the exhaust fan at the circuit breaker. Remove the fan cover and carefully detach the fan blades from the motor shaft. The blades may be held in place by a screw, clip, or friction fit. Exercise caution when removing the blades to avoid damaging them.
Once the blades are removed, clean them thoroughly with a mild detergent and water. Use a soft cloth or brush to remove any accumulated dust, dirt, or grease. Rinse the blades thoroughly with clean water and allow them to dry completely before reinstalling them. Pay particular attention to the area where the blades attach to the motor shaft, ensuring that it is free from debris.
After the blades are clean and dry, carefully reattach them to the motor shaft, ensuring that they are securely fastened. Reinstall the fan cover and restore power to the circuit. Turn on the exhaust fan and listen for any improvement in the noise level. If the squeaking persists, the problem may lie elsewhere.
Tightening Mounting Screws and Housing: Loose mounting screws or a rattling fan housing can also cause squeaking noises. Over time, vibrations from the fan can loosen screws, creating gaps and allowing the housing to rattle. Tightening these components can often eliminate the squeak.
Turn off the power to the exhaust fan at the circuit breaker. Inspect all mounting screws that secure the fan housing to the ceiling or wall. Use a screwdriver to tighten any loose screws. Be careful not to overtighten the screws, as this could strip the threads or damage the housing.
Check the fan housing itself for any loose or rattling parts. If the housing is made of multiple pieces, ensure that they are securely connected. If necessary, use caulk or weather stripping to seal any gaps or cracks in the housing. This can help reduce vibrations and noise.
Reinstall the fan cover and restore power to the circuit. Turn on the exhaust fan and listen for any improvement in the noise level. If the squeaking persists, further investigation may be required.
When to Consider Replacement
In some cases, despite attempts to lubricate, clean, and tighten the components, the squeaking may persist. This could indicate a more serious problem, such as a worn-out motor or damaged fan blades. In these situations, replacing the exhaust fan may be the most practical and cost-effective solution.
Consider the age of the exhaust fan. If the fan is more than 10 years old, it may be nearing the end of its lifespan. Replacing an aging fan can not only eliminate the squeaking noise but also improve the fan's overall performance and energy efficiency. Newer models are often quieter and more powerful than older ones.
Evaluate the cost of repairs versus the cost of replacement. If the motor is severely damaged or the fan blades are cracked or broken, the cost of replacing these components individually may be comparable to the cost of replacing the entire fan. In such cases, replacement is often the more economical option.
When selecting a replacement exhaust fan, choose a model that is appropriately sized for the bathroom. A fan that is too small will not effectively remove moisture and odors, while a fan that is too large may be noisy and energy-inefficient. Consult with a hardware store professional or contractor to determine the appropriate fan size for the bathroom.
Ensure the replacement fan has a good noise rating. Look for a fan with a low sone rating (e.g., 1.0 sone or less) for quieter operation. Compare sone ratings across different models to find the quietest option within the desired performance range.
Installing a new exhaust fan will typically involve disconnecting the old fan from the electrical wiring and mounting the new fan in its place. If unfamiliar with electrical work, consider hiring a qualified electrician to perform the installation to ensure safety and proper functionality. Improper wiring can lead to fire hazards or damage to the fan motor.
Proper ventilation is vital to prevent mold and mildew growth in bathrooms, so replace the fan as soon as possible once it starts exhibiting terminal issues, whether that be squeaking, rattling, or just poor ventilation.

Bathroom Exhaust Fan Making Noise When Off 3 Fixes

Fix Your Noisy Bathroom Fan In 10 Minutes

How To Fix Loud Exhaust Fan Step By

9 Easy Ways How To Fix A Noisy Bathroom Fan

How To Fix A Humming Exhaust Vent Fan In 5 Minutes

How To Fix A Noisy Bathroom Fan Addressing Irregular Sounds Soundproof Living

Maxxair Fan Squeak Fix Ray Outfitted How To

Fix A Noisy Bathroom Fan Diy Family Handyman

Is Your Bathroom Exhaust Fan Making Noise When Off

Screaming Bathroom Exhaust Fan Fix Diy Works For Me
Related Posts


