How To Unclog A Bathroom Sink Beyond The Trap Door
A clogged bathroom sink is a common household problem that can disrupt daily routines. While the trap, or P-trap, located directly beneath the sink is often the culprit, sometimes the blockage lies further down the drainpipe, requiring more advanced troubleshooting and techniques. This article provides a comprehensive guide to unclogging a bathroom sink when the issue extends beyond the easily accessible P-trap.
Assessing the Situation
Before embarking on any unclogging endeavor, it is crucial to accurately assess the situation. This involves determining the severity of the clog and identifying any potential causes. If water is draining very slowly or not at all, it suggests a significant blockage. Common culprits include hair, soap scum, toothpaste, and small objects that may have accidentally fallen into the drain.
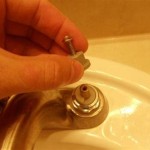
Begin by removing the sink stopper. Most bathroom sinks have a pop-up stopper mechanism. Lifting it directly upward may work. Alternatively, you may need to access the lever beneath the sink that controls the stopper. Disconnecting this lever allows removal of the stopper itself. Inspect the stopper for any accumulated debris and clean it thoroughly. Run water into the sink to observe if removing the stopper alone resolves the problem. If the sink still drains slowly, or not at all, proceed to the next steps.
Tools and Materials Needed
Effective unclogging often requires the right tools and materials. Gathering these before starting the process saves time and frustration. Essential items include:
*Plunger: A standard cup plunger or a toilet plunger can be used. A cup plunger is typically more effective for sinks due to its flat surface.
*Plumber's Snake (Drain Auger): A plumber's snake is a flexible tool designed to reach further down drainpipes and break up or retrieve clogs. Various lengths and types are available. A smaller snake is often suitable for bathroom sinks.
*Bucket: To catch water and debris during the unclogging process.
*Gloves: To protect hands from bacteria and chemicals.
*Wrench: To loosen and tighten plumbing connections, if disassembly is required.
*Screwdriver: May be needed to remove access panels or components.
*Old Towels or Rags: To absorb spills and protect surfaces.
*Baking Soda and Vinegar: A natural cleaning solution that can help dissolve some types of clogs.
*Wire Coat Hanger (Optional): A straightened wire coat hanger can be used for preliminary probing, but exercise caution to avoid damaging the drainpipe.
Unclogging Techniques Beyond the P-Trap
Once the necessary tools and materials are assembled, the following techniques can be employed to address clogs located beyond the P-trap:
1. Plunging: Plunging is a simple but often effective method. Ensure there's enough water in the sink to cover the cup of the plunger. The overflow drain opening should be sealed to create a vacuum. This can be achieved by plugging it with a wet cloth or using duct tape. Position the plunger over the drain opening, ensuring a tight seal. Push and pull the plunger up and down vigorously for several minutes, maintaining the seal. Periodically lift the plunger to see if the water begins to drain. Repeat the process until the clog is dislodged. If plunging fails to produce results after a few attempts, proceed to other methods.
2. Baking Soda and Vinegar Solution: This natural solution can sometimes dissolve organic matter contributing to the clog. Pour one cup of baking soda down the drain, followed by one cup of white vinegar. The mixture will fizz and bubble. Allow the mixture to sit for at least 30 minutes, or preferably overnight. After the waiting period, flush the drain with hot water. This method is generally more effective for minor clogs or preventative maintenance. If the drain remains clogged after this treatment, more aggressive techniques will be required.
3. Using a Plumber's Snake: The plumber's snake, or drain auger, is a more direct approach to breaking up or retrieving clogs located deeper within the drainpipe. Carefully insert the end of the snake into the drain opening. Rotate the handle of the snake as it is pushed further down the drain. This rotating motion helps the snake navigate bends in the pipe and break up or hook onto the clog. If resistance is encountered, continue rotating the snake to try and break through the blockage. Once the clog is reached, continue rotating to either break it apart or snag it for removal. Slowly withdraw the snake, removing any debris that comes up with it. Rinse the snake thoroughly after each retrieval to remove any clinging residue. Repeat the process until the snake comes back clean, indicating the clog has been cleared. After using the plumber's snake, flush the drain with hot water to ensure the blockage has been completely removed.
4. Accessing the Drainpipe Through the Wall: In some cases, the clog may be located in a section of the drainpipe that is inaccessible from the sink itself. If a cleanout plug is present on the drainpipe within the wall, it can be removed to provide access. Place a bucket beneath the cleanout plug to catch any water that may spill out. Carefully unscrew the plug using a wrench. Once the plug is removed, a plumber's snake can be inserted through the opening to clear any blockages. After the unclogging is complete, ensure the cleanout plug is securely tightened to prevent leaks.
5. Chemical Drain Cleaners: Chemical drain cleaners are widely available but should be used with caution. These products contain corrosive chemicals that can damage pipes, especially older ones. Furthermore, they pose a risk of chemical burns if they come into contact with skin or eyes. If a chemical drain cleaner is used, carefully follow the manufacturer's instructions. Wear appropriate safety gear, including gloves and eye protection. Avoid mixing different types of drain cleaners, as this can create dangerous fumes. In addition, chemical drain cleaners are often ineffective against certain types of clogs, and they can solidify and worsen the problem if they fail to clear the blockage entirely. Due to the potential risks, alternative methods are generally preferred.
6. Checking the Vent Stack: The vent stack is a pipe that extends from the drain system to the roof, allowing air to enter the pipes and maintain proper drainage. If the vent stack becomes blocked, it can create a vacuum that prevents water from draining properly. Leaves, debris, or even small animals can sometimes obstruct the vent stack. Checking and clearing the vent stack typically requires accessing the roof, which can be dangerous. Therefore, this should only be attempted by individuals comfortable and experienced with working at heights. Use a garden hose to flush water down the vent stack to dislodge any obstructions. If the problem persists, a plumber may need to be called to inspect and clear the vent stack.
7. Disconnecting and Inspecting Drainpipes: As a last resort, it may be necessary to disconnect sections of the drainpipe to inspect them for clogs. This should be done carefully and methodically to avoid damaging the pipes or creating leaks. Place a bucket beneath the connection to catch any water. Use a wrench to loosen the slip nuts that connect the pipes. Once the nuts are loosened, carefully separate the pipes. Inspect the inside of the pipes for any blockages. If a clog is found, remove it using a plumber's snake or a wire hanger. After the clog is cleared, reassemble the pipes, ensuring the connections are tight but not overtightened. Run water to check for leaks.
8. Using a Wet/Dry Vacuum: A wet/dry vacuum can be used to try and suck out the clog. Place the vacuum hose over the drain opening, ensuring a tight seal. Set the vacuum to the "liquid" setting. Turn on the vacuum and attempt to suck out the clog. Alternatively, the vacuum can be used in reverse to blow air down the drainpipe, potentially dislodging the blockage. This method is often more effective for loose debris than for solid, compacted clogs.
9. Hot Water Flushing: Sometimes, the clog is simply grease or soap buildup. Running hot water down the drain for an extended period can help melt and dissolve these types of clogs. Allow the hot water to run for several minutes, checking periodically to see if the drain is clearing. This method is most effective as a preventative measure, but can sometimes resolve minor clogs.
When to Call a Professional Plumber
While these techniques can resolve many common drain clogs, there are situations where professional help is necessary. If the clog persists after attempting these methods, it may indicate a more serious problem, such as a broken or collapsed drainpipe. Similarly, if there are signs of water damage, such as leaks or stains, it is essential to consult a plumber to prevent further damage to the property. Complex plumbing repairs should always be handled by qualified professionals to ensure the work is done safely and correctly. A plumber can accurately diagnose the problem and implement the appropriate solution, preventing further damage and ensuring the drain system functions properly.

How To Clear A Clogged Drain Reviews By Wirecutter

How To Clear A Clogged Drain Forbes Home

How To Clear Clogged Drains Diy

How To Clean A Clogged Sink Remove Stopper

How To Unclog A Sink 12 Easy Ways

Slow Sink Drain 6 Diy Fixes For Before You Call A Plumber Bob Vila

How To Unclog A Bathroom Sink The Home Depot

How To Unclog A Bathroom Sink Hana S Happy Home

How To Get Hair Out Of Sink Drain All Coast Inspections

How To Fix A Bathroom Sink That Won T Drain Bfp Bay Area
Related Posts


